twitter Facebook Google+

                 linkedin pinterest houzz  

Click for the BBB Business Review of this Countertops in Denver CO 

Google Review 

Sales & Promotions!

Architects, interior designers, and more ∨

Hire a decorator to find that just-right couch and coffee tables for your living room.
Find wall shelves, a customizable closet organizer and stylish furniture for home to whip your closet into shape.
Remodeling and Home Design

Qualify Us Now! ProView 

Cambria logoUp to $45,000 interest free for your project!Finance by Cambria

 convenient and easy.

  • No Money Down
  • Interest-free financing for up to one year without payments
  • Financing up to $45K for any project that includes Cambria (including cabinets, flooring, sinks, plumbing, install & more)
  • Secure paperless telephone application
  • Credit decision in less than 10 minutes


Tuesday
Jul172012

Floor Care and Cleaning Guide

Regular care and maintenance of your new flooring is a simple way to extend the life and performance of your investment and keep it looking like new for years. Here are some general guidelines to follow for the different flooring types. 
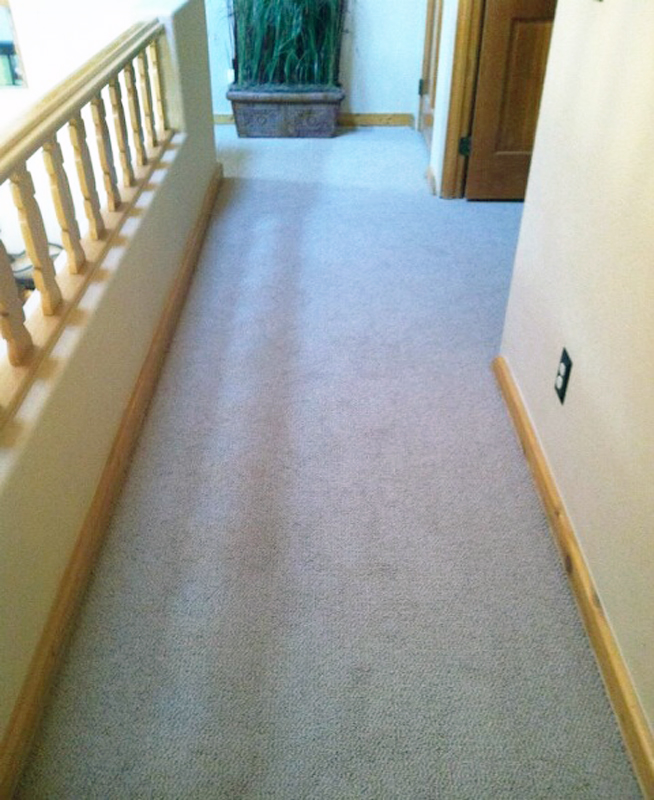
carpet in a hallwayCarpet

Suck it Up: dirt, dust, and other small particles are sharp and abrasive, and when they collect in your carpet, they can rip and tear the fibers over time. Regular vacuuming keeps these particles from wearing away at the carpet, and it also improves its appearance. 

Bag it: if you choose a vacuum that uses bags, make sure you change the bag frequently to allow maximum cleaning efficiency - and to avoid all that dust blowing back onto your carpets! Newer bagless models may save time and make the effort even easier.

Watch Your Weight: heavy furniture, potted plants and other home décor can crush carpet pile and leave compressions that you may not notice until you redecorate or move. Use felt pads or protective caps and re-arrange the furniture periodically. 

Stay Out of the Sun: in the same way the sun damages our skin, its ultraviolet rays can also damage the color of your carpet over time. To avoid sun lightening to your carpets, shut the curtain or blinds when the sun is most intense or use UV glass or film in your windows. 

Snip the Snags: looped carpets tend to snag over time - especially at the seams. It's best not to vacuum over lose yarn or pull at the snags. Instead, treat every loose thread like you would on an expensive suit. Grab scissors and carefully snip the snag flush with the plush. 

Watch the Spills: when these events occur begin the clean-up process by using a dry cloth to blot up as much debris or liquid as possible. The longer you wait, the more the fibers will absorb the stain. Warm water should then be used to rinse the stained area. Press the cloth into the carpet to soak up the moisture until the stain is gone. Don't scrub and don't use hot water. You'll damage the fibers. Finally, rinse the area with warm water and absorb the wetness with a dry cloth. After your carpet is dry, vacuum it to restore its texture and appearance. There are some carpet cleaners that do actually work. Ask you retailer about cleaning products that have earned the Carpet & Rug Institute's (CRI) Seal of Approval. 

Read Up!: like a fine piece of clothing, carpet is a textile. Though it doesn't come with a little white tag on the back of the neckline, it does come with maintenance literature provided by the manufacturer. Different fibers, styles and finishes require specific care. In the same way you wouldn't throw a silk blouse in the washing machine, you don't want to make a similar mistake with your carpet. Read up and follow the suggested guidelines. You'll be glad you did.

Call the Pros: time and traffic take their toll. It's just a fact of life. Carpet manufacturer warranties have very specific instructions on the type of professional cleaning necessary to keep that warranty in force. Refer to that material. Then, when necessary, call on a reputable carpet cleaning service to restore your rugs to their original luster. The knowledge, commercial equipment and experience of a professional can go a long way towards removing stubborn stains and keeping your home beautiful. 

Hardwood Flooringhardwood floor

Meet Mat: tiny particles, like dirt, can act like sandpaper and scratch your wood. By placing a floor mat at each entryway and encouraging family members and guests to wipe their feet, the majority of dirt and grime will remain on the mat. Also put a floor mat or rug in any area where water could be splashed - like near the kitchen sink. This will hinder any possible water damage. Note that rubber-backed or non-ventilated floor mats or rugs can damage your floor. Instead use floor mats or rugs made especially for hardwood floors and be sure to shake them out regularly. 

Whistle While You Work: along with a hardwood floor comes the responsibility of keeping it clean. The better care you take, the longer your floor will maintain its original beauty. 

  • Step #1 - purchase a high quality broom so that you can sweep your floor regularly of dirt, dust and other particles. 
  • Step #2 - use a vacuum cleaner without a beater bar to get in between the boards and other hard to reach areas. Deeper cleaning techniques vary depending on the installation and finish of your hardwood floor.

For "Finish in Place" hardwood floors, using an 8"x14" terrycloth mop with a rotating head that makes cleaning corners, under cabinets and along base boards easier is recommended. Professional cleaning products recommended by your flooring manufacturer can be used to remove tough stains and spills without dulling the finish of your wood floor. Makers of "Pre-finished" floors recommend their own specific products for routine maintenance.

Do's and Don'ts
  • DO use cleaners that won't leave a film or residue
  • DO use a professional hardwood floor cleaner to remove occasional scuffs and heel marks (just spray some cleaner on a cloth and rub the stained area lightly)
  • DO clean sticky spots with a damp towel or sponge
  • DO minimize water exposure and clean spills immediately
  • DON'T wax a wood floor with a urethane finish
  • DON'T use ammonia cleaners or oil soaps on a wood floor - they'll dull the finish and affect your ability to recoat later. 
  • DON'T wet mop or use excessive water to clean your floor (wood naturally expands when it's wet and can cause your floor to crack or splinter)

Protect Your Investment - all hardwood floors fade or change shades over time. Like our own skin, wood's exposure to sunlight may greatly increase this process and cause permanent damage.

Window treatments are recommended to shade your floors from the sun's harsh rays. We also recommend rotating area rugs and furniture regularly, allowing wood floors to age evenly from UV exposure. To avoid permanent marks and scratches, it's a good idea to cover furniture and table legs with flannel protectors. Be careful when moving heavy objects across your floor to avoid scuffing. Ladies - your stiletto heels may be fashionable, but what's not in fashion (or covered by your warranty) are the dents and scratches they cause to wood floors. Likewise, trim your pet's nails regularly and keep any and all other sharp objects away from your floors. Love your floors and your floors will you back for a long, long time. 

Laminate Flooring

Sweeping & Mopping: dust and dirt act as an abrasive on a laminate's surface and seriously dull its appearance. This fact of life can be avoided by regular sweeping, dust mopping or vacuuming to remove loose dirt and grime. Either a broom or a vacuum cleaner without a beater bar will do the trick. Vacuum cleaner attachments are useful to capture dust and dirt between planks or along edges. An occasional damp mopping is also recommended. But be careful - laminate flooring can expand when it comes in contact with excessive water. After a damp mopping, a clean cloth should be used to wipe the floor dry. Placing doormats at each entryway is also a good idea to collect excessive moisture and dirt before they enter your home. 

Do's and Don'ts
  • DO use glides or floor protectors on the bottom of furniture to prevent scratching or abrasion
  • DO lift heavy furniture instead of dragging or pulling it to avoid scratching and abrasion
  • DO use carpet fragments face down under heavy objects when moving them across a laminate floor
  • DO your spot cleaning and occasional complete cleaning using the manufacturer's recommended products
  • DON'T use soap-based detergents or "mop-and-shine" products
  • DON'T use abrasive cleaners, steel wool or scouring powder 
  • DON'T flood your floor with water or cleaner
  • DON'T try to refinish or sand your laminate floor

Repair - replacement laminates may be a slightly different dye lot and/or texture than your original installation. With time and usage, however, the replacement product will blend in with the rest of your floor. With proper care and regular maintenance, laminate flooring will provide you and your home with many years of beauty, warmth and durability.

 Vinyl Flooring

Your Mother Was Right: keeping the floor clean is not hard, but there are some guidelines to increase the life of your flooring. Dust, sand and grit particles are the enemy. Sweep or vacuum frequently. Don't use a vacuum with a beater bar as it may scratch your floor and don't use scrub brushes. When sweeping or vacuuming does not remove the dirt, mop the floor with clean warm water. Rinse the floor thoroughly with fresh water. If water alone does not clean the surface, use cleaning products recommended by the manufacturer. Most "no rinse" cleaners will work just fine. An ounce or so of liquid detergent or ammonia in a gallon of water will work, but you will need to rinse the floor well. Do NOT use detergents, abrasive cleaners or "mop and shine" products. And always toss in an ounce of prevention. Mats or rugs in front of outside doors will help keep the dust and grit from getting to the floor in the first place. Be sure the mats and rugs you buy are for vinyl floors. Some rubberbacked mats may leave stains or marks. 

It's Just a Spill: for spots or spills, wipe them up immediately and use the same technique on the spot as you would for the whole floor. 

Sometimes It's Serious: if you have a seam open up, you need to cover it to keep out the dirt. The same applies if you get a cut or gouge in your new floor. Dirt makes it harder to repair. Call your retailer or installer for information on who should repair the seam.

ceramic tile flooring
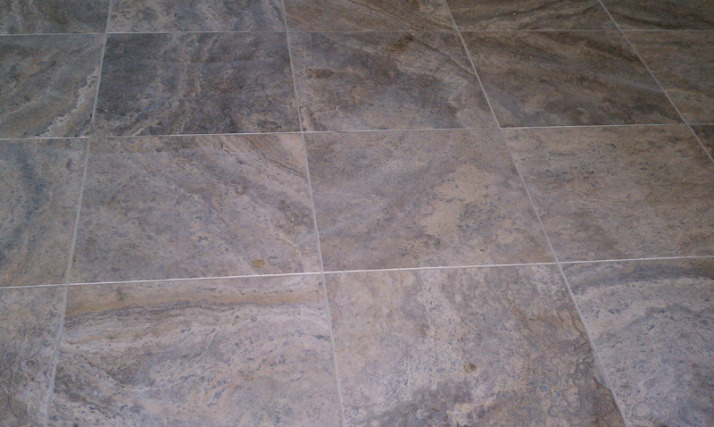
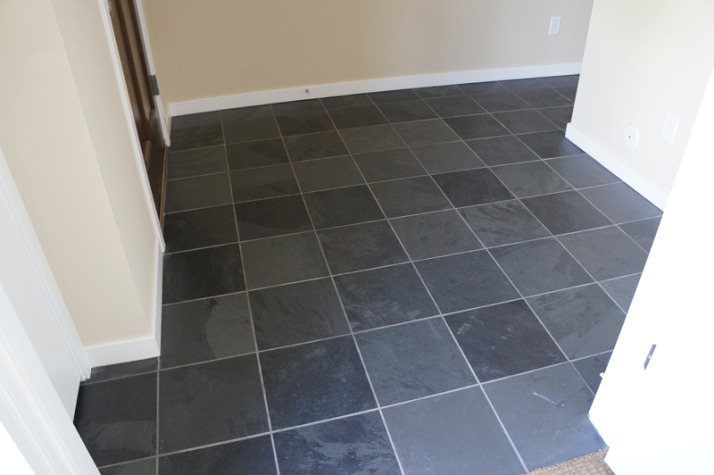
Ceramic Tile Flooring

Sweeping: dirt adheres easily to the surface of ceramic tile, especially styles with textured surfaces. Regular sweeping loosens and removes most dirt. A vacuum cleaner can also be used to sweep, but make sure you use one without a beater bar to avoid dulling and scratching the tiles. Vacuum cleaner attachments are great to suck up dirt along edges or in between tiles.

Mats: use doormats to keep dirt from coming into your home and shake them out often. This will reduce the amount of dirt being tracked across your ceramic tile floor, and reduces the wear to the finished surface. 

Mopping: ceramic tile floors should be damp-mopped using manufacturer-recommended grout and tile cleaners. For heavier soil, spot clean the floor with a sponge or clean cloth using the same recommended cleaners. 

Heavy Cleaning: mild scrubbing with a soft brush or electric polisher/scrubber may be required for textured tiles. After cleaning with a mild detergent, rinse thoroughly with clean, warm water to remove leftover residue. If necessary, wipe the tile dry with a clean towel to remove any film. For soft water situations, an all-purpose cleaner may be necessary. Apply it to your floor and let it stand for 3-5 minutes. Then lightly scrub with a sponge, rinse well and you're good to go. Cleaning products available from your local grocery or hardware store can be used to remove soap scum, hard water deposits and mildew stains from ceramic tile. Be sure to consult the cleaning product's instructions to ensure the product is recommended for your type of tile. After cleaning, rinse well and wipe dry for a sparkling shine. 

Do's and Don'ts
  • DO clean up spills as quickly as possible so your grout won't become stained
  • DO remember that while ceramic tile is very durable, it's not indestructible and may crack or chip under extreme force
  • DO take the proper precautions when moving heavy objects across a ceramic tile floor
  • DO cover furniture and table legs with protectors to guard your floor against scratching
  • DO remember that if a repair is necessary, the replacement product may be a slightly different dye lot and/or texture than the original tile, however, with time and usage, the replacement tile will blend in with its neighbors.
  • DON'T use steel wool, scouring powders, or other abrasives that can scratch the finish of your ceramic tile
  • DON'T use bleach or ammonia-based cleaners - these products can discolor your grout if used too often

Caulking and Sealing - once your tile has been laid and grouted, it's your responsibility to caulk areas that may be exposed to water. Caulking will prevent expensive subsurface damage and keep the tiled areas looking as good as new. Depending on your lifestyle, sealing your tile and grout may also be an option. After installation, sealing the grout and tile can provide protection from dirt and spills by slowing down the staining process. Grout colorants can transform the original color of your grout and, in some cases, can act as a form of sealant. Be aware that non-epoxy grout joints should be treated with a silicone sealer. Regular care and maintenance will keep your ceramic tile floors looking their very best for years to come. 

Area Rugsarea rug

You should vacuum or sweep your area rug as you would wall-to-wall carpeting. Watch the fringes. You don't want to have to pull them out of the vacuum cleaner. Handmade area rugs can benefit from being turned over and vacuumed. Lift the rug up carefully and you will see all the dirt that had filtered down.

Turn, Turn, Turn: rotating your rug occasionally (annually) will help even wear patterns and prevent uneven fading. When rugs are exposed to the sun evenly, the colors harmonize and the rug ages nicely. If parts of the rug receive too much or too little of sun, one side might fade faster than the other.

See Spot? Go!: clean your area rug immediately after a spill. A water spill should be dried with a hair dryer set on a warm temperature. Try to dry both sides of the rug if possible. Anything else should first be blotted with paper towels to absorb as much as possible, and then apply salt or baking soda to the spot for a few minutes to absorb the rest. Once it dries, vacuum off the salt or baking soda. Professional grade rug cleaners are available. Be sure to test for color fastness before using. Take the rug to a professional handmade rug cleaner to deal with old or persistent stains. Do not try to clean it yourself. You might make it worse!

Read the Labels and Listen to the Pros: if you purchased a handmade rug, it's best to have it cleaned by professionals. If you have a machine made rug, look to the manufacturer for the best way to clean it. Some can be machine washed. Others can be scrubbed by hand and dried outside.

Does Your Pad Need Padding?: consult with your retailer about the proper padding to be placed under the rug you choose. A pad can help stabilize and protect your rug. Some rugs come with a non-skid backing or a nice foam padding already attached.

Storing: if your area rug needs to be stored for a long time in a place without exposure to light or air, first vacuum it or get it professionally cleaned. For handmade rugs and those made of natural fibers, you might consider packing it with mothballs to protect against insect damage. Never fold your rug - roll it and store it in a dry location.

Rug Repair - repairing a handmade rug is an art form in and of itself. It is time consuming and labor intensive and therefore, often costly. Get the opinion of a professional before you have work done on a handmade rug - and be sure to use a reputable repairman. 

stone flooringStone Flooring

It's Its Own Worst Enemy: sand, grit, and dirt can damage natural stone surfaces because they are abrasive. Use a vacuum on your floor if it's textured, but avoid the beater bar. Those bristles are tough and might scratch your flooring. An old-fashioned dust mop works well, as does a broom. Wet mop as needed. 

Be Proactive: walk-off mats or area rugs on either side of entrances from the outside will help collect dirt before it reaches your beautiful new floor. Choose a rug or mat with a non-slip surface.

There's Clean and There's Cleaner: Damp mopping your natural stone floor will keep it looking beautiful. But your retailer or manufacturer can suggest special cleaners meant specifically for stone floors. Wipe up spills immediately. Use soap, not detergent, for good-old fashioned mopping. Liquid Ivory or a Castile soap product work well. Too much cleaner or soap may leave a film and cause streaks, so rinse well. Change your rinse water frequently. Don't use products that contain lemon juice, vinegar or other acids on marble, limestone, or travertine. Avoid abrasive cleaners or any ammonia based cleaners. These products will dull the floor's luster. Retail grout cleaners, scouring powders or bathroom tub and tile cleaners can mar the finish on your stone. Never mix bleach and ammonia. The combination creates a toxic gas. To remove algae or moss from your stone in outdoor pool, patio or hot tub areas, flush with clear water and use a mild bleach solution. 

Green Flooring green flooring

Green Tips for Adhesives:

  • Choose products with low to no VOCs (Volatile Organic Compounds)
  • Avoid formaldehyde
  • Look for Carpet and Rug Institure's (CRI) Green Label® or Green Label Plus® certification

Green Tips for Cleaners:

  • Choose products with natural and biodegradable ingredients
  • Consider homemade cleaners using things from the pantry: vinegar, baking, soda, salt, lemon juice, rubbing alcohol, ammonia, or olive oil

Green Tips for the Whole House:

  • Keep caulked areas caulked (caulking prevents the loss of heat or cold air)
  • If you are installing a new floor, make sure that space between the flooring and the door is just right (too much space means you're heating or cooling the entire outdoors while too little space means you can't close the door)
  • Consider that space heaters are energy hogs and can generate more than two pounds of greenhouse gas per hour (use them too much and they might make your hardwood floors contract)
  • Choose low or no VOC products whenever you can
  • Insulation is not just for the attic anymore, it can be added between floors for additional saving
  • Choose a retailer that shares your commitment to the environment and knows about all the latest advances in green products.

Back to Top

Wednesday
Jun132012

Cabinetry Care Guide

armstrong logoCabinetry Care

As with any product constructed of wood, a few moments of care and a little common sense can go a long way in keeping your new cabinets looking their best. Here are a few simple suggestions to make your cabinet care easier.

  • Clean cabinets as needed with a mild detergent or with soap and water (use sparingly) and dry well using a lint-free cloth for both washing and drying.
  • Wipe up spills, splatters and water spots as they occur, keeping cabinets and countertop surfaces dry.
  • Give special attention to areas near the sink and dishwasher that come in contact with moisture.
  • Use cleaners and polishes designed for wood cabinets and clean all surfaces as needed.

Cabinetry Care Kit: contains all the materials required to repair nicks and scratches

Touch Up Marker: used to re-stain small scratches (one-step application, stain only)

Putty Stick: used to fill nail holes, minor nicks and dents

Stopping Problems Before they Occur

DO NOT use abrasive cleaners, scouring pads or powdered cleaners! These materials may penetrate the cabinet finish allowing moisture to enter and cause deterioration.

  • Do not use aerosol sprays containing silicone or paste waxes.
  • Do not leave wet cloths on or near cabinets.
  • Do not allow oven cleaners or other caustic cleaners to touch the cabinets.
  • Follow instructions carefully for self-cleaning ovens and other kitchen appliances around cabinets.
Remedies For Common Kitchen Accidents

Most problems can be prevented by wiping up any spills as soon as they occur. Follow these first aid suggestions for common household accidents. When removing a spot, begin at the outer edge and work toward the middle to prevent the spot from spreading.

Food Spots / Water Spots

Clean cabinets as needed with a mild detergent or with soap and water (use sparingly) and dry well using a lint-free cloth for both washing and drying. Use cleaners and polishes designed for wood cabinets and clean all surfaces as needed.

Greasy Spots

Rub grease, lipstick, crayon or oil with a damp cloth. Use cleaners and polishes designed for wood cabinets and clean all surfaces as needed. 

Chewing Gum / Candle Wax

Apply a plastic bag filled with ice on top of the deposit until it is brittle enough to crumble off. Use cleaners and polishes designed for wood cabinets and clean all surfaces as needed.

Nicks / Dents

Most nicks and dents can be repaired with a cabinetry care kit from your cabinet manufacturer. 

Scratches / Cigarette Burns

Most common scratches or burns can be repaired with a cabinetry care kit from your cabinet manufacturer. Rub the area with fine sandpaper until you have removed the scratch or burn. Re-stain with the cabinets color matched touch-up stain and apply a light coat of clear sealer finish. Use cleaners and polishes designed for wood cabinets and clean all surfaces as needed.


Always treat your cabinets as you would fine furniture!

 Back to Top

Wednesday
Jun132012

Natural Stone Countertop Care Guide

,arble institute of america logoCare & Cleaning of Natural Stone Surfaces

The natural stone you have purchased is an investment that will give your home or office many years of beautiful service. Simple care and maintenance will help preserve your stone's beauty for generations to come! 

Care and Precautions:

Use coasters under all glasses, particularly those containing alcohol or citrus juices. Many common foods and drinks contain acids that will etch or dull the surface of many stones. Do not place hot items directly on the stone surface. Use trivets or mats under hot dishes and placemats under china, ceramics, silver or other objects that can scratch the surface.

Cleaning Procedures and Recommendations:

Dust mop interior floors frequently using a clean non-treated dry dust mop. Sand, dirt and grit do the most damage to natural stone surfaces due to their abrasiveness. Mats or area rugs inside and outside an entrance will help to minimize the sand, dirt and grit that will scratch the stone floor. Be sure that the underside of the mat or rug is a non-slip surface. Normally, it will take a person about eight steps on a floor surface to remove sand or dirt from the bottom of their shoes.

Do not use vacuum cleaners that are worn. The metal or plastic attachments or the wheels may scratch the surface.

Clean stone surfaces with a few drops of neutral cleaner, stone soap or a mild liquid dish washing detergent and warm water. Use a clean rag mop on floors and a soft cloth for other surfaces for best results. Too much cleaner or soap may leave a film and cause streaks. Do not use products that contain lemon, vinegar or other acids on marble or other calcareous stones. Rinse the surface thoroughly after washing with the soap solution and dry with a soft cloth. Change the rinse water frequently. Do not use scouring powders or creams; these products contain abrasives that may scratch the stone.

In the bath or other wet areas, soap scum can be minimized by using a squeegee after each use. To remove soap scum, use a non-acidic soap scum remover or a solution of ammonia and water (about 1/2 cup ammonia to a gallon of water). Frequent or over-use of an ammonia solution may eventually dull the surface of the stone.

Vanity tops may need to have a penetrating sealer applied. Check with your installer for recommendations. A good quality marble wax or non-yellowing automobile paste wax can be applied to minimize water spotting.

In food preparation areas, the stone may need to have a penetrating sealer applied. Check with your installer for recommendations. If a sealer is applied, be sure that it is non-toxic and safe for use on food preparation surfaces. If there is a question, check with the sealer manufacturer.

In outdoor pool, patio or hot tub areas; flush with clear water and use a mild bleach solution to remove algae or moss. 

Know Your Stone:

Natural stone can be classified into two general categories according to its composition: siliceous stone or calcareous stone. Knowing the difference is critical when selecting cleaning products. 

  1. Siliceous Stone is composed mainly of silica or quartz-like particles. It tends to be very durable and relatively easy to clean with mild acidic cleaning solutions. Types of siliceous stone include granite, slate, sandstone, quartzite, brownstone and bluestone.
  2. Calcareous Stone is composed mainly of calcium carbonate. It is sensitive to acidic cleaning products and frequently requires different cleaning procedures than siliceous stone. Types of calcareous stone include marble, travertine, limestone and onyx. 

What may work to clean siliceous stone may not be suitable on calcareous surfaces.

How to Tell the Difference:

A simple acid sensitivity test can be performed to determine whether a stone is calcareous or siliceous. You will need about 4oz. of a 10% solution of *muriatic acid and an eye dropper. Or you can use household vinegar and an eye dropper. Because this test may permanently etch the stone, select an out of the way area (a corner or closet) and several inches away from the mortar joint. Apply a few drops of the acid solution to the stone surface on an area about the size of a quarter.

  • If the stone is calcareous, the acid drops will begin to bubble or fizz vigorously.
  • If little or no reaction occurs, the stone can be considered siliceous.

Rinse the area thoroughly with clean water and wipe dry. This test may not be effective if surface sealers or liquid polishes have been applied. If an old sealer is present, chip a small piece of stone away and apply the acid solution to the fractured surface.

*CAUTION: Muriatic acid is corrosive and is considered to be a hazardous substance. Proper head and body protection is necessary when acid is used.  

Stone Finishes:

A polished finish on the stone has a glossy surface that reflects light and emphasizes the color and marking of the material. This type of finish is used on walls, furniture tops and other items, as well as floor tiles.

A honed finish is a satin smooth surface with relatively little light reflection. Generally, a honed finish is preferred for floors, stair treads, thresholds and other locations where heavy traffic will wear off the polished finish. A honed finish may also be used on furniture tops and other surfaces. 

A flamed finish is a rough textured surface used frequently on granite floor tiles.

Stone Colors and Appearance:

Granites and marbles are quarried throughout the world in a variety of colors with varying mineral compositions. In most cases, marbles and granites can be identified by visible particles at the surface of the stone. Marble will normally show "veins" or high concentrations. The minerals in granite will typically appear as small flecks distributed uniformly in the stone. Each type of stone is unique and will vary in color, texture and marking.

Sandstones vary widely in color due to different minerals and clays found in the stone. Sandstone is light gray to yellow or red. A dark reddish brown sandstone, also called brownstone, has commonly been used in the northeastern United States and eastern Canada. Bluestone is a dense, hard, fine-grained sandstone of greenish-gray or bluish-gray color and is quarried in the eastern United States.

Limestone is a widely used building stone with colors typically light gray, tan or buff. A distinguishing characteristic of many limestones is the presence of fossils that are frequently visible in the stone surface.

Slate is dark green, black, gray, dark red or multi-colored. It is most commonly used as a flooring material and for roof tiles and is often distinguished by its distinct cleft texture.

Spills and Stains

Blot the spill with a paper towel immediately. Don't wipe the area, it will spread the spill. Flush the area with plain water and mild soap, rinse several times. Dry the area thoroughly with a soft cloth. Repeat as necessary. If the stain remains, refer to the Stain Removal instructions.

Stain Removal:

Identifying the type of stain on the stone surface is the key to removing it. If you don't know what caused the stain, play detective. Where is the stain located? Is it near a plant, a food service area, an area where cosmetics are used? What color is it? What is the shape or pattern? What goes on in the area around the stain?

Surface stains can often be removed by cleaning with an appropriate cleaning product or household chemical. Deep-seated or stubborn stains may require using a poultice or calling in a professional. The following sections describe the types of stains that you may have to deal with and appropriate household chemicals to use and how to prepare and apply a poultice to remove the stain. 

Types of Stains and First Step Cleaning Actions:

  • OIL-BASED (grease, tar, cooking oil, milk, cosmetics): An oil-based stain will darken the stone and normally must be chemically dissolved so the source of the stain can be flushed or rinsed away. Clean gently with a soft liquid cleanser with bleach, a household detergent, ammonia, mineral spirits OR acetone.
  • ORGANIC (coffee, tea, fruit, tobacco, paper, food, urine, leaves, bark, bird dropping):  May cause a pinkish-brown stain and may disappear after the source of the stain has been removed. Outdoors - with the sources removed, normal sun and rain action will generally bleach out the stains. Indoors - clean with 12% hydrogen peroxide (hair bleaching strength) and a few drops of ammonia.
  • METAL (iron, rust, copper, bronze): Iron or rust stains are orange to brown in color and follow the shape of the staining object such as nails, bolts, screws, cans, flower pots, metal furniture. Copper and bronze stains appear as green or muddy-brown and result from the action of moisture on nearby or embedded bronze, copper or brass items. Metal stains must be removed with a poultice. Deep-seated, rusty stains are extremely difficult to remove and the stone may be permanently stained.
  • BIOLOGICAL (algae, mildew, lichens, moss, fungi):  Clean with dilute (1/2 cup in a gallon of water) ammonia, bleach, OR hydrogen peroxide. *DO NOT MIX BLEACH AND AMMONIA, THIS COMBINATION CREATES A TOXIC AND LETHAL GAS!*
  • INK (magic marker, pen, ink): For light colored stone - clean with bleach or hydrogen peroxide. For dark colored stone - clean with lacquer thinner or acetone
  • PAINT: Small amounts can be removed with lacquer thinner or scraped off carefully with a razor blade. Heavy paint coverage should be removed only with a commercial "heavy liquid" paint stripper available from hardware stores and paint centers. These strippers normally contain caustic soda or lye. Do not use acids or flame tools to strip paint from stone. Paint strippers can etch the surface of the stone; repolishing may be necessary. Follow the manufacturer's directions for use of these products, taking care to flush the area thoroughly with clean water. Protect yourself with rubber gloves and eye protection, and work in a well-ventilated area. Use only wood or plastic scrapers for removing the sludge and curdled paint. Normally, latex and acrylic paints will not cause staining. Oil-based paints, linseed oil, putty, caulks and sealants may cause oily stains.
  • WATER SPOTS and RINGS (surface accumulation of hard water): Buff with dry 0000 steel wool.
  • FIRE and SMOKE DAMAGE: Older stones and smoke or firestained fireplaces may require a thorough cleaning to restore their original appearance. Commercially available "smoke removers" may save time and effort.
  • ETCH MARKS: Caused by acids left on the surface of the stone. Some materials will etch the finish but not leave a stain. Others will both etch and stain. Once the stain has been removed, wet the surface with clear water and sprinkle on marble polishing powder available from a hardware or lapidary store, or your local stone dealer. Rub the powder onto the stone with a damp cloth or by using a buffing pad with a low-speed power drill. Continue buffing until the etch mark disappears and the marble surface shines. Contact your stone dealer or call a professional stone restorer for refinishing or repolishing etched areas that you cannot remove.
  • EFFLORESCENCEThis white powder may appear on the surface of the stone. It is caused by water carrying mineral salts from below the surface of the stone rising through the stone and evaporating. When the water evaporates, it leaves the powdery substance. If the installation is new, dust mop or vacuum the powder. You may have to do this several times as the stone dries out. Do not use water to remove the powder; it will only temporarily disappear. If the problem persists, contact your installer to help identify and remove the cause of the moisture.
  • SCRATCHES and NICKS: Slight surface scratches may be buffed with dry 0000 steel wool. Deeper scratches and nicks in the surface of the stone should be repaired and repolished by a professional. 

Making and Using a Poultice

A poultice is a liquid cleaner or chemical mixed with a white absorbent material to form a paste about the consistency of peanut butter. The poultice is spread over the stained area to a thickness of about 1/4 to 1/2 inch with a wood or plastic spatula, covered with plastic and left to work for 24 to 48 hours. The liquid cleaner or chemical will draw out the stain into the absorbent material. Poultice procedures may have to be repeated to thoroughly remove a stain but some stains may never be completely removed. 

Poultice Materials

Poultice materials include kaolin, fuller's earth, whiting, diatomaceous earth, powered chalk, white molding plaster or talc. Approximately one pound of prepared poultice material will cover one square foot. Do not use whiting or iron-type clays such as fuller's earth with acid chemicals. The reaction will cancel the effect of the poultice. A poultice can also be prepared using white cotton balls, white paper towels or gauze pads. 

Cleaning Agents or Chemicals:

  • OIL-BASED stains: Poultice with baking soda and water OR one of the powdered poultice materials and mineral spirits.
  • ORGANIC stains: Poultice with one of the powdered poultice materials and 12% hydrogen peroxide solution (hair bleaching strength) OR use acetone instead of the hydrogen peroxide.
  • IRON stains: Poultice with diatomaceous earth and a commercially available rust remover. Rust stains are particularly difficult to remove. You may need to call a professional. 
  • COPPER stains: Poultice with one of the powdered poultice materials and ammonia. These stains are difficult to remove. You may need to call a professional.
  • BIOLOGICAL stains: Poultice with dilute ammonia, bleach, OR hydrogen peroxide. *DO NOT MIX AMMONIA AND BLEACH, THIS COMBINATION CREATES A TOXIC AND LETHAL GAS!*

Applying the Poultice:

If using powder, mix the cleaning agent or chemical to a thick paste like the consistency of peanut butter. 

If using paper, soak in the chemical and let drain. Don't let the liquid drip.

  1. Wet the stained area with distilled water.
  2. Apply the poultice to the stained area about 1/4 to 1/2 inch thick and extend the poultice beyond the stained area by about one inch. Use a wood or plastic scraper to spread the poultice evenly.
  3. Cover the poultice with plastic and tape the edges to seal it.
  4. Allow the poultice to dry thoroughly, usually about 24 to 48 hours. The drying process is what pulls the stain out of the stone and into the poultice material. After about 24 hours, remove the plastic and allow the poultice to dry.
  5. Remove the poultice from the stain, rinse with distilled water and buff dry with a soft cloth. Use the wood or plastic scraper if necessary.
  6. Repeat the poultice application if the stain is not removed. It may take up to five applications for difficult stains.
  7. If the surface is etched by the chemical, apply a polishing powder and buff with burlap or felt buffing pad to restore the surface. 

Do's and Don'ts

DO Dust mop floors frequently

DO Clean surfaces with mild detergent or stone soap

DO Thoroughly rinse and dry the surface after washing

DO Blot up spills immediately

DO Protect floor surfaces with non-slip mats or area rugs and countertops surfaces with coasters, trivets or placemats


DON'T Use vinegar, lemon juice or other cleaners containing acids on marble, limestone, travertine or onyx surfaces

DON'T Use cleaners that contain acid such as bathroom cleaners, grout cleaners or tub and tile cleaners

DON'T Use abrasive cleaners such as dry cleansers or soft cleansers

DON'T Mix bleach and ammonia; this combination creates a toxic and lethal gas

DON'T Ever mix chemicals together unless directions specifically instruct you to do so

Call your professional stone supplier, installer, or restoration specialist for problems that appear too difficult to treat.


Back to Top