twitter Facebook Google+

                 linkedin pinterest houzz  

Click for the BBB Business Review of this Countertops in Denver CO 

Google Review 

Sales & Promotions!

Architects, interior designers, and more ∨

Hire a decorator to find that just-right couch and coffee tables for your living room.
Find wall shelves, a customizable closet organizer and stylish furniture for home to whip your closet into shape.
Remodeling and Home Design

Qualify Us Now! ProView 

Cambria logoUp to $45,000 interest free for your project!Finance by Cambria

 convenient and easy.

  • No Money Down
  • Interest-free financing for up to one year without payments
  • Financing up to $45K for any project that includes Cambria (including cabinets, flooring, sinks, plumbing, install & more)
  • Secure paperless telephone application
  • Credit decision in less than 10 minutes


Entries in Remodel (5)

Monday
Dec012014

Kitchen Evolution: Work Zones Replace the Triangle

Article by:

When I began studying kitchen design many (many!) years ago, I learned all about the much-venerated kitchen work triangle — in which the refrigerator, range and sink are placed 4 to 9 feet apart, forming a roughly equilateral triangle. This design principle was developed back when most people had smaller, closed-off kitchens, where only one person prepared and cleaned up meals. It's an efficient way to lay out appliances and the sink in a small closed or semiclosed kitchen. 

The work triangle is still useful today, but with kitchens that now run the gamut from tiny single-wall galleys up to large open-plan kitchens, it's more useful to think in terms of work zones instead.

Work zones are really just the natural evolution of the kitchen work triangle. As kitchens grew in size and opened up to other rooms in the house, it became more of a challenge to place appliances in a neat triangular layout. We also have more appliances than ever before — dishwashers, extra sinks, microwaves, separate cooktops and wall ovens — not to mention more people working and socializing in the space. By sectioning off your kitchen into work zones, you'll maximize efficiency in a larger space; more cooks, as well as their guests, will be better accommodated.

Group appliances and fixtures according to use.To set up work zones in your kitchen, think of the tasks you perform regularly: storing food, prep, cooking, baking, serving, eating, cleaning, making coffee, chilling wine etc. A work zone contains everything you use to perform each task. 

For instance, you should place your dishwasher next to your sink, with a compost bin and a garbage bin nearby to streamline kitchen cleanup.


Store what you need where you need it most. In addition to grouping appliances and fixtures according to use, give yourself enough storage in each zone for what you need to perform the task. 

This wood-topped baking zone is perfect for kneading bread or rolling out pizza dough. All the bread-making and baking tools can be stored in the cabinets below. Someone can easily work at this station while another person prepares food in another part of the kitchen.

Provide landing areas next to major appliances.For safety and efficiency, consider placing a countertop landing area next to your major kitchen appliances, especially the range, cooktop, microwave and wall ovens. 

You want to be able to quickly set down something hot without having to trek halfway across your kitchen. This will also give you a cooking work zone; you can store items like knives, cutting boards and pots and pans in the cabinets and use the countertops for chopping and cooking prep.


Create a kids' zone. If you have children and a good-size space, set up an area in the kitchen where the kids can hang out, do homework and eat snacks. This will allow you to all be in the kitchen together without the little ones getting underfoot.


Consider a zone for guests. If you have an open kitchen and like to entertain often, you know how important it is to have an area where guests can hang out and chat while you prepare food and drinks. A large island or peninsula works well for this, since it can act as a barrier that keeps visitors from getting in your way while also giving them a place to perch while you work. Again, think about the items you use for serving and entertaining, and store them in the cabinets below so you can easily access them.

Widen the aisles. Whether you opt for the traditional work triangle or to break up your kitchen into work zones, pay attention to your kitchen's aisle widths. The recommended minimum aisle width is 42 inches, but I prefer 48 inches, especially in kitchens with multiple cooks. If you cook and entertain often and have the space, you could go as wide as 54 inches. Wider than that, though, and your space will likely become inefficient, as you'll spend more time walking than cooking. 

Wednesday
Oct152014

8 Little Remodeling Touches That Make a Big Difference

Article by:

When we did our remodel, our contractor suggested a thousand things I had never really thought about. They weren't necessarily design considerations; they were more quality-of-life considerations — just little things you didn't know you were missing until you had them. 

Here are eight little touches I didn't know I couldn't live without until I lived with them. What are yours?

1. A built-in dish soap dispenser. Because I don't care how nice the bottle is; it's just one more thing cluttering up your countertop.

2. Soft-close hinges. It is impossible to slam a drawer or cabinet in my kitchen. Each closes with a small whisper. It's calming somehow.


3. Large kitchen drawers. Looking down into a well-lit space is much better than looking deep into a dark cabinet. In this kitchen large drawers have completely replaced cabinets. Just make sure they are all soft close.

4. Undercabinet lighting. I know this seems like no-brainer, but before I had it I never knew how useful it could be for task lighting and mood lighting. But spring for LEDs. We opted for fluorescent to save money, and we regret it.

5. Dimmer switches. Because there are a thousand stops between on and off.


6. A garage keypad. You will never be locked out of your house again.

7. A motion-activated porch light. You will never fumble in the dark for your keys again.


8. An automatic drip system. People told us, they did. But we didn't listen, and because of that we killed a lot of plants over 12 years. Last year we finally had an irrigation system put in. The yard is nicer, the plants are healthier and life is easier.

Wednesday
Apr092014

What to Know About Budgeting for Your Home Remodel

Article by:

The budget conversation — it’s sometimes awkward, often slightly uncomfortable and usually comes with a bit of anxiety. Because of the nature of construction, things often cost more than what homeowners think. There are endless debates on why that is, but the result is that we designers often have conversations with clients that end with an awkward silence. The silence usually means that certain aspects of their project might be out of their reach. And truth be told, we really don’t like being the messenger in these conversations. We want our clients to be satisfied with the process and get what they really want. 

But the flip side of that conversation is that budget constraints can make a project better. Just hear me out. What we find is that financial considerations make our team and clients focus on what’s really important. That pressure helps edit down the myriad choices and allows a more coherent story to emerge. And it all comes back to sticking to that budget. Here’s how.

Establish Your Budget Early

We have been in situations where clients have not told us their budget until we have completed some of the initial phases of work. This, no surprise, can slow down the process. It’s like going to a personal trainer but not telling them how much weight you can lift, and so you spend time trying a few exercises to figure out what the proper weights are. 

There are situations where homeowners generally don’t know what a new custom home or addition will cost, but a key part of the process is considering how much you would be comfortable spending on the project. Obviously spending $50,000 will produce a dramatically different result than if you spent $500,000. And what you spend will be influenced by a wide variety of factors, including neighborhood, type of project and level of finishes.

Without knowing a budget range, we could get through the first few meetings with clients and then give them a rough ballpark figure, which is sometimes double or triple what they thought it would be.

Don’t try to second-guess your design team by holding your cards close to your chest. Help us work with you to get the most value for your hard-earned dollars. Most designers don’t look for opportunities to waste money just for the sake of it. Sure we all want a great project at the end of the process, but we also want to make sure our clients are happy. So establishing your budget early in the process will be helpful to your team, as it will give them one of the key ingredients that will go into making a design you can live with.

Ensure Your Budget Is Realistic

It’s easy to look at TV shows and get the wrong idea about what things cost. In most cases those budgets are not realistic for a bunch of reasons, most of which revolve around how suppliers and trades price their services to be included on the show. There is an old project management saying that goes, “Price, speed, quality — pick any two.” 

It’s not totally untrue, and it underscores that there are no easy trade-offs in a construction project. It would be problematic for me to suggest pricing in this article, as it varies substantially based on a number of factors, including location, number of trades in the area, level of finish, complexity of construction etc. 

The budget number that most clients care about is the “all-in” number. That includes everything they will write a check for including moving expenses, fees and construction. (More about that later.) 

Your design team can help you get a sense of what a realistic budget might be for your project; you can also ask friends who have done projects in the recent past, or check the Houzz Real Cost Finder

Pricing tip: Pricing can change substantially in certain areas over as little as a few years, so be sure that the projects were completed recently for the best idea of pricing.

After you create your budget, subtract 20 percent. Construction being what it is, there are always situations that arise that will increase the cost, and those are hard to foresee at the beginning of construction. It’s a very complicated process involving many people and a lot of communication, so there usually are things that happen that will eat into that 20 percent contingency. The contingency should not be used for upgrades to counters or splashy fixtures. 

On a recent project, our clients had to spend thousands of dollars to get their utilities hooked up again, as the electrical feed from the street was torn up by mistake. On top of that, since the utility’s own drawings said that the feed still existed, there was a three-month delay on top of the reconnection order so that the utility could update its drawings. Even though this these will never be seen, they were absolutely critical and had to be completed before construction could be completed. 

Keeping a 20 percent contingency allows our clients to end up spending what they thought they would spend initially, and they can sleep at night.

Understand What You’re Paying For

Hard costs, fees, furniture — what is in the contract? Your design team will also help you understand what is in those budget numbers. Hard costs include the costs of the construction materials and fixtures required to actually build the structure. Soft costs generally include fees for permits, consultants and designers.

It’s important to establish what your team is referring to in conversation to make sure everyone is on the same page about budget numbers. For example, construction is often expressed in dollars per square foot to give a rough guide during planning. Generally this does not include appliances or soft costs. So it’s important to know that if your contractor says your new house can be built for $750,000, there are soft costs likely not covered in that estimate. Work with your design team to understand the costs and how they relate to a schedule, and how there are items you might not have thought about, to get an overall sense of what is required.

What if You Run Out of Money?

We have had this conversation with clients on more than one occasion, and truly it’s not easy for either the clients or us. It’s frustrating to hear how something that you’ve been planning for is out of your reach. 

There may be opportunities to reduce costs by changing the scope of the project. For example, instead of fully constructing a basement bathroom in a new house, you might just rough in the plumbing so it could be finished at a later date. Or it could be possible to reduce the cost of fixtures and finishes such as flooring or faucets.

During a recent conversation with clients, we recommended that they wait before starting the project so they could gather more resources before proceeding. In the discussion we realized that it wouldn’t be possible to “de-scope” or redesign the project to fit their needs, so the best course of action was to delay. Was this difficult for all involved? Absolutely, but we felt strongly that starting a project that didn’t address their needs wouldn’t serve their overall best interests.

Whenever you are dealing with money, there is the potential for some uncomfortable conversations. But if you understand what you are dealing with early in the process, those conversations will be less stressful than if you’re standing in the middle of a half-completed project in the middle of winter wondering where all your hard-earned money has gone.

Monday
Jul152013

Homeowner's Workbook: How to Remodel Your Kitchen

Article By: Rebekah Zaveloff

You've decided to remodel your kitchen. Now what? Not knowing where to start, many homeowners fall into two camps. Some start by looking at appliances. Others start by collecting inspiring kitchen photos. Some decide they need more room. Others simply want to upgrade their current kitchen. Homeowners may find themselves in this exploration stage for a year or longer before they start interviewing kitchen designers or general contractors. 

Once you've pondered long enough and you're ready to green-light a kitchen remodeling project, then what? We'll start with the first 9 steps and we'll get into the nitty-gritty details under specific steps as we move through the complete workbook. 

Step 1: Think about what you need

This step is all about how you use your kitchen, and finding the layout and features that fit your household's lifestyle. Get ideas from every resource possible, including Houzz guides and photos, showrooms, books, magazines and blogs. 

Think about your priorities: how many people will be cooking and gathering here, and how they'll need to move around in it. Do you need an addition? Or can you work with your existing kitchen footprint?

If you haven't already, start saving photos of kitchens with features that suit your style. Your collection can be organized and beautiful like a scrapbook or it can be filled with random, unorganized images. I actually prefer the latter, because I like to randomly stuff images into my folders and ideabooks and go back to them later on for edits. 

Step 2: Research and plan

Ready to green-light that project and take the plunge? The best place to start is by formulating what's commonly referred to as a scope of work and figuring out your preliminary budget. 

Both of these may be subject to change, so don't feel like you have only once chance at this. Budget and scope are intertwined and often change many times during the design process as you become more educated and able to reconcile what you want and what you can afford. As a homeowner, you're not expected to walk into this knowing what everything should cost. Remember, this is an educational process. 

Step 3: Find the professionals you will need

Even if you're going the DIY route, unless you're building your own kitchen cabinets and doing your own electrical and plumbing, you're going to have to work with a professional at some point. It may be as brief as leaning on your salesperson to help you in selecting and ordering your appliances or cabinets, but it's something to plan on either way. 

Some people start by visiting big-box stores or cabinet showrooms where they can see everything. Many homeowners get referrals from friends or colleagues and start by hiring an architect or designer. Still others might work on their own with a builder or contractor. Pros are available to help you with everything from contracts and permits to space planning, budgets, choosing finishes and fixtures, shopping, ordering products, helping you set up a temporary kitchen, and managing your project from start to finish.

Step 4: Schematic design

This phase includes sketches, space planning, preliminary floor plans and elevations showing the layout and cabinet sizes. I try to keep my clients focused more on layout and space planning, even though the temptation is to talk about what the kitchen will look like. But I find that getting caught up in the look too early can distract from the space planning phase. 

Plus, you need a plan in order to figure out what materials will go where, and how many square feet you will need, and ultimately how much this will cost. I like to begin the contractor interview process early and give them a preliminary drawing packet and scope of work so we can get some ballpark construction numbers. At the same time you can be sending out drawings for estimates on some top choices of finishes and fixtures.

Step 5: Fixture and finish specification

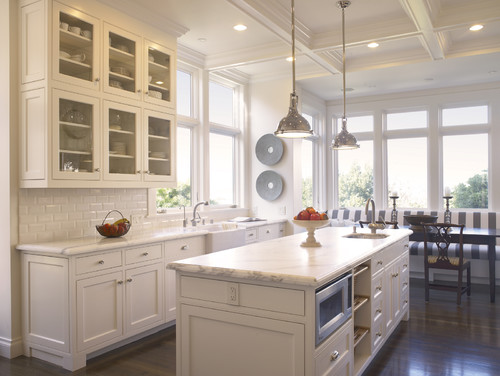
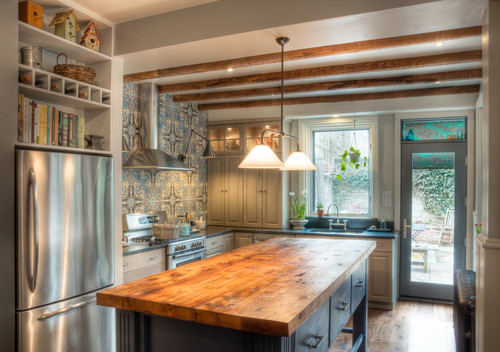
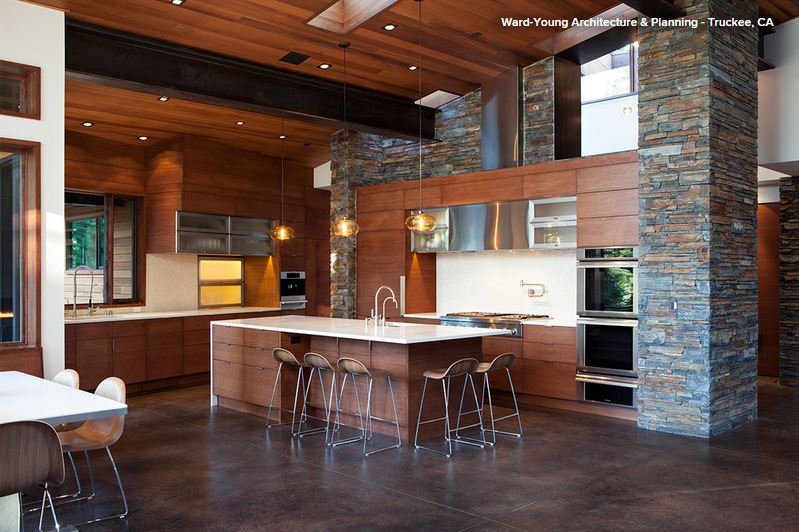
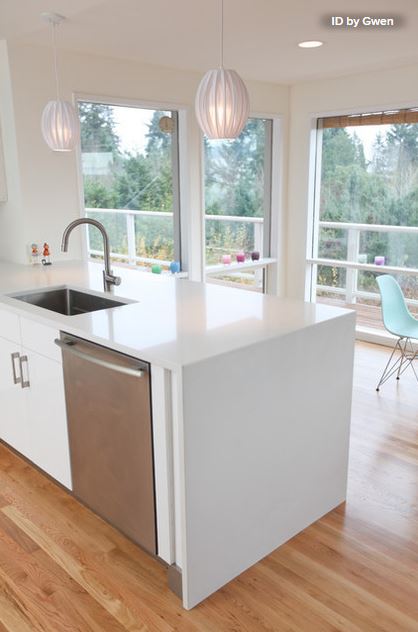
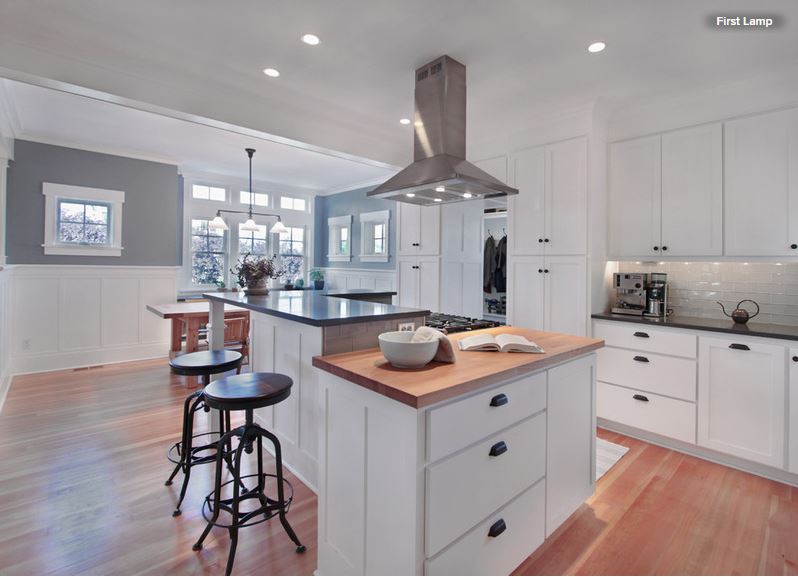
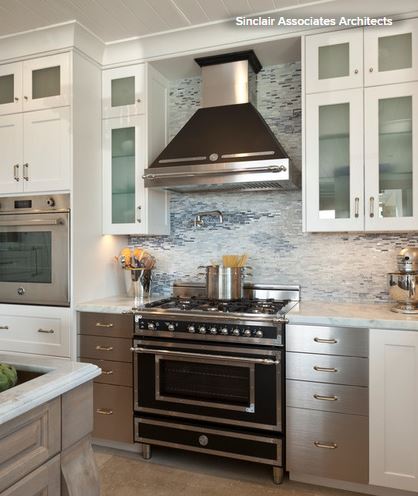
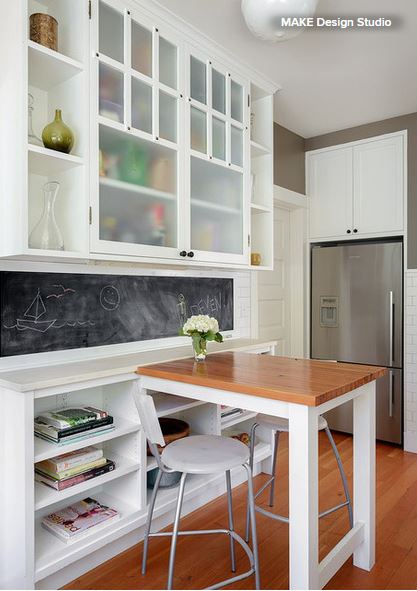
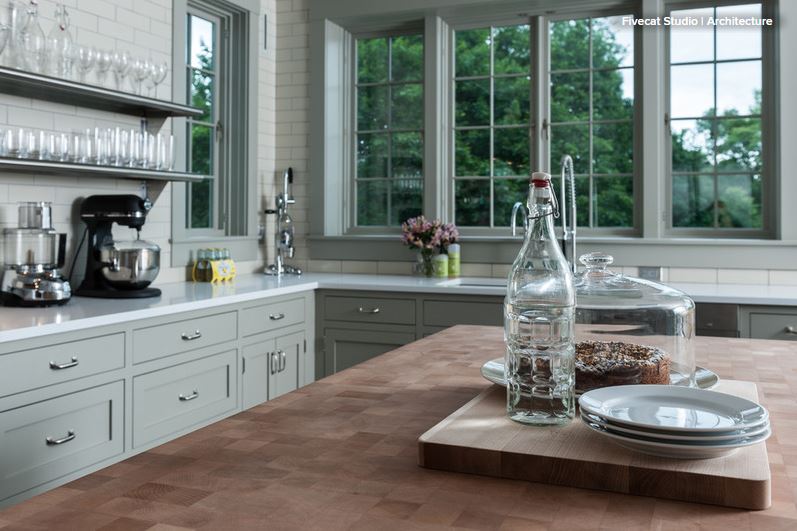
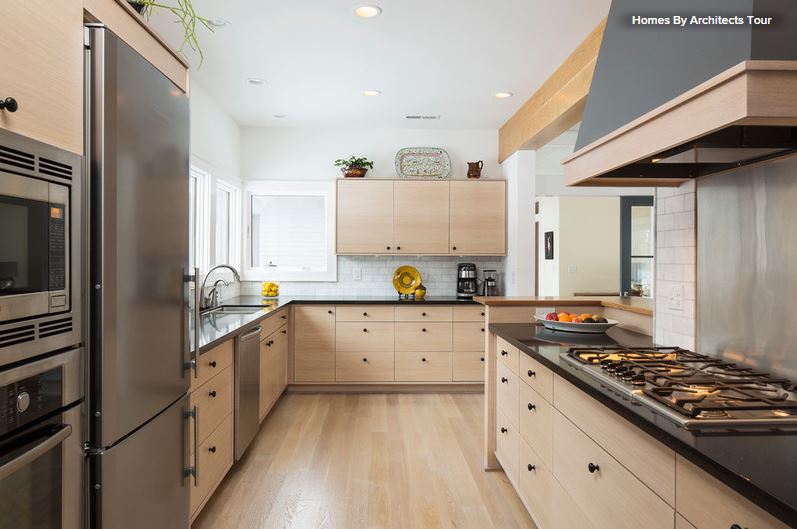
Throughout this process, and probably long before, you have been saving photos of kitchens you love into your ideabooks and folders. You've found your style, whether it's modern, classic,traditional, cottage or a personal style in between. You probably know if you want a white kitchen, a natural wood kitchen, or some color

Now you need to make your final selection of finishes and fixtures. This usually includes: 

  • Cabinetry construction type, doorstyle, finish and color
  • Countertop material
  • Refrigerators and other appliances
  • Kitchen sink and faucet
  • Light fixtures
  • Flooring 
  • Backsplash
  • Decorative hardware 

Step 6: Work on design development and construction documents

This is the stage when you finalize the design and prepare final floor plans, elevations, details and, if applicable, mechanical and electrical drawings, lighting switch plans, and exterior elevations.

This is where your final permit set or Construction Drawings (CDs) come into play. It's important to have finishes and fixtures selected at this time, since this is what will be considered in the final pricing from the contractor. 

You'll submit drawings for permits. These have a lead time, so check the timing with your local village. You'll need an architect, designer or licensed contractor signed up to finalize the paperwork and pick up your permits, so get ready to hire someone in the next step. I often find that we're submitting for permits around the same time or a little bit after we've placed the cabinet order, due to similar lead times. 

Step 7: Get contractor estimates

If you don't already have a licensed contractor on your project, your next step is to find one to carry the project through. I always recommend to my clients to get at least 3 different contractor estimates. I like to do preliminary walk-throughs with the contractors once the schematic designs are done so we can get some ballpark estimates and find out if we're on the right track or need to pull back some to fit the budget.

Step 8: Get ready for demo

The big day is upon us, most likely something like 4-8 weeks from when you submitted for permits. Time to get that schedule firmed up and plan on cleaning out the cabinets, putting what you don't need in storage and — if you're living in the house during construction — setting up a temporary kitchen so you don't lose your mind!

You may be moving out of your house temporarily, but most homeowners white-knuckle it and try to live in the house through construction. Preparation and organization can save your sanity.

Discuss the logistics ahead of time with your contractor. Will you meet once a week for updates? Will you have to be out of the house for certain tasks like demo or flooring? What about debris removal and dust? Are there any family allergy issues? What is a typical work day for the crew? Getting all this on the table beforehand can set expectations and make for a smoother ride. 

Step 9: Surviving the dreaded punch list

Once construction is over, well ... almost over ... there's always this annoying little list of items that are missing, wrong, or simply forgotten about. A missing light switch plate, a caulk line that shrank and pulled away from the wall, paint touch ups — small things like this, and sometimes bigger things like the hood doesn't work, or there's a big scratch in the newly refinished floor. 

Sometimes the homeowner does the punch list. It can be as informal as an emailed list of items that need to be fixed or finished. I like to use a little form I put together that identifies the item to be fixed or finished, the responsible party and the date of completion. I send it to the client for review, changes and additions, and then off to the contractor. 

It's inevitable that the contractor may have to make multiple visits back to the house to finish these items; prepare yourself for more than one visit and you'll be fine.The best way to approach this is with a Zen attitude. Things happen, little things get missed. It's sort of like making a list for the grocery store and still forgetting some key ingredient. We all do it.

Friday
May242013

Raw Materials Revealed: Drywall Basics

Learn about the different sizes and types of this construction material for walls, plus which kinds work best for which rooms.

Photo: Pine Grove Homes Ready for Drywall via Wiki Commons

Drywall vs. Plaster

Drywall is a master of disguise. The walls in this picture look like they could be plaster. One of the visual giveaways that you're actually looking at dry wall is when you see the sharp corners created by standard corner bead.

Corner bead is a metal or plastic piece that covers the outside corners of drywall to protect them from damage. Then joint compound is spread over the bead and sanded smooth.

In many traditional plaster applications, a rounded piece of wood trim was placed at the corners and then plastered over, creating a round corner. To mimic this look with drywall, look for a bullnose corner bead.

Unlike with traditional plaster applications, for which the entire surface was troweled on by hand, only the seams and fasteners are covered with joint compound when you're finishing drywall.

The finishing happens in several steps. First paper tape is embedded in joint compound, or "mud". Then two more coats of mud go on before sanding.

If you are looking for a plaster-like finish, you should install blue bead - a drywall product made for this purpose - then skim coat the entire surface instead of just the seams. This is much faster than with traditional plaster. 

Drywall Sizes

Most drywall of Sheetrock you see is either ½ inch or ⅝ inch thick. What size to use depends on a variety of factors, including durability, location and fire safety.

The width of drywall sheets is either 48 or 54 inches. The reason for the two width sizes is that when installed horizontally, two sheets will equal either 8 or 9 feet - common ceiling heights in residential construction.

The sheet lengths vary from 8 to 16 feet. For the do-it-yourselfer, a 4- by 8-foot sheet will be difficult enough to maneuver. And don't forget that you'll need to cut holes for every outlet and light fixture box and get those all to line up, too. 

Professionals generally use the longer sheets, like the one shown in this picture, because it reduces the time spent on taping joints. 

The advantage of ⅝-inch-thick drywall is that it does not bend or sag as much as ½-inch drywall, which can show imperfections in the framing.

But what if you want the drywall to bend? Use ¼-inch or ⅜-inch drywall. You may also need to make slits in the material to allow it to take the curve.

Quiet Rock Soundproof Drywall & Other Drywall Types

Other than regular gray drywall, you'll also see green and purple. Both of these are good for areas that will see a lot of moisture, like a bathroom. The purple is a step up in moisture protection from the green. Even with this added security, I don't recommend installing these in a shower or tube surround - you'll want to tile on cement board for bathroom walls outside the shower. And install a good bath fan with a timer switch so that you're not testing the capability of the drywall.

Other types of drywall you'll see are type X for added fire protection and QuietRock, which is two pieces of gypsum laminated together with a special glue that allows the assembly to absorb sound and make your living space quieter. The drywall is installed with the same special glue at the seams, and a putty-like material is placed around outlet boxes. If installed properly, it is quite effective - but that doesn't come cheap.

If you're looking for a lighter sheet of rock, try USG's new lightweight drywall. Better yet, DIYers should rent a drywall left for ceilings. It's worth the added expense. 

We've only scratched the surfaces of what can be done with drywall. Although drywall is easier to install than plaster, it takes time to master the skill. Look for opportunities to practice, like in a garage, before you try your skills on the living room.

Have fun, wear a mask when you sand and rock on!


(You are reading an article originally posted on Houzz