twitter Facebook Google+

                 linkedin pinterest houzz  

Click for the BBB Business Review of this Countertops in Denver CO 

Google Review 

Sales & Promotions!

Architects, interior designers, and more ∨

Hire a decorator to find that just-right couch and coffee tables for your living room.
Find wall shelves, a customizable closet organizer and stylish furniture for home to whip your closet into shape.
Remodeling and Home Design

Qualify Us Now! ProView 

Cambria logoUp to $45,000 interest free for your project!Finance by Cambria

 convenient and easy.

  • No Money Down
  • Interest-free financing for up to one year without payments
  • Financing up to $45K for any project that includes Cambria (including cabinets, flooring, sinks, plumbing, install & more)
  • Secure paperless telephone application
  • Credit decision in less than 10 minutes


Entries in Product Guides (23)

Wednesday
Oct292014

Pet-Friendly Design: Making Room for the Dog Dish

Article by:

When I say there is nothing quite so unpleasant as stepping in a dog’s water dish, I speak from experience (no thanks, Augie). Like a good pet owner, I keep my pup’s water bowl filled with fresh water. It’s located in the kitchen, where I inevitably get busy and distracted and step in the drink. It has happened a lot, which goes to show you really can’t teach an old dog new tricks.

When I next remodel, I’m going to plan for this condition, using the clever ideas from these fellow pet owners as inspiration.

In this project, by Buckenmeyer Architecture, finding a space for the dog dishes was a key design consideration. “A recess at one end of the island keeps the bowls out of the way,” says Marty Buckenmeyer.

Judging from the gray around his or her muzzle, I’m guessing this sweet dog is a little long in the tooth. I’m sure the elevated bowls are appreciated.

The designers at Haddad Hakansson employed a similar strategy in this kitchen, but they placed the bowls at the end of a cabinet run as opposed to an island. It’s a smart move in a kitchen that has the room. “One of the highlights of this space is the custom dog dishes,” the designers write. They are “inset into a small slab of white quartzite. The cabinet above has a tilt-out tray for dog treats.”

Perhaps the feature helped the space win first place in the 2014 NKBA northern New England kitchen design competition. And, as you can tell by the blur running toward the eating area, it clearly has won the popular canine vote too.

In this kitchen, by Shannon Ggem, the lucky dog can pretend he or she is eating in the wild, thanks to a dining niche lined with artificial turf.


A closer look reveals the other features. Not only does the space have bowls printed with a grass image, but it has a faucet with an above-counter control. As the designer says: “No bending!”


With built-in bowls and the same material treatment as the kitchen island, this dog eating area, by Studio Zerbey Architecture + Design, is almost undercover.


This niche, by Plain & Fancy by Dandamudi’s, is outfitted with a pullout drawer and an easy-to-clean stone surface.

Some smart and space-endowed homeowners take the dog dishes farther from the kitchen triangle. In this project, by Kathleen Donohue, Neil Kelly, the eating area is under the command center.


In this project, by Anthony Wilder Design/Build, an eating and storage area for the dog is tucked into the end of a wall. Below are the bowls; above are dog accessories and treats.


This mudroom, by Dreamstructure DesignBuild, is outfitted for everyone — four-legged and two. Due to the recessed and elevated nature of the bowls, you’d be unlikely to step in them — but if you did, you might be wearing your boots.

Monday
Oct202014

Bathroom Workbook: 7 Natural Stones With Enduring Beauty

Article by:

There’s no other material quite like natural stone. No two pieces are exactly alike, and nothing else adds the same organic warmth and texture to a bathroom. Not to mention the longevity. If they’re well maintained, your stone surfaces can last a lifetime. 

Marble, of course, has been a popular stone choice for luxurious interiors for centuries based on its inherent beauty. But while Carrara and Calacatta remain classics, they have their downsides, and they aren’t your only options. Here are seven other natural stone varieties, each with its own unique characteristics and strengths, worth considering for your bathroom floors, countertops and walls.

The price of natural stones can vary greatly, so do your research. But don’t let a high price deter you from incorporating a stone you absolutely love. Larger-format tiles are usually less expensive than smaller tiles, and you can try to find remnant slabs at your local stone yard. Also, consider using natural stone for just one wall or a small niche area to work it into your budget.

Soapstone. Surprisingly underused in bathrooms, soapstone is actually a great option because it’s so low maintenance. No sealers are necessary; just periodically rub a little mineral oil on the surface. Over time this stone oxidizes and gets darker and richer in color. 

Cost: Comparable to marble; you’ll find slabs from $90 to $200 per square foot. But take a look at this pretty soapstone countertop paired with a gray vanity and you might be like, “Marble who?”


Limestone. In its natural state, this stone is highly porous and needs to be sealed to avoid stains. But it’s a popular choice for its soft and uniform look and warm, neutral color. It lends itself to both traditional designs and modern ones, like this vast bathroom covered top to bottom in the material.

Cost: Limestone tile starts at around $5 per square foot.

Travertine. This is actually a type of limestone with natural markings in a range of warm hues. The deep pores in the stone are often filled with a similar-colored grout or epoxy to create a smoother surface. 

Cost: Travertine tile starts at around $5 per square foot.


Belgian bluestone. This is also a limestone, but with a dark gray or black background and gray, white and tan markings. It looks especially great with a contrasting grout, like in this photo. This material will get lightly scratched over time, but the patina makes it even more beautiful. And a little olive oil will bring back its sheen. 

Cost: Similar to soapstone ($90 to $200 per square foot), but to save a little cash, consider using 12-inch by 12-inch bluestone tiles on your counter instead of a slab.


Onyx. This stone has a unique look with striations in a wide range of colors. Since it has a translucent quality, designers often backlight surfaces or walls to showcase the veining and make the space glow. It’s important to know that this stone is delicate and needs to be sealed. 

Cost: Because large slabs like the gorgeous one featured here are rarer, they can set you back $200 to $500 per square foot.


Slate. This stone is usually associated with rustic interiors, but it can work in any space. This photo depicts a mosaic of slate tiles in a rainbow of hues, including blue, green, red and purple. Slate is especially great for floors, because it is naturally slip resistant. To clean slate, just use a mild cleanser that isn’t abrasive. 

Cost: You can find tiles that cost less than $10 per square foot.


Sandstone. Created by layers of densely packed sand, the material has a wavy desert-landscape-like appearance and comes in a variety of colors. It’s essential to seal it regularly (like twice a year), because the highly porous surface will soak up water or any other liquids, causing stains or potentially even warping. 

Cost: Similar to limestone and travertine, around $5 per square foot.

Wednesday
Apr302014

Your Guide to a Smooth-Running Construction Project

Article by:

Imagine walking into your newly built or remodeled home and seeing it exactly as you had imagined it at the start of construction: the windows are all in the right places, the flooring is the right color, and the kitchen cabinets are a perfect fit.

Now allow me to pinch you on the arm, because for most people, reality is often different from that idyllic scenario. You might see missing trim around the bedroom doors or wonder why that small change in the kitchen cost so much. Looking back, you might ask, “And why did we have to hire another subcontractor to finish the bathroom?” 

Of course, there are things you just can’t plan for, but there’s plenty that you can. Costly changes and additional time-consuming work can be kept to a minimum if you fully understand what you are building before you start. By understanding the construction process, being part of the team and keeping a firm grip on the budget, your construction project can result in the home of your dreams. 

1. Don’t Skimp on Design Help

Given the busy lives most of us lead, we don’t have the time to research every type of technology and material that might be used on a construction project. Use professionals to save some of the time that would otherwise be spent learning and perfecting the process. 

Architects are trained not just to make a project pretty but to match building systems, thermal envelopes and other properties to the client’s needs. They have a broad, up-to-date knowledge of these systems as well as of materials and processes for a wide variety of project areas.

Now, I sympathize with the awful feelings associated with a project’s going over budget. I’ve been there; I’ve gotten that dreaded call from the contractor that the structural and mechanical designs are in conflict. And dealt with preexisting conditions that the contractor hadn’t anticipated.

A design pro can provide guidance on what team members will likely be required for the project. And not just for the big ones, like a full custom home construction. Smaller projects like additions and remodels also can benefit from a pro’s expertise.

Architects can usually recommend other team members, too, such as engineers.
 

Your budget might be tight, but I’ve seen time and time again that trying to save money on design actually can cost homeowners far more in the end, in dollars and frustration. 

Homeowners often underestimate the cost and complexity of a remodel or new home. The cost of the design work on a project is something that homeowners may consider skimping on to save money, but we find that the best way to avoid problems in construction is to invest time with your designer or architect up front to think about the construction process during design. This takes far less time than fixing mistakes that happen when the walls are going up. 

Although it isn’t often pointed out, a good designer or architect depends on the client throughout the design and planning process as much as the client depends on the designer.
 

2. Become Part of the Team

Most people spend more time planning their next vacation than they do planning their house project. Not that planning a house project has to be a full-time job. An architect or a designer can help you understand your role in the project as well as the contributions of other team members. That means participating in the process from the start so that you stay fully up to speed with what is happening throughout the project. 

I’ve seen clients assume that I know what’s going on in their head and are surprised when something comes out different than what they were expecting. That’s why communication is important. The Houzz web site and app allow you to show your team what spaces and materials you like. This can give them a reference point to understand where you are coming from (and where you can go together as a team).
 

Being part of the team also means becoming familiar with some of the ways your team members communicate. The vast majority of projects use two-dimensional drawings (as well as written specifications) to communicate a homeowner’s intent to the construction team. This documentation is used to create three-dimensional structures. 

This sounds simple enough, but there are many chances for misunderstandings each time a team member reads the documentation. On a recent project, the foundation contractor misread the drawings and built the formwork too narrow on part of the foundation. During a site visit, we were able to catch it before the concrete was poured, saving the time and frustration of having to chip out all that concrete.

You can ask your team to assist you so you understand what is being communicated at each stage of the project. The best opportunity for this is during your design meetings. Remember, if you don’t understand something, ask. It’s better to get everyone on the same page early before a structure gets built that sticks out like a sore thumb. 

You should also talk with the architect and/or contractor before the project starts so you can make sure that everyone agrees on the approach to how the building will be put together. There are evolving areas of construction, especially regarding the building envelope, that contractors and the architect should resolve before the project commences.
 

3. Establish Your Goals and Refer Back to Them Frequently 

Be ready to suggest ways to get what you want while avoiding potential problems down the road. If you can create a list of priorities, then when you are faced with challenging decisions during construction, which is pretty much guaranteed, you and your team will be able to look back at your prioritized list to really focus on what will get you closer to your goal instead of what may be a costly distraction. 

Things like prioritizing morning light in the kitchen or consciously forgoing a walk-in closet for a larger main bedroom can save the time and cost of having to move walls and making other expensive changes in the middle of construction.

How to Stick to Your Remodeling Goals

4. Establish Your Budget and Add at Least 10 Percent 

Be sure to set aside a construction contingency for critical items — and don’t be tempted to use it just to put in an upgraded cooktop! Due to the complexity of the construction process, unforeseen issues will come up. Without a contingency, you might find yourself short of cash when you really need it. 

A few years ago while remodeling my own house, we discovered numerous problems stemming from a quick and dirty job done 40 years prior. One of the most worrisome issues was a hacked-out joist on the second floor, leaving the bathtub supported inadequately by adjoining joists and bits of plywood. A great deal of creative thought and some extra cash were needed to fix the deficient joist without tearing apart the whole bathroom. Without a contingency to tackle this urgent situation, we might have been forced to postpone other parts of the project to deal with it and might have been stuck with dust and disruption for a longer time.
 

5. Don’t Get Attached to an Optimistic Timeline 

Ideally, your team members will take the time to carefully plan and build your dream house most efficiently. Even if they are not putting in hours specifically on your project, the designer and others will likely be thinking about your project in the back of their mind. It takes time to work out the details of a project, so if you need to get the project designed and built very quickly, there might be situations that won’t be fully resolved in the design phase. There will always be elements that will need resolving onsite, but taking the time to do as much as possible on paper can reduce costs.

It’s also tempting to look at the best-case scenario for construction and think that it will then be the norm for your project. Just like with a cost contingency, though, you’d be well served to build in a time contingency as well. As much as it might seem possible to get into the house on a certain date if all the stars align, realistically there is a chance that the project could go late for a whole variety of reasons (laid out previously). Do yourself a favor: Have a backup plan in case you can’t roll up in the moving van on your exact date.
 

6. Consider Construction Implications Before You Start 

During a recent remodel, one homeowner (who was working without a designer) realized that opening up the main floor of her house required a structural engineer, which caused delays as she searched for an engineer and he did his drawings. 

So it’s important to understand what the construction implications will be to get the space you want. Even though it cost her approximately $7,000 more to open up the space, she was really glad that she went ahead with this part of the project. An architect would have been able to point this out before construction started and would have avoided the stress and extra costs involved in undoing some work in the middle of the project.
 

7. Communicate Frequently With Your Team

A weekly or biweekly status report can help identify areas of concern. This should be done at the onset of the project and continue through construction. The construction phase is where there are likely to be changes due to site conditions, availability of products or other factors. Be sure to get all changes documented in writing, along with the dollar amount promised; sign off on both the changes and the cost to stay in control and to ensure that all team members are up-to-date at every stage of the building process. 

In construction the document is usually called a change order; it explains the nature of the change and the cost. Sometimes the changes are called extras, because they are additional to what was agreed on in the construction contract.

For example, a homeowner might decide to move the location of a door, so the designer will assess the impact of the change with the general contractor and draw up a change order for review by the client. If the client is OK with the amount, then he or she would ideally sign the physical copy (often confirmation via email is used) and the work would begin.

Tuesday
Feb252014

Choosing New Cabinets? Here’s What to Know Before You Shop

Article by:

With all the options available, choosing cabinets for your kitchen or bath can be an overwhelming experience. Aesthetics aside, there are lots of factors that might not be readily apparent that will impact the cabinet’s performance and price. Understanding those factors will give you an advantage in making your selection.

There are three basic structural components to a cabinet: the box, the shelves and the drawers. Each can be constructed in a number of ways. Cabinets generally come four ways: boxed and ready to install in standard dimensions, boxed and ready to assemble, semicustom and custom.

To get a better understanding of the way cabinets are made, I visited two manufacturers: Canyon Creek Cabinet Company in Monroe, Washington, which makes semicustom units, and O.B. Williams Company in Seattle, a 125-year-old woodworking shop that builds custom cabinets. 
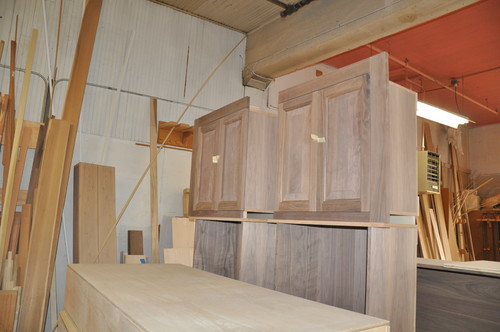
Boxes 

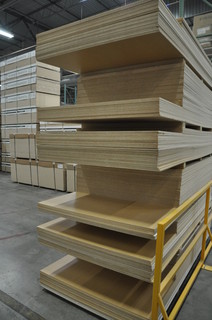
They look just like they sound: rectangular and ready to be filled up with shelving and drawers. Boxes are typically built in one of three ways: with plywood, particleboard or MDF (medium-density fiberboard) and a base that is later covered with a finish piece called a toe kick. There are pros and cons to each of these materials.
 

When plywood is used, it’s typically ¾ inch thick and has a maple or birch veneer. Plywood is made from layers of wood laminated together, and has the benefit of being a fairly stable material that performs well over time and in areas with higher humidity and the chance of contact with water. The panels can be glued, nailed or screwed together, and are usually installed (as is the case with most cabinets) by screwing them into the wall. Plywood’s main downside is that it is relatively expensive.


Particleboard’s draw is its low price. Made from pressed bits of wood bound together with adhesives, particleboard can be covered with a veneer of wood or melamine, or a paper veneer printed to look like wood. The interior can be white or a wood tone. 

The downside to particleboard is that it can be sensitive to moisture and is more prone to coming apart at stress points — where hardware is screwed in, for instance. Ask about how the veneer will hold up with small amounts of water (glasses not completely dried, for instance) or something more serious, like a spill that sits for a while. 

Some cabinet manufacturers, like Canyon Creek, regularly have the particleboard they use tested for performance, so ask if there are different grades of material from which to select, and what you can expect in terms of durability.


MDF is also less expensive than plywood; it has a more uniform surface than particleboard. MDF is often used for paint-grade panels, rather than thinly milled solid wood, because it’s such an easily paintable material. 

Manufacturers of semicustom and mass-market cabinets tend to have better/best or good/better/best options for their cabinet boxes, which may consist of one or a combination of all three materials. Custom shops tend to stick with plywood and MDF, or just plywood, for construction, because of its strength and performance.
 

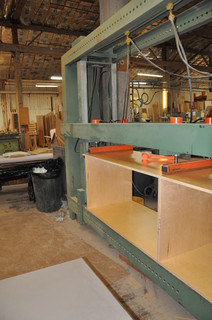
On boxes that will have European-style doors and drawers (where the doors and drawers completely cover the box — also known as full overlay), making sure the box is completely square is essential. That can be accomplished with a clamping system, or in a custom shop by using individual clamps. This ensures that when the fasteners are installed, the box will be perfectly square.


Drawers and Shelves
 
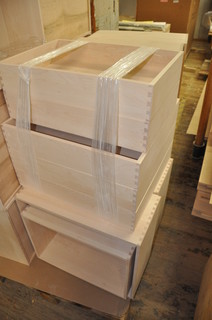
Drawers and shelves are also made from particleboard, MDF or plywood, and can be assembled in a number of ways. The most common and least expensive method of drawer construction is gluing and pinning (stapling) the ends together.


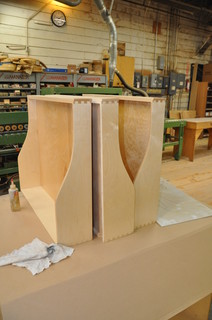
A step up in cost and longevity is dovetailconstruction: Small pieces on the ends are routed out to key into one another, making a connection that is very difficult to dislodge.


The sides of the drawers are usually made from ½ inch of material with a bottom panel that’s ¼ inch thick. This is another place construction can vary, with thinner or thicker materials all the way around.


You can make a decision about drawers based on performance or aesthetics. Ask to see different drawer construction options so you know what you will see when you open them — on the tops and inside — and how they will look when they are extended. 

What you see has a lot to do with how the cabinets are edge banded. More on that in another installment in this series.


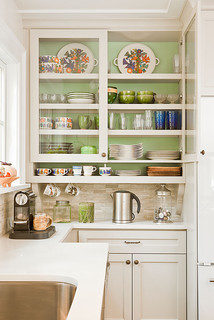
Shelves can be installed fixed, or they can be adjustable, with pegs that fit into rows of holes on each side of the cabinet. While shelves are typically made from the same material or wood species as the rest of the cabinet box, an exception would be if the cabinet has a glass front or the shelves themselves are glass. When the interior of the cabinet is visible, making the shelves and box interior the same wood species as the face, or painting it the same color, is a common practice.


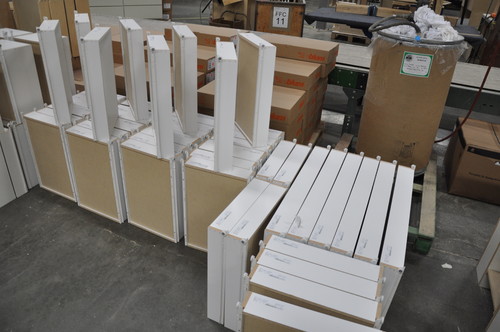
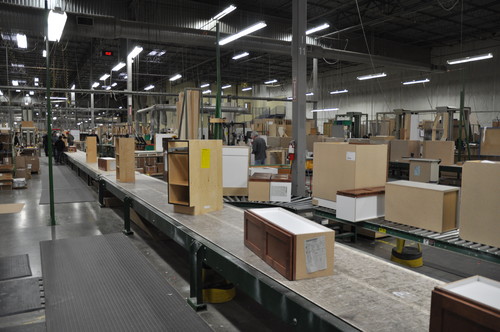
One more note on the drawers and boxes: Larger-production cabinetmakers tend to build their drawers and boxes at the same facility where all of the cabinets are assembled. Some smaller shops, including many custom cabinetmakers, send out their boxes and drawers to be built by a company that specializes in this. The box and drawer companies can build them relatively inexpensively, leaving the custom shop to focus on the parts of the cabinets that make them truly custom — the doors and drawer faces, and the millwork that finishes out the cabinets. 

Indoor Air Quality 


One final thing to think about is how the materials are made — and particularly whether they include urea-added formaldehyde, a substance known to have an impact on human health. Many manufacturers have removed urea-added formaldehyde from their manufacturing process, making the cabinets NAUF (no added urea formaldehyde) compliant. However, there is still the possibility of the material’s containing other volatile organic compounds (VOCs) that will off-gas over time. And formaldehyde is a naturally occurring compound, so there may still be traces of it. 

California has been a national leader in air-quality initiatives, so you may see a mention of the materials in your cabinet being CARB Phase 2 compliant. CARB is the California Air Resources Board, which has created requirements to limit VOCs in cabinets, furniture and other materials used in homes. The requirements focus specifically on plywood, particleboard and MDF. The U.S. Environmental Protection Agency is working on nationwide requirements based on CARB’s standards that may go into effect as early as 2014.
 

There are a number of claims made and opinions offered about the relative “greenness” of plywood and particleboard, and not all are manufactured in the same way. If this is an important consideration for you, you might need to do some extended research. It also means you’ll need to ask detailed questions when pricing different cabinets, to understand how they are made and with which materials. 

Bottom line: Cabinet prices are wide ranging and directly correlate to materials and construction methods. Expect a basic unit to include particleboard, melamine and stapled drawers, and everything else to be an upcharge.

Tuesday
Feb042014

Construction Timelines: What to Know Before You Build

Article by:

One of the first questions we get when talking to clients about a new custom home or remodel is, “How much will it cost?” This is usually quickly followed by the second question, “How long will it take?” The answer to both is, “It depends.” 

While we don’t want to be evasive, there are many variables that have to be factored in before we can adequately assess the time and cost of a project. One thing that most homeowners don’t see initially is that for a properly planned and designed project, the design and construction phases can last roughly the same amount of time.

As I’ve written about previously, the design process can take up to six to eight months for a new custom build (including determining the client’s needs, designing to those needs and deciding how to best to build the project). And it could take longer if there are complications such as other approvals or if someone objects to your project. This time is not spent just daydreaming and staring out the window — your team is working to understand the design and construction to smooth out potential issues in your timeline. 

Be realistic. It’s often difficult for homeowners to know what’s realistic for each phase of the construction process. For instance, one week to construct a kitchen is not realistic due to the number of services and trades involved — installers, plumbers, tile contractors. It would be foolhardy to think that everything could be done to satisfaction in such a short time. 

What’s also confusing is that timelines for suburban developments can be wildly different from a single luxury custom home. We have had clients ask us why a custom home costs more per square foot and takes longer that a tract home. The reason is that developers have crews that move from house to house and are dedicated to that development. This means that for all intents and purposes, they finish their work on one house and move on to the next. 

On a custom house, your framers might be a week late showing up (because their last job ran late), and then the next trade in line is thrown off as well. You can see how this can cause a domino effect on your project. Most contractors can’t wait around until the exact time they are needed on a site — they have to keep their crews busy, or they don’t get paid. So they tend to overbook rather than underbook to make sure they have enough work to keep them busy.
 

Often one trade cannot begin work until another is finished. There is time associated with mobilization and demobilization of each trade, and often one of the trades cannot be onsite the exact day or even within a week of when you need it. So often there is downtime that needs to be accounted for. When planning, it is important not to try to plan schedules too tightly, as they rarely work out that way.

Understand the timeline and the implications of what is written. Do you know what demolition entails? The mess? The noise? Words on a spreadsheet can seem awfully abstract when you are looking at them in your living room, but they can mean a whole different thing when one wall of your kitchen is blown out in the middle of a March storm. It might mean that you want to consider moving out while some of the more disruptive work is completed. Your design team should be helping determine this as part of their work. If you don’t understand what specific items mean, clarify them with your team. 

Also, plan for construction to take place when it will best for the project and affect your family the least. One of our clients learned the hard way after he insisted on starting a project just as winter set in. The contractors were only able to pour the footings, and then a cold snap set in, which held up the project for six weeks. The lesson here is to understand what potential delays could crop up that could derail your project timeline.
 

What is in the timeline? Your timeline should be specific enough to include a level of detail that helps you and your team understand the logical flow of activities, so you can follow the logical steps that should happen in sequence. It is typical to require the contractor, as part of the contract, to prepare a comprehensive schedule for all work and phases from start to finish and present it at the beginning of the project. This schedule is then reviewed at a start-up meeting, at which the client, architect, contractor and major consultants who might have a stake are present. 

Get a sense of what could affect the timeline. There’s a rule of thumb for construction used by contractors and designers: “It will always take longer than you think.” There are a number of factors that conspire against the pristine order of a freshly minted timeline document: complexity, weather, number of construction workers, permits and inspections, back orders and delays for materials, equipment or fixtures. Make sure you or your team members are aware of products that have a long lead time. These could include materials, equipment or products that are not warehoused locally, such as custom-fabricated furniture, light fixtures or imported tile. 

There are also municipal approvals to consider. A municipal building inspector has to come to the site during construction to check that what is being built corresponds with the drawings. It is the contractor who coordinates these inspections, and who needs to plan for them so work doesn’t stop while everyone waits for an inspection to happen. 

If the inspector feels there is a gap between what has been documented in the drawings and what is being built, he or she can request more information from the team. This is to understand that the changes from what is documented in the drawings will still satisfy the building code. Or worse, the inspector can place a stop-work order, which effectively shuts down the project. And that can put your timeline on life support. But with proper project oversight from your design team, your project should be able to move along smoothly.
 

Final details. For some reason the final details on a project often take a lot longer that you might think. The reasons are that they often require very precise work that takes time to get right. Things like installing trim or custom millwork can wreak havoc on a schedule. 

On a recent project, we specified a custom millwork piece for all the bathrooms. The challenge was that it required coordinating three separate trades: the millworker who built the cabinets, the countertop contractor who fabricated the quartz and the stainless steel fabricator who made the custom sink. While the owner is thrilled with how it looks, it did take some time to get everyone involved on the same page. 

One thing to keep in mind is that at the end of the project, most of the budget has been spent and many of the tradespeople have made the majority of their money. This is where holdbacks come in. A holdback keeps a certain percentage of the contract amount set aside until a set number of days after completion. Tradespeople want to see their work completed and will finish up what needs to be done. But in some cases, it is important to not only judge the amount of work done when a contractor applies to be paid but also how much work is left, and can the remaining funds motivate them to finish. It is not unheard of for a designer to return a contractor’s application for payment and insist that certain details are done first before the requested amount is paid out.
 

Just as there is not one piece of art that everyone agrees is perfect, there is no construction timeline that fits all projects. But by working with your team, you can understand the components that go into your timeline. And that can help avoid timeline trauma during construction.