twitter Facebook Google+

                 linkedin pinterest houzz  

Click for the BBB Business Review of this Countertops in Denver CO 

Google Review 

Sales & Promotions!

Architects, interior designers, and more ∨

Hire a decorator to find that just-right couch and coffee tables for your living room.
Find wall shelves, a customizable closet organizer and stylish furniture for home to whip your closet into shape.
Remodeling and Home Design

Qualify Us Now! ProView 

Cambria logoUp to $45,000 interest free for your project!Finance by Cambria

 convenient and easy.

  • No Money Down
  • Interest-free financing for up to one year without payments
  • Financing up to $45K for any project that includes Cambria (including cabinets, flooring, sinks, plumbing, install & more)
  • Secure paperless telephone application
  • Credit decision in less than 10 minutes


Entries from June 1, 2013 - June 30, 2013

Wednesday
Jun262013

8 Clever Ways to Put Your Backsplash to Work

Article By: Shane Inman

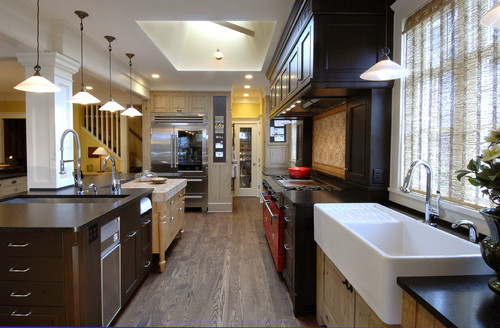
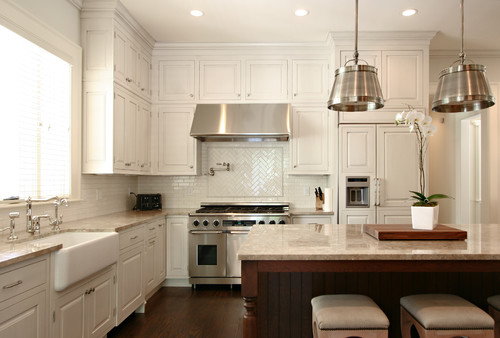
Most kitchen backsplashes are 15 to 18 inches high. This vertical surface is just like any other in your kitchen, so don't let it go to waste. Make the most of it to help you get through day-to-day tasks. From holding cookbooks to letting you watch your favorite cooking show, to keeping often-used items at hand, these clever backsplashes help set the bar for style and service.


1. Cookbook reader. For messy cooks, keeping a cookbook on the counter can be a big mistake. If you're constantly dripping oil and tomato sauce all over, try hanging your cookbook on your backsplash. 

Railing systems like the one shown here are easy to install on any type of backsplash. Choose your own set of hooks, containers and ledges to create the configuration you need.


2. Knife and towel rack.Avid chefs and occasional cooks alike use towels and knives just about every day. This backsplash installation keeps both within arm's reach, making prep, cooking and cleaning much easier.


3. Utensil and spice racks. Get a professional look by keeping your cooking utensils out, just like in a restaurant. Cooking your favorite dishes is much easier when you don't have to search crowded drawers for that one spoon, spatula or spice. Find a shelf or spice rack to hang directly on your backsplash for easy access.


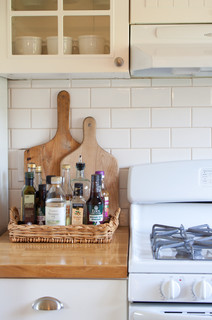
4. Oils and spice niche.A wall's depth — about 3 to 4 inches — is rarely used. Create a niche for everyday oils, spices and other cooking necessities. It will help you take advantage of every square inch your kitchen offers.


5. Microwave. Microwaves often take up valuable space on a counter, in an island or in upper cabinetry. If you're tight on space but can't imagine living without a microwave, build it into your backsplash. This fully flush microwave creates a clean and seamless look and works perfectly with the modern decor.


6. Television. Prep your meals along with your favorite celebrity chef. Building a TV straight into your backsplash means you can watch every move without having to crane your neck, and you can catch up on your favorite shows while dinner is in the oven.


7. Espresso maker. This uberpopular kitchen appliance (at least first thing in the morning) can be installed right into your backsplash for easy espresso making. Bulky coffeemakers can take up valuable countertop space in small kitchens; this seamless options works great for those who can't go without their morning joe.


8. Appliance garage. Hide your awkward countertop appliances behind flush tambour doors. The countertop extends inside these appliance garages, so your blender, toaster and food processor can slide out with ease. See if you can have outlets installed inside to avoid constant plugging and unplugging.


General contractors, home builders, and more ∨

Browse bedroom ideas, from loft beds to a decorative duvet cover, and dream in style.
Select patio furniture to match your style, designer garden sheds or even a greenhouse to personalize your landscape.


Wednesday
Jun262013

8 Kitchen Organizing Ideas for Messy Cooks

Article By: Lisa Frederick

I’ve always loved to cook. My stove gets a daily workout, my recipe books number in the hundreds, and I have so many pots, dishes and kitchen gadgets that I rotate them in and out of storage. With enthusiasm comes a price, however: an unruly mess that somehow has overtaken every flat surface by the time I untie my apron.

My husband, who is of the clean-as-you-go school of cooking, is mystified at how I can use every one of our five sauté pans, or three different sets of measuring spoons, to make a single meal. Honestly, so am I — I'm not sure I could tell you exactly when the jumble hits critical mass. But since the kitchen in our suburban split level has less counter space than some New York apartment kitchens I've seen, I suppose it's time to get the clutter under control. 


1. Block the view. If you can't avoid making a mess while you cook, you can at least shield it from guests.A two-tier island or peninsula, with the back higher than the front, screens flotsam from those seated opposite the cook. 

This island has more height than some, so if the owners add a few bar stools that aren't too tall, guests would be hard pressed to glimpse more than a sliver of mess.


2. Build in trash receptacles. I'm a little squeamish about keeping a trash can right in my kitchen (yes, I know people do it all the time). So mine stays in the garage, and I gather trash and food scraps in a small grocery bag that I carry outside when I'm done cooking. It's not the most efficient or attractive solution, I freely admit.

But bins like these, built right into the cabinetry, could change my mind. Having a spot where you can sweep away waste and compost as you go is a huge part of keeping counters tidy, and built-in bins sure look better than my stash of plastic bags from Target.


3. Choose an extra-large sink. As cooking progresses, dirty dishes mount. An oversize sink can corral them and keep them below eye level. Apron-front and single-bowl models work especially well.


4. Build in a prep sink.If your kitchen has the space, try a dedicated prep sink to keep eggshells, vegetable peelings and more out of the main cooking area.


5. Add baskets galore.When I'm making a meal, jars and boxes don't always get returned to their proper homes right away. Having a row of baskets to toss things into helps to keep the kitchen neat. These are in a full pantry, but you can use the same tactic on open counter space, or on built-in or freestanding shelves.


Similarly, a shallow basket right near the work area keeps staples from migrating all over the kitchen.


Baskets on the end of an island could conceal stacks of folded towels, recipe binders and miscellaneous tools.


6. Store utensils in crocks. Not only do crocks keep wooden spoons, tongs and spatulas tidy, but they also keep tools close at hand so they're a cinch to grab when you need them.


Of course, you could always take it one step further: built-in receptacles in a pullout drawer. If I could have one specialized cabinetry insert, I think this would be it.


7. Double up on dishwashers. Ample dishwasher space means you can tuck dirty dishes in as you go (or, if you're like me, try to remember to do it). In a pinch you can also keep a cooler full of hot, sudsy water near the sink when you're cooking a major meal.


Modular and flexible, dishwasher drawers work well near the main sink or prep sink.


8. Slip in a portable island. As in my case, messy cooks often lack enough counter space for spreading out. A small island on casters can be amazingly effective at extending the work area. Why haven't I tried this yet?

Remodeling, decorating, and more ∨

From Shabby Chic home accents to contemporary furniture and the perfect mirror, browse thousands of decorating ideas to inspire your next home project.
Find inspiring decorating ideas, from tufted beds to custom window treatments, to help you redesign your bedroom.


Monday
Jun242013

Your Guide to Choosing Kitchen Cabinets

Article by: Vanessa Brunner

The right kitchen cabinetry can make or break your kitchen's functionality and style — not to mention your budget. No pressure, right? Don't stress yet — Houzz's kitchen cabinet guides can walk you through the process, from start to finish. Resource guides covering everything from Shaker to flat panel, from corbels to aprons, from glass knobs to recessed pulls, are all listed here in easy-to-access fashion.


Door Styles

Shaker, flat or inset? Your cabinet door style is important — it may be your biggest kitchen expense, after all — but choosing it doesn't have to be stressful. See which of these popular cabinet doors fit with your home's style. 

Get the guide: Popular Cabinet Door Styles for Kitchens of All Kinds


Who says cabinets have to be wood? Put your best dishes on display and open up your kitchen to light and space with glass cabinets. 

Get the guide: 8 Beautiful Ways to Work Glass Into Your Kitchen Cabinets

Go beyond the standard swinging door in your new kitchen. Flip-up doors, pocket doors and corner drawers can make your cabinets more functional and your life easier. 

Get the guide: 8 Cabinet Door and Drawer Types for an Exceptional Kitchen


If you'd rather stick with something more traditional for your cabinets, then the timeless Shaker style is a sure bet. Learn how to make this look work with different counter, hardware and backsplash materials. 


Add a more traditional furniture style to your kitchen storage with a countertop hutch. Glass fronts make these the perfect place to put pretty dishes on display. 


Open shelving feels as much at home in modern kitchens as it does in traditional ones. See how to make this simple, clean storage style work in your home. 

Using ecofriendly materials isn't rare anymore — it's easy to choose kitchen cabinetry that contributes to a healthy home and family, as long as you know what to look for. 


Can't decide between two different styles? Mix and match — two different cabinet styles can make an even bigger impact. 

Hardware Styles

Of course, once you have your cabinets chosen, you have a whole other task ahead of you: choosing hardware. Even if you've got simple Shaker cabinets like these, your choice of drawer pulls and knobs makes a big difference in your finished look. 


Flat-panel cabinets tend to work best in modern kitchens; make sure you choose hardware to match. Clean, simple and contemporary pulls work well with this cabinetry style. 

Raised-panel cabinetry tends to suit traditional kitchens. Look for classic, old-world fixtures to fit this beautiful style. 

Colors and Finishes

Colorful kitchen cabinetry has made a big comeback. Try pretty palettes to give your kitchen flair.


Try playing with two different colors on your kitchen cabinetry. Scared to go too bold? Contrast a single bright color with neutral finishes. 

If you want to get color the DIY way, read our related ideabook first. Painting your kitchen cabinets can be difficult, but these pro tips will help. 

Get the guide: From the Pros: How to Paint Kitchen Cabinets


Stains are a great way to get color on your kitchen cabinetry without covering up the wood's beauty. From greens to blues to browns, stain colors can really enhance your new kitchen. 


Curious about color but worried about the maintenance? A distressed finish can cover all the bases, offering a warm, bright look that can actually embrace wear and tear. 

Sometimes a kitchen remodel doesn't require a new fridge or oven — but how do you pick a cabinet color to go with your existing appliances? Check out our cabinet color guide for cabinets with dark appliances. 

Get the guide: Cabinet Colors for Dark Appliances


Molding and Details

Adding molding is an easy way to make any type of cabinetry look custom. Whether you want to add crown molding to your existing kitchen or edge molding to new cabinets, this guide can help you envision the final result. 

Decorative supports, aprons, corbels and toe kicks — these features might not come standard on most cabinetry, but they can make a huge visual impact. 

Learn how frosted, textured and seeded glass is made, and whether or not it can work with your kitchen cabinets. 

Get the guide: Choose Your Kitchen Cabinet Glass


Whether you're building a new kitchen or retrofitting an existing one, it's important to keep universal design in mind. Clever accessories will make your kitchen comfortable and accessible for everyone who uses it. 


Kitchen ideas, bathroom ideas, and more ∨

Browse living room ideas, from a sectional sofa couch to chandelier lights and floorlamps, for your next interior design project.
Find a wall shelf, customizable closet organization and stylish furnishings to whip your closet into shape.


Friday
Jun212013

Bathed in Color: When to Use Black in the Bath

Article By: Jennifer Ott, LEED AP, Assoc. AIA

Black is admittedly an unconventional color choice for a dominant color. Making it work in a bathroom can be extremely tricky, especially one that is cramped or underlit. But when done well, it can look stunning and sophisticated, as evidenced by the selection of black bathrooms featured below. 

Here you'll find tips for how to work with black in a bath, along with a selection of black paint colors to try in your own space.

Look for subtle differences in undertones when selecting a black hue for your bathroom. 

Some have a warm tinge; others are cooler. 

My favorite blacks have a little bit of blue or purple — this gives them a cool, clean feel that contrasts nicely with wood tones and warm neutrals.


Black-hued walls don't have to make a space feel dark and confining. 

Take a tip from this elegant bathroom and pick a blue-black for one or two of your bathroom walls. 

Cool colors recede, so the far wall here feels more distant than it actually is, giving the impression of a larger space. 

The black wall color also coordinates nicely with the dark veining in the marble.


If you decide to go all in and use black on most or all of your bathroom surfaces, think of ways to circulate light so the space isn't too dark. 

The wide mirror (with its integrated light) and the wall of windows help to lighten things up in this bathroom. The lighter color of the sloped ceiling makes the room feel more open, too.


What a fun, fantastic bathroom! It's proof that a black and white palette need not be boring. The wall covering is such a strong visual element in the room that not much else, adornment-wise, is necessary.


Play with shades of gray and black for a stylish, debonair space. I like the use of materials and textures here. 

The bulk of the colors in the space are dark, but because of the variety of materials and textures, it doesn't feel like a black abyss.


If a limited palette of black, white and gray feels too cold to you, add some warm wood into the mix. These dark gray and black tiles provide a nice backdrop for the sculptural plumbing fixtures. They really pop out and take center stage.


If black walls aren't your thing, try putting the hue on your floor. Black absorbs light, so incorporating plenty of reflective surfaces helps to bounce light through the space.


Those fortunate enough to have tall ceilings in their bathroom can easily pull off a palette that includes black without having the space feel cave-like and claustrophobic.


This sleek, contemporary bathroom is a knockout with its interesting mix of materials and textures. The black tile on the shower walls has a nice texture and sheen that allow light to bounce and reflect off of it, unlike with a light-absorbing matte black surface. This helps lighten up the space immensely.

Wednesday
Jun192013

Amazing 40-Square-Foot Kitchen

Article By: Vanessa Brunner

How do you get storage, prep space, cooking space and a washer-dryer into 40 square feet? Ask Palmer Thompson-Moss, who did just that for a New York client. "These constraints actually helped us make something nice that works really well," he says. 

Even better, almost every part of this teeny kitchen is reclaimed from various demolished projects in New York City. Handmade cabinetry made from salvaged old-growth pine, salvaged subway tile, a vintage stove and a massive island combine beautifully to give the client everything on her wish list. 

Kitchen at a Glance
Who lives here: A single woman
Location: East Village neighborhood of Manhattan
Size: About 40 square feet


The previous kitchen was an eyesore. "You were just looking at this hideous thing from the living room," says Thompson-Moss. 

He likes to use salvaged items in his design, rather than using just recycled materials. He had the custom cabinets built with salvaged old-growth pine beams — very dense — from old New York City buildings. "These were the beams that built New York," he says.


The designer found the 1930s Armoid stove on Long Island via Craigslist, and painstakingly cleaned and polished it before installing it in the kitchen. "You really have to really do your research to make sure that a vintage stove is actually working and it'll fit in your space," he says.

The subway tile was salvaged from old apartments and projects around New York City.


The long, glass cabinet doors and open shelving around the island put the client's beautiful dish collection on display. The shelving makes the large island look more like a piece of furniture. "It feels less like a massive volume just sitting in the middle of the room," Thompson-Moss says.


A space at the end of the island holds one of the client's biggest musts: a washer and dryer. This LG appliance actually combines both functions in one to save space.


A superthin Blomberg refrigerator with custom wood panels fits the kitchen perfectly.

Thompson-Moss had to leave the build-out in the wall on the left side of the sink because it contains plumbing. The upper cabinet actually wraps around this section of the wall. A glass panel on the side of the cabinet keeps it from looking too awkward.

The sink was salvaged from Demolition Depot in Manhattan's Harlem neighborhood. TheHerbeau fixtures — among the few new things in the kitchen — were carefully chosen to match the sink.

The vintage cabinetry hardware was refinished to a shine. 


A sprinkler pipe at the top of the kitchen posed some problems with the new, higher cabinetry design. The pipe couldn't be moved, so Thompson-Moss built a door around it. The door is stationary, but the inside of the cabinet can be accessed through the other door.