twitter Facebook Google+

                 linkedin pinterest houzz  

Click for the BBB Business Review of this Countertops in Denver CO 

Google Review 

Sales & Promotions!

Architects, interior designers, and more ∨

Hire a decorator to find that just-right couch and coffee tables for your living room.
Find wall shelves, a customizable closet organizer and stylish furniture for home to whip your closet into shape.
Remodeling and Home Design

Qualify Us Now! ProView 

Cambria logoUp to $45,000 interest free for your project!Finance by Cambria

 convenient and easy.

  • No Money Down
  • Interest-free financing for up to one year without payments
  • Financing up to $45K for any project that includes Cambria (including cabinets, flooring, sinks, plumbing, install & more)
  • Secure paperless telephone application
  • Credit decision in less than 10 minutes


Entries in Bathroom (34)

Wednesday
Apr302014

Your Guide to a Smooth-Running Construction Project

Article by:

Imagine walking into your newly built or remodeled home and seeing it exactly as you had imagined it at the start of construction: the windows are all in the right places, the flooring is the right color, and the kitchen cabinets are a perfect fit.

Now allow me to pinch you on the arm, because for most people, reality is often different from that idyllic scenario. You might see missing trim around the bedroom doors or wonder why that small change in the kitchen cost so much. Looking back, you might ask, “And why did we have to hire another subcontractor to finish the bathroom?” 

Of course, there are things you just can’t plan for, but there’s plenty that you can. Costly changes and additional time-consuming work can be kept to a minimum if you fully understand what you are building before you start. By understanding the construction process, being part of the team and keeping a firm grip on the budget, your construction project can result in the home of your dreams. 

1. Don’t Skimp on Design Help

Given the busy lives most of us lead, we don’t have the time to research every type of technology and material that might be used on a construction project. Use professionals to save some of the time that would otherwise be spent learning and perfecting the process. 

Architects are trained not just to make a project pretty but to match building systems, thermal envelopes and other properties to the client’s needs. They have a broad, up-to-date knowledge of these systems as well as of materials and processes for a wide variety of project areas.

Now, I sympathize with the awful feelings associated with a project’s going over budget. I’ve been there; I’ve gotten that dreaded call from the contractor that the structural and mechanical designs are in conflict. And dealt with preexisting conditions that the contractor hadn’t anticipated.

A design pro can provide guidance on what team members will likely be required for the project. And not just for the big ones, like a full custom home construction. Smaller projects like additions and remodels also can benefit from a pro’s expertise.

Architects can usually recommend other team members, too, such as engineers.
 

Your budget might be tight, but I’ve seen time and time again that trying to save money on design actually can cost homeowners far more in the end, in dollars and frustration. 

Homeowners often underestimate the cost and complexity of a remodel or new home. The cost of the design work on a project is something that homeowners may consider skimping on to save money, but we find that the best way to avoid problems in construction is to invest time with your designer or architect up front to think about the construction process during design. This takes far less time than fixing mistakes that happen when the walls are going up. 

Although it isn’t often pointed out, a good designer or architect depends on the client throughout the design and planning process as much as the client depends on the designer.
 

2. Become Part of the Team

Most people spend more time planning their next vacation than they do planning their house project. Not that planning a house project has to be a full-time job. An architect or a designer can help you understand your role in the project as well as the contributions of other team members. That means participating in the process from the start so that you stay fully up to speed with what is happening throughout the project. 

I’ve seen clients assume that I know what’s going on in their head and are surprised when something comes out different than what they were expecting. That’s why communication is important. The Houzz web site and app allow you to show your team what spaces and materials you like. This can give them a reference point to understand where you are coming from (and where you can go together as a team).
 

Being part of the team also means becoming familiar with some of the ways your team members communicate. The vast majority of projects use two-dimensional drawings (as well as written specifications) to communicate a homeowner’s intent to the construction team. This documentation is used to create three-dimensional structures. 

This sounds simple enough, but there are many chances for misunderstandings each time a team member reads the documentation. On a recent project, the foundation contractor misread the drawings and built the formwork too narrow on part of the foundation. During a site visit, we were able to catch it before the concrete was poured, saving the time and frustration of having to chip out all that concrete.

You can ask your team to assist you so you understand what is being communicated at each stage of the project. The best opportunity for this is during your design meetings. Remember, if you don’t understand something, ask. It’s better to get everyone on the same page early before a structure gets built that sticks out like a sore thumb. 

You should also talk with the architect and/or contractor before the project starts so you can make sure that everyone agrees on the approach to how the building will be put together. There are evolving areas of construction, especially regarding the building envelope, that contractors and the architect should resolve before the project commences.
 

3. Establish Your Goals and Refer Back to Them Frequently 

Be ready to suggest ways to get what you want while avoiding potential problems down the road. If you can create a list of priorities, then when you are faced with challenging decisions during construction, which is pretty much guaranteed, you and your team will be able to look back at your prioritized list to really focus on what will get you closer to your goal instead of what may be a costly distraction. 

Things like prioritizing morning light in the kitchen or consciously forgoing a walk-in closet for a larger main bedroom can save the time and cost of having to move walls and making other expensive changes in the middle of construction.

How to Stick to Your Remodeling Goals

4. Establish Your Budget and Add at Least 10 Percent 

Be sure to set aside a construction contingency for critical items — and don’t be tempted to use it just to put in an upgraded cooktop! Due to the complexity of the construction process, unforeseen issues will come up. Without a contingency, you might find yourself short of cash when you really need it. 

A few years ago while remodeling my own house, we discovered numerous problems stemming from a quick and dirty job done 40 years prior. One of the most worrisome issues was a hacked-out joist on the second floor, leaving the bathtub supported inadequately by adjoining joists and bits of plywood. A great deal of creative thought and some extra cash were needed to fix the deficient joist without tearing apart the whole bathroom. Without a contingency to tackle this urgent situation, we might have been forced to postpone other parts of the project to deal with it and might have been stuck with dust and disruption for a longer time.
 

5. Don’t Get Attached to an Optimistic Timeline 

Ideally, your team members will take the time to carefully plan and build your dream house most efficiently. Even if they are not putting in hours specifically on your project, the designer and others will likely be thinking about your project in the back of their mind. It takes time to work out the details of a project, so if you need to get the project designed and built very quickly, there might be situations that won’t be fully resolved in the design phase. There will always be elements that will need resolving onsite, but taking the time to do as much as possible on paper can reduce costs.

It’s also tempting to look at the best-case scenario for construction and think that it will then be the norm for your project. Just like with a cost contingency, though, you’d be well served to build in a time contingency as well. As much as it might seem possible to get into the house on a certain date if all the stars align, realistically there is a chance that the project could go late for a whole variety of reasons (laid out previously). Do yourself a favor: Have a backup plan in case you can’t roll up in the moving van on your exact date.
 

6. Consider Construction Implications Before You Start 

During a recent remodel, one homeowner (who was working without a designer) realized that opening up the main floor of her house required a structural engineer, which caused delays as she searched for an engineer and he did his drawings. 

So it’s important to understand what the construction implications will be to get the space you want. Even though it cost her approximately $7,000 more to open up the space, she was really glad that she went ahead with this part of the project. An architect would have been able to point this out before construction started and would have avoided the stress and extra costs involved in undoing some work in the middle of the project.
 

7. Communicate Frequently With Your Team

A weekly or biweekly status report can help identify areas of concern. This should be done at the onset of the project and continue through construction. The construction phase is where there are likely to be changes due to site conditions, availability of products or other factors. Be sure to get all changes documented in writing, along with the dollar amount promised; sign off on both the changes and the cost to stay in control and to ensure that all team members are up-to-date at every stage of the building process. 

In construction the document is usually called a change order; it explains the nature of the change and the cost. Sometimes the changes are called extras, because they are additional to what was agreed on in the construction contract.

For example, a homeowner might decide to move the location of a door, so the designer will assess the impact of the change with the general contractor and draw up a change order for review by the client. If the client is OK with the amount, then he or she would ideally sign the physical copy (often confirmation via email is used) and the work would begin.

Wednesday
Mar262014

Bathroom Workbook: 12 Things to Consider for Your Remodel


Remodeling, decorating, and more ∨

Hire a decorator to find that sofas and a coffeetable for your living room.
Find shelves, customizable closet organizers and stylish storage furniture to whip your closet into shape.


Wednesday
Jan222014

9 Big Space-Saving Ideas for Tiny Bathrooms

Article by:

Really small bathrooms can be incredibly challenging to design. When there is hardly room for a toilet and sink, let alone a shower (a tub being totally out of the question), the usual fixtures and room layout simply will not do. These nine ideas go beyond simply making your bathroom look bigger and actually free up more space. 

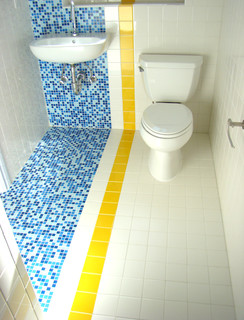
1. European-style wet bath. A wet bath is exactly what it sounds like: a bathroom where everything can (and does) get wet. This style of bath is quite common in Europe, where you will often see a tiny bathroom with the showerhead directly over the toilet, a small sink on the side and a drain in the middle of the floor. By forgoing a shower surround, you can really maximize square footage in a small space.


Wet bath a little too wet for you? Add a shower curtain on a ceiling track. If you plan the layout so the shower nozzle doesn’t spray directly across the toilet, you’ll have the option of dividing the space with a shower curtain.


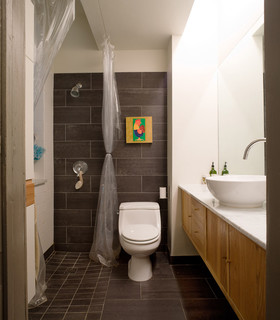
2. Wall-mounted toilet. This wet bath has another feature widely used in Europe — a petite wall-mounted toilet. This style of toilet might look a little flimsy, but it’s actually quite strong when properly installed. Not having the center pedestal and upper tank to contend with makes this a major space saver.


3. Compact shower stall. A mini shower stall with a partial wall is another good option, somewhere between a traditional shower and a wet bath. The openness makes the room feel larger, but the partial wall offers some sense of division.

4. Flat mirror plus narrow sink. A regular mirror instead of a medicine cabinet has two benefits: its slim profile visually expands the space, and it allows for a narrower sink profile than a fat medicine cabinet sticking out above.


5. Teardrop-shaped sink. Curves feel more welcoming than sharp angles in a tight space, and this unique teardrop-shaped sink is both a space saver and a focal point. The curved shower wall in this wet bath echoes the lines of the sink, creating a smooth and seamless look.


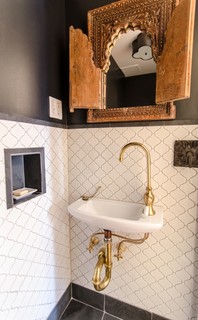
6. Water fountain–style sink. With a smaller scale than most sinks out there, a single-basin, single-handle, gooseneck faucet sink can fit into even the tightest spots. And it looks pretty swell doing it.


7. Sliding door. The designers of this space-conscious houseboat chose a sliding door to save room. The swing of a traditional door can eat up a lot of floor space; go with a pocket door or sliding barn door instead and save that precious square footage for other things.


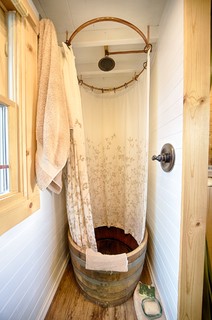
8. Shower in a barrel. Rustic, charming and certainly not for everyone, this may be the most creative reuse of a wine barrel we’ve ever seen. The homeowners must wipe out the interior of the barrel after each shower to keep the unsealed wood in good shape, but it’s worth the effort for its scale and unique good looks.


9. Custom-fit shelves. Hard to find storage space? Look closely and you may find a few nooks to tuck shelves into. Even 6-inch-wide shelves can be enough storage for toiletries, washcloths and extra soap. Don’t forget to look up, too — a high shelf or two can be a lifesaver if you need a place for extra towels.

Thursday
Dec262013

Splendor in the Bath: Art Deco Brings on the Elegance

Article by:

I realized a few years ago that our upstairs bathroom — with its leaky tiles, rusty faucets and crumbling walls — was due for a major rehab. I still loved its retro seafoam-green bathtub and sink, and its champagne-bubbly black and white wallpaper, so I wanted to hold on to those features and design around them. The room lent itself to an art deco treatment, and I knew that the aesthetic would make it chic at minimal cost.

There’s just something about art deco — the exuberant decorative style that had its heyday in the period between the two world wars — that has beguiled the public for nearly a century. Perfectly suited to both grand communal spaces (think Radio City Music Hall and the Chrysler Building) and intimate home interiors, it has never really fallen from fashion since its introduction at Paris’ Exposition des Arts Décoratifs in 1925. Since then art deco’s signature parallel lines and repeated geometric motifs have been incorporated into vacuum cleaners and ocean liners, toasters and martini shakers. The style exudes an urban, industrial essence, as well as a sense of optimism and fun.

Here are some art deco bathrooms that inspired me and a couple of photos of our new bathroom. I hope they inspire you

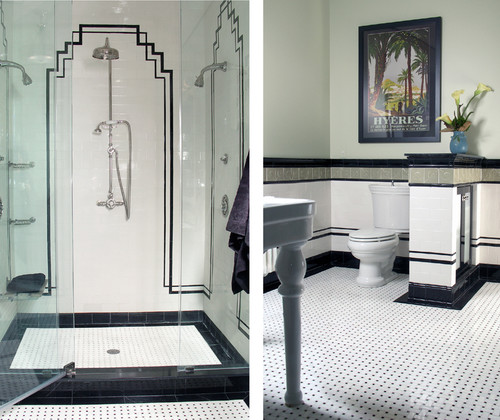
With its jazzy tile pattern, classic black and white color scheme, and streamlined, linear look, this bathroom projects the art deco sensibility in spades. The ziggurat pattern in the tiling evokes the image of a skyscraper; it’s a popular deco look. It’s based on an ancient Mesopotamian design. (Egyptian motifs were popular during the King Tut craze of the 1920s.) 

This bathroom exudes the self-confidence and futurism of the art deco age. This flamboyant fan-shaped mirror would look great in a larger space (such as the ladies’ room at Radio City Music Hall), but the simple white sink and black accessories (as well as the shower’s relatively restrained tile pattern) manage to tone down the energy level.


As people began to speed across the ocean in airliners and across the continent in locomotives, design became filled with allusions to transportation. The parallel vertical lines on this vanity base recall a rocket preparing for liftoff and express the style’s sense of speeding headlong into the future. The broad curving line of the top evokes ocean liner furniture and gracefully avoids sharp edges that would detract from the desired sleekness.


This bathroom has the whole art deco package, with its classic color combo of black, white and seafoam green; creative linear touches in black; and elegant glass and chrome wall sconces. The vertical-horizontal dynamic is enhanced by the placement of the green wall tiles, which alternate between horizontal and vertical pairs.


Cleverly incorporating the nautical look that is a hallmark of art deco design, this recently made piece functions as both a light and a mirror. Circular windows have always evoked the portholes on ocean liners, and this one even comes with a fish. 

A shiny black vanity top rests on a sturdy chrome base against a backdrop of black and white ceramic floor tiles and glass light fixtures, evoking the high-gloss aura of art deco. The wallpaper’s pattern of powder-gray lines (reflected in the mirror) echoes the open vertical spaces in the light fixtures, providing a clever softening touch.


This bathroom is a little more restrained than the usual art deco confection, but it still includes the basic elements. The chrome towel rack at the foot of the tub is a nice touch, while the suspended shower curtain ring and elongated shower stem give the room the illusion of greater verticality.


Cleopatra would have loved this elegant black, white and apple-green bathroom, with its ziggurat motif and touch of Nile-blue glass. The gleaming walls are made of Vitrolite, a lustrous structural glass that was very popular in the 1930s. You could get a similar look today with back-painted glass tile.


This is a corner of our new bathroom. We redid the wall in period-appropriate (and easy-care) subway tiles, with a horizontal line of green glass tiles on the shower wall and a vertical black line that’s out of view. A green glass shelf (with rounded corners) and chrome plumbing fixtures complete the look — although we’re still searching for a circular, black-framed mirror that will fit in the small space above the sink.


We treated ourselves to an accent panel depicting Charles Rennie Mackintosh’s popular Glasgow rose. We’ve incorporated Glasgow roses into other places in our house; we like the idea of repeating favorite motifs from room to room. Mackintosh’s visionary design work — most of it executed during the era of Victorian fussiness — is often considered a foundation of art deco.


Thursday
Dec122013

10 Elements of a Dream Master Bath

Article by:

Dreaming of revamping your master bath? From dual showers and soaking tubs to saunas, live-edge wood and built-in storage, more options abound than ever before. See if any of these 10 features make the wish list for your ultimate master bath. 

A dual shower. Would you forgo a bathtub altogether in favor of a shower? What if it were a really nice shower? This gorgeous shower has dual showerheads, black slate and built-in storage for towels and soap.


A Japanese soaking tub. If you do go for a tub, consider a Japanese-style soaking tub rather than a full-size version. A soaking tub is ideal for smaller spaces or when you want to devote more real estate to the shower; although it has a smaller footprint, it’s deep enough for bathers to fully submerge. 

Slightly larger than a traditional Japanese soaking tub, this one is deep enough for someone to have a good, relaxing soak and wide enough for two. The clean lines of the cube-shaped tub pair well with the narrow horizontal wood slats for an organic modern look.


Wood. Wood in bathrooms has been trending for several years now and shows no signs of slowing — and why not? With marine-grade supplies and specialty finishes, it’s possible to enjoy the warm look and feel of wood in the bathroom. Say goodbye to cold tile! 

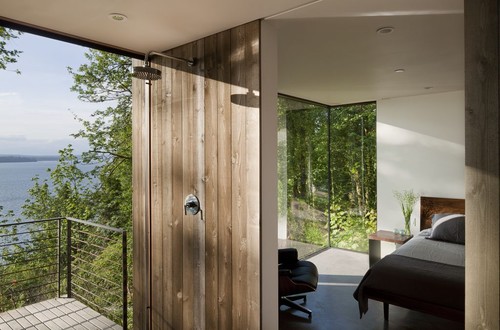
The bath in the bedroom. Would you bathe in the bedroom? Combining bath and bed tends to ignite controversy — superluxurious, say some, while others prefer a distinct separation. Where do you stand?


A sauna. Live somewhere cold or just love a good sweat? Embrace the wintertime traditions of Nordic countries with your very own sauna at home. Saunas don’t need to eat up too much space, and having one installed may cost less than you think.


Sneaky storage. If you are redoing the whole bathroom, you may as well give some thought to your storage options — things have evolved since the days when your only choices were pedestal sink or double vanity. 

Sneak in pullout shelves, wall cubbies, recessed niches and more to get exactly the right storage for your stuff.


What would have been a wasted section of wall space here was transformed into hidden shelving that’s perfect for storing spare toiletries.


Black and white. You really can’t go wrong with black and white — it’s chic, versatile and always in.Whether you bring the scheme to life with hand-painted floor tiles and horizontal black wall tiles, as in this hip space, or go for the classic subway and hex-tile combo, it’s bound to look good even five or 10 years out.


Live-edge wood. Well suited for both rustic and modern interiors, a live-edge wood slab makes a great bathroom feature.


A view. Sadly, this won’t work for all of us (at least not those of us with close neighbors), but if you are lucky enough to have a home with some privacy, I say make use of it! 

A wall-to-wall window like this one will give you the feeling of soaking right out in nature — and making the bottom of the window level with the top of the tub will keep you from feeling overexposed. You can also always add window shades for privacy and light filtering.


Open air. If privacy isn’t an issue, consider opening up an entire wall to the outdoors. On cool days you can still enjoy the view, and on warm days you can slide open the glass and let the sun shine in!