twitter Facebook Google+

                 linkedin pinterest houzz  

Click for the BBB Business Review of this Countertops in Denver CO 

Google Review 

Sales & Promotions!

Architects, interior designers, and more ∨

Hire a decorator to find that just-right couch and coffee tables for your living room.
Find wall shelves, a customizable closet organizer and stylish furniture for home to whip your closet into shape.
Remodeling and Home Design

Qualify Us Now! ProView 

Cambria logoUp to $45,000 interest free for your project!Finance by Cambria

 convenient and easy.

  • No Money Down
  • Interest-free financing for up to one year without payments
  • Financing up to $45K for any project that includes Cambria (including cabinets, flooring, sinks, plumbing, install & more)
  • Secure paperless telephone application
  • Credit decision in less than 10 minutes


Entries in Floor Design (4)

Tuesday
Dec172013

6 Reasons to Hire a Home Design Professional

Article by:

Who hasn’t heard that regular trips to the dentist can prevent the spread of tooth decay? Even though sitting in that chair isn’t the most enjoyable way to spend time, most of us know that a dentist has the knowledge and expertise to check all aspects of our oral health. Similarly, residential designers (architects, interior designers and others) bring a wealth of knowledge and skills to make sure all aspects of remodeling and custom home projects go as smoothly as possible. 

Talk with almost anyone who’s ever tried to do a construction project without pro help, and you’ll likely hear one statement over and over again: “I wished I had hired a designer.” Even in smaller projects, like a one-room remodel, once you open up those walls, situations arise for which only an experienced professional can apply his or her creative problem solving to save time and money. 

Here’s why it’s worth it to hire a designer. 

1. You’ll save time. You may not know how structural choices can impact the installation of the mechanical system. Or about options for new materials or technologies that might be cheaper, better or more appropriate than what you are familiar with. Figuring those things out takes time, and lots of it. A skilled professional will have this information at the ready for you. 

Plus, with advances in technology, new building envelope techniques are coming on the market with increasing frequency, and new, tougher energy-efficiency requirements are transforming how walls are constructed and bringing an end to many traditional building practices. So it’s more crucial than ever to have someone on your team who understands how your building assembly meets current building code requirements. 

These codes are typically complex texts that are difficult for those outside the building industry to understand. When designers submit drawings to the building authority, a plans examiner reviews them and issues a revision notice to address any variances from the current codes and construction standards. 

A well-informed designer with up-to-date knowledge of building science can get building projects through with the minimum number of revisions. Since each revision takes time to be completed, having fewer revisions will allow you to get your permit faster. Low-quality or incomplete documents can delay your construction. Hiring a designer will help ensure that your project meets relevant codes so it can progress smoothly through your municipality’s process.

This could save you many sleepless nights and potentially weeks on your project trying to determine what is needed to satisfy the code requirements. 

2. You’ll get their expertise and understanding of the overall construction process. The basic function of a designer is interpreting your needs and coming up with a professional plan for any building project. Although you may hire him or her only for this task, the designer will also provide a wide variety of other resources to make sure the whole building process goes off without a hitch. 

Depending on your needs and budget, a designer can guide you through the relevant building application process, research planning legislation, assist in the hiring of surveyors and general contractors, recommend subcontractors and manage the construction phase of a project on your behalf to ensure that building plans are accurately followed.

Trying to do this yourself would mean hours and hours of research and potential delays.
 

There are many types of designers working in the home building industry. Some are licensed professionals; others are builders who have expanded their services into design as well as construction of custom homes and home renovations. 

Design-builders and unlicensed designers make up a large contingent of the individuals working in the procurement of custom homes and renovations. They tend to be cost effective and can be the right fit for your project, so long as you find a reputable person to work with. 

Architects are generally more expensive to hire but bring to a project a broader set of skills 
and talent that can result in both an exceptional project and an exceptional experience. This 
results from the additional work an architect puts into coordinating everyone involved in your project, as well as the unique skills and knowledge related to current technology, materials and construction processes. 

That said, not every project requires an architect, and not every design-builder can deliver on your vision. The rule of thumb is that the more unique and challenging the project is, the better suited an architect is for it.
 

3. They speak the language. Because so much information on your project is communicated using two-dimensional drawings, there are many conventions on how planssections and elevations are interpreted. Your project revolves around translating the 2-D drawing to 3-D construction using wood studs, insulation and other materials. 

There can be misinterpretations of these drawings, which gives rise to confusion about how building elements go together. Especially if the drawings show something that the contractor might not be familiar with. Or if the contractor is busy and hasn’t had the time to really look at certain parts of the drawings, critical elements of the details can be overlooked. A designer knows how to stay on top of this.

On a recent project a client who was supervising his own construction project found the contractors hadn’t correctly followed the detail drawings. They had inadvertently switched the location of the vapor barrier from the warm side of the building envelope to the cold side, where the wall meets the floor. Doesn’t sound like much, but most problems with mold and rot in building are cause by prolonged periods of condensation occurring within the wall and floor assembly. 

Over time the presence of moisture will give rise to the mold’s bacteria and fungus, which lead to rot and structural failure. The only way to fix this was to rip out several courses of brick all around the house, costing the client almost $10,000.

Having someone onboard who speaks the language can prevent these costly missteps.
 

4. They’ll be your advocate. If you’re having problems with contractors on your project, it might be tough for you to verify that they are properly carrying out the intent of the drawings, or even which contractor is actually responsible for the issue. 

It can be hard to know where the responsibility for one contractor ends and the other begins. Time and again we’ve seen things get overlooked or improperly constructed early in the process, which affects contractors later in the job. And if that earlier contractor has left to another job, it’s oftentimes difficult to get the person back onsite to fix those mistakes. Plus, it’s costly for new contractors to fix another’s mistakes. 

We had one client who didn’t elect to procure our construction management services. He had to bring in a second team of drywall contractors near the end of the project to fix the poor job done by the initial subcontractors, who wouldn’t come back to fix areas that weren’t up to standard. It cost the client an additional $3,500 out of his pocket to fix the mistakes that weren’t caught earlier.

Substandard drywalling can cause a whole host of problems at the finishing stage, not the least of which is uneven tile, because the tile contractors can’t get a straight line to adhere tile. Problems that may not be very apparent when looking at a whole wall of drywall under construction lighting are magnified when the tile is on and the pot lights are showing areas where the tile doesn’t meet properly or is uneven.

Contract administration can be accessed on a fixed fee or an hourly basis. Expect to budget 3½ to 4½ percent of your construction cost to this for a typical project. 

5. You’ll get their design sense and attention to detail. A designer translates your needs to functional spaces but also makes them beautiful. Good designers are consummate three-dimensional thinkers and can use their abilities to find special opportunities in a design that might not easily be understood in two-dimensional drawings. Additionally, they are always keeping up-to-date on trends in local and international design. 

If you want a space that has lasting appeal and adds to the value of your investment, you need to hire a designer. Designers have the skills to include the features that will maximize your house, while making sure your project runs smoothly.
 

Not all architectural details are reflected in drawings. Architects can also specify plumbing fixtures, expected quality levels, finishes, electrical fixtures and other related information that’s communicated in drawings or in specifications written for the contractors working on the project. If the architect does not prepare written specifications, then you could be faced with change orders, which can slow down the process. 

Change orders are instructions to the contractor to make an onsite change from what’s specified in the contract documents. It can simplify construction based on site conditions, but it also can add costs when it requires redoing part of the construction due to oversights.
 

6. You’ll get access to other skilled pros. Being in the design business means meeting lots of other pros who also work on residential projects. From structural engineers to painters, your designer probably has quite the network of skilled contractors who can get the job done within the given budget. 

And, again, the point here is that the additional cost for a quality design team can mean savings in the long run. I think one of the contractors we are working with said it best with a quote at the bottom of the company letterhead, which reads, “The bitterness of poor quality remains long after the sweetness of low price is forgotten.” 

Monday
Oct282013

What to Ask Before Choosing a Hardwood Floor

Article By: Mitchell Parker

So you’ve decided to get hardwood floors. Easy enough, right? Pick a wood and be done with it. 

Not so fast. There are a lot of factors that will determine what kind of hardwood floor your home can accommodate, and what will look best with your existing or planned furnishings and decor. 

You have some basic options: solid wood and engineered wood. Solid wood is what you generally think of as a hardwood floor: thick, solid planks of wood. Engineered wood is made of a veneer layer that sits atop a core of plywood. This construction deals with moisture a bit better and is recommended for concrete slab subfloors. Which brings up another point. The construction of the floor you're working with pretty much will dictate what kind of wood you can use. 

Here's how to prepare yourself for choosing a hardwood floor for your home. 

1. Where will the wood be going?

Installing hardwood floors on a second story is much different than doing so in a basement. A space beneath ground level is what’s known as below grade. A floor that’s even with the outside ground level is on grade, and any floors above this are above grade. Where you're installing the wood will limit your recommended options.

“For example, you’re not supposed to put solid wood below grade, because the moisture coming up through the ground can cause problems,” says Bob Hagen, who owns Magnus Anderson Hardwood. “So an engineered wood is recommended."


2. What is the subfloor made of? 

Find out what kind of subfloor you have. The three most common types are concrete slab, plywood and particleboard. This will help you determine whether you can install solid wood floors, or if an engineered wood would be best. 

Concrete. “If you have a concrete slab floor, you’re pretty much limited to engineered wood,” says Andrew Zheng, manager of Unique Wood Floors, which specializes in and ships prefinished hardwood. But don’t fret. You can still get any type of wood in an engineered format. And the thickness of the veneer on engineered wood varies. Higher-end engineered woods "are no less than solid woods in performance and price,” Zheng says. 

(Note: Even the hardest woods, such as Brazilian cherry and hard maple, will ding on an engineered floor if the plywood onto which they are veneered is soft, like lauan, which is a commonly used base.)

Another option is to install plywood over the concrete, but you’ll have to pay for the additional plywood, insulation and labor. “Most people just choose to stick with what they have,” Zheng says. 

If you’re still not sold on the engineered product, Hagen says there's a way to still have solid wood on a concrete slab (as long as it's on grade). It just needs to be glued down, preferably by an experienced professional. 

The downsides are that you need completely flat boards (hard to come by in longer lengths), and the glue is so strong that there’s a permanency to it. “If you have a leak or a flood, getting the material up is incredibly difficult,” Hagen says. “You’ll also want to check the VOCs [volatile organic compounds, which are toxic] in the product. And we ask clients about any chemical sensitivities.” 

Plywood. This is probably the most common subfloor and allows for the most versatility with hardwood floors. You can nail solid wood on top or use engineered wood. 

Particleboard. This material was commonly used under carpet in homes built in the 1970s. It’s basically a cheaper version of plywood. For hardwood floors, you'll need to replace the particleboard with plywood. Then you can add engineered or solid wood. 
 

3. What are your living habits?

Think about how much abuse your floors will take and learn about specific wood species and their durability. Do you have kids and pets? Have large parties often? Or are you a single person who travels a lot? 

If you have a high-traffic house, you’ll want to go with a harder wood. The Janka scale measures how strong a wood is; basically a BB is fired into a plank and the size of the dent it leaves is measured. “Red oak is considered the bell curve,” Hagen says. “It’s pretty hard and medium priced.” 
You can also play with grain patterns as well as with stains and finishes that will hide dents and scratches.
 

4. What style is your home?

You might love the look of hickory but then think differently when you see it covering a floor in a kitchen with modern cabinets. That's because some woods lend themselves better to certain styles. 


When choosing a wood, consider cabinets, trimwork and door casings to make sure the wood won’t clash with other design elements. And coordinate with the colors of the walls and the amount of natural light. This will affect color choice. If you have a lot of windows and skylights, then you probably have enough light to balance out really dark floors. If you have a dark house already, a lighter floor choice will help brighten things.

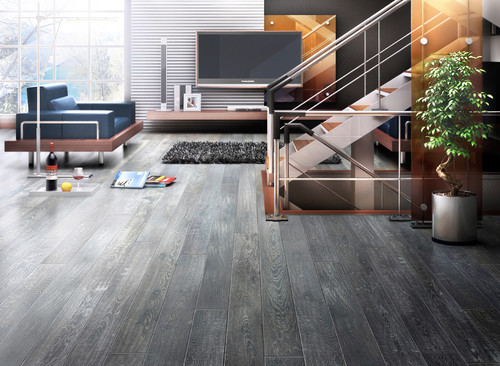
If your style is modern: Natural maple lends itself well to modern styles. “It’s more of a Norwegian-looking design with a clean look and not a lot of variation,” Zheng says. Gray-stained oak and boards without knots create a clean aesthetic that also works in modern settings.

If your style is traditional: Go with something like hickory. "It mixes lighter and darker pieces, and it’s more like a traditional cabin feel," Zheng says. Also, boards with knots and wider planks fit a more traditional style.

Of course, designers do incredibly creative things with mixing old and new, so don’t discount a wood just because it’s considered more appropriate for a certain style. Playing with grain pattern and stains can yield all sorts of interesting results.
 

5. What’s important to you? 

Is budget the biggest factor? Or is the appearance all you care about? 
Determining what’s most important to you will help you determine the right wood for your floor. 

Cost. 
Engineered wood isn’t always the cheapest route, so don’t think you can’t have solid wood floors on a budget. Zheng says you can purchase generic oak flooring in various stains for $3.50 to $4 per square foot, while lower-end engineered floors start at $2.50 to $3 per square foot. Beautiful hardwood like the popular acacia species can be as high as $6 per square foot.

Maintenance. 
If you want something that will hold up over time, you'll want to look at the harder woods (with higher Janka ratings). Also pay attention to the stain. 

The traditional method for staining wood uses a polyurethane finish, which produces a higher sheen. If the floor gets dinged or scratched, light bouncing off the semigloss finish can exacerbate the appearance of those flaws. 

Oil finishes are increasingly becoming more popular these days. They soak into the wood and provide a more matte finish. This can help hide wear and tear; plus, they last longer. While the up-front cost is higher, you won’t need to restain the floor as often, saving you money in the long run.

You can play around with finishes too. Hand-scraped or wire-brushed treatments rough up the appearance, creating a worn look so that if something does scuff it, the mark is not as noticeable. Note that the thickness of the veneer on an engineered floor affects how often it can be sanded down and finished.
 

Appearance. Everyone's preference is different. Some people are attracted to oak more thanwalnut, and vice versa. 

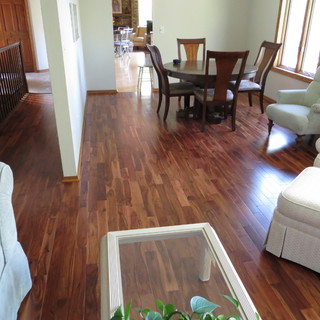
Acacia, shown here, is an exotic wood from Asia that Zheng says is a hot seller right now, because of its mix of lighter and darker tones; plus, it’s harder than hickory. The cost ranges from about $4 to $6 per square foot at his warehouse. The unique look is worth the higher cost for some. 

Pay attention to knots and grain pattern. Patterns in hickory and maple are different than in oak. You might want to spend the extra money for a unique grain pattern, or you may want to save money and go with a less-expensive wood with a better stain.

Consider plank width, too, which alters the appearance of your hardwood floors. Wide-plank walnut and 7-inch European oak are popular in traditional homes at the moment. 


The best thing you can do is see and feel the wood in person. “Wood is a living species. You need to feel what you’re attracted to. You’re the one living in the house, not the designer pushing you,” says Ilan Zamir, CEO ofAmber Flooring.
 

6. How will you stain and finish it? 

A stain adds color to the wood. The finish protects the floors from getting dirty. Any stain or finish can be applied to almost any wood. Some people like the color of oak but want the grain pattern of walnut. That's where staining can come into play. 

Some people can’t tell the difference between unstained black walnut and white oak that's been stained espresso. Others can look at those woods and their grain patterns and immediately know the difference. It all depends on what's important to you. 

A finish affects the maintenance. A solid wood that’s been hand scraped for a lower-sheen matte finish is easier to maintain, because you won’t see as much wear and tear. But maybe you want a semigloss look. 

Also, purchasing wood that's been prefinished will give you a good idea of what it will look like and will save you the time and effort of finishing the floors onsite. Engineered wood is usually prefinished.
 

7. How will you test it? 


This step is incredibly important. The last thing you want to do is install 800 square feet of black walnut based on a photo or tiny sample you saw in a showroom only to find it's overpoweringly dark and contrasts poorly with your furnishings. 

Always ask for a 2- by 2-foot sample of what the floor will look like with a stain and finish on it. Use this to test it with your paint colors and decor to make sure it's exactly what you want.

Wednesday
Jul102013

Transition Time: How to Connect Tile and Hardwood Floors

Article By: John Whipple

Transitioning a bathroom's tile floor to the hardwood of another room is often given little forethought. However, not planning the transition can result in a final product that doesn't meet your expectations, or a floor assembly that's destined to fail. 

Most of the floor framing in North America is designed to meet a base industry standard. This standard (usually measured as a deflection rating) allows for materials like small ceramic tile, vinyl, carpet and hardwood to be used on floors. But these days most of my clients want large, natural stone tile. 

Many also want the tile to transition seamlessly from one room to the other. This can be done, but most homeowners don't know that their home has to be designed with extra strength and rigidity to carry this weight. 

Below you'll learn what to specify when planning a transition from tile flooring to hardwood. 

This bathroom is a great example of current trends in bathroom design: plenty of space, bright light, a great soaking tub and a walk-in barrier-free shower. 

Notice the flush transition from hardwood flooring to tile. Looking closer (click on the photo to enlarge it), you'll see that the tile is large (about 1 foot by 2 feet) and made of marble; both features require a stiffer floor than most homes have. 

Tip: If you're working with large-format tile or natural stone, specify that your rooms meet a stronger deflection rating: L/720, instead of the base-standard L/360. This number indicates how much flex a floor has before tile is installed — both the Tile Council of North America (TCNA) and the Terrazzo, Tile and Marble Association of Canada (TTMAC) require L/720 for heavy installations.


Most of today's floor tile is ⅜ inch to ¾ inch thick. Most hardwood flooring is ¾ inch thick. This means that when you put tile next to hardwood flooring, your tile choice will be critical for a flush transition. 

Simply tiling on top of a plywood subfloor is not an option — this practice is frowned upon and is not permitted by the TCNA or TTMAC. However, you can install a thin uncoupling mat (like Laticrete's Strata Mat or Schluter Systems' Ditra) to meet the tile industry's requirements. 

Tip: Installing a second layer of plywood over your subfloor and under your hardwood allows for more floor preparation options in the future. This is also a valid option if your home's floor joists were not designed for a stronger, heavier floor. However, this should be planned early on, since it affects how your stairs and stair risers are built.


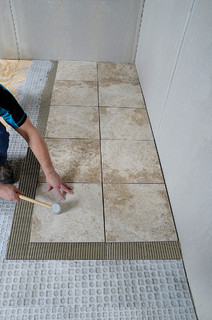
Here's an action shot of tile being installed over an uncoupling membrane from Laticrete, which prepares the plywood subfloor for tile. 

Tip: If your floor isn't strong enough to meet the right deflection rating, an uncoupling membrane won't help. Increasing the floor joist width or adding another layer of plywood is a better and safer option.


Here Tarkus Tile is prepping for a tile installation with a second layer of plywood and an uncoupling membrane. The orange material (Schluter Systems' Ditra) was installed with a quality modified thinset (mortar). Since this home's existing framing was not suited to hold the new tile selection, the installers beefed up the subfloor to make sure the installation would last for years to come. 

Tip: The choice between a flush installation from tile to hardwood and one that meets industry guidelines should not be a hard one. Always follow industry guidelines! They will probably be stricter than local building codes.


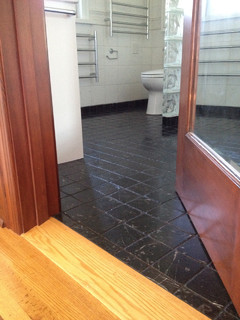
This custom oak transition helps adjust for the difference between the bathroom floor and the bedroom floor in this master suite. This is often called a reducing wood transition, because it works with two surfaces, reducing their height differences.

We centered the tile installation under the door, so when the door is closed you see only tile in the bathroom and oak in the bedroom. 

Tip: I find that these transitions look cleaner if the door jamb (the vertical part of the door frame) overlaps the tile a little bit. But this is hard to do if the tile hasn't been installed yet. If possible, install your bathroom door after the tile installation.


The simplest way to link floor tile and hardwood of different heights is with a transition strip. These strips can be finished to look like the floor or painted to stand out. 

Tip: Leave ⅝ inch to ¾ inch of space centered underneath the door for the bottom of the transition strip. If you affix a piece of scrap baseboard or plywood in the same size, it'll help keep this channel clean of thinset, making the transition strip much easier to install.
 

A custom transition can be milled by your flooring contractor for installation after the tile is complete. Notice where the wood transition meets the tile here — the wood is not cut to a feathered edge but kept to about ⅛ inch thick. This makes the edge stronger. The reducing transition also overlaps the tile, which helps with movement, since wood and tile expand at different rates.


Kitchen designs, bathroom designs, and more ∨

When decorating or building a home, don't forget about the walls.
For small bathroom ideas, browse photos of space-saving bathroom cabinetry and clever hidden mirrored medicine cabinets.


Tuesday
Jul312012

Flooring Design Trends

Then & Now

What a difference 20 years makes. When Floor Focus first started in 1992, residential carpet hadn't evolved much from the solid color saxonies that were so popular when wall-to-wall was introduced in the early '60s. Along with the new berbers and sisals, the biggest fashion statements were broader color offerings. But palettes then were not as carefully calibrated as they are today. Most color lines then included only a handful of neutrals (one or two beiges and grey) with lots of jewel tones: blues, teals, greens, golds, roses and burgundies. Today's palettes offer a significantly broader selection of neutrals, in both warm and cool casts, ranging from light to dark. 

Carpet dominated the residential market back then. Sheet vinyl was beginning to fade, and hardwood was just beginning to make a comeback after nearly three decades of lackluster sales. There was a ripple of excitement in the area rug market as the Egyptian company Oriental Weavers began to make waves in the U.S. market with stylish, well-priced polypropylene rugs. It was just the beginning of a trend that would completely transform the U.S. rug market in the '90s.

Another important trend was developing around then. In 1993, the Swedish company Pergo opened a plant in North Carolina that made laminate flooring, a product that was already successful in Europe but had not made it to the States. Laminate floors, most of which imitate hardwood, became a huge success in the U.S. residential market in the '90s, and they contributed to the further decline of sheet vinyl.

Hardwood began making a dramatic move in the late '90s, when importers; mostly from Brazil and China, entered the market with exotic woods like Brazilian cherry and Santos mahogany. In the 2000s, domestic players like Anderson Hardwood took it up another notch with exciting variations on solid wood: weathered and scored looks, lower gloss levels, deeper colors, wood that looks like barn siding. 

Also, exciting advances in porcelain technology, such as sophisticated through-body color combined with striking natural stone designs, gave the ceramic sector a big push in the late '90s. Continuing technical advances, like digital inkjet technology, allow today's stylists to create artistic architectural finishes and effects for both the residential and commercial markets.

While the residential market made its most dramatic changes in the late '90s and early 2000s, the commercial carpet market was already becoming a style leader in 1992, thanks to dramatic improvements in the capabilities of the tufting machine. First came small-scale graphic patterns and textures and more subtle color choices, then larger scale patterns and even more complicated color combinations. But the biggest change was the rise of carpet tile. In the late '90s, David Oakey of Interface began making tiles with non-directional "random" designs that could be laid on the floor in any direction. As the tile market soared, every firm followed his lead. Today, designs range from small and medium scale to large, even giant scale patterns that can be laid on the floor in virtually limitless combos, which gives designers the ability to create signature looks with a single product.

Today, linoleum, luxury vinyl tile (LVT) and, more recently, rubber have become important complements to carpet in the commercial market. Companies like Mannington, Amtico and Parterre are making LVT products that emulate stone and wood with striking authenticity. Rubber floors, too, have transformed over time from the limited palettes in standard utilitarian colors and textures into creative collections' with interesting finishes and trendy colors.