twitter Facebook Google+

                 linkedin pinterest houzz  

Click for the BBB Business Review of this Countertops in Denver CO 

Google Review 

Sales & Promotions!

Architects, interior designers, and more ∨

Hire a decorator to find that just-right couch and coffee tables for your living room.
Find wall shelves, a customizable closet organizer and stylish furniture for home to whip your closet into shape.
Remodeling and Home Design

Qualify Us Now! ProView 

Cambria logoUp to $45,000 interest free for your project!Finance by Cambria

 convenient and easy.

  • No Money Down
  • Interest-free financing for up to one year without payments
  • Financing up to $45K for any project that includes Cambria (including cabinets, flooring, sinks, plumbing, install & more)
  • Secure paperless telephone application
  • Credit decision in less than 10 minutes


Entries in Flooring (16)

Monday
Oct282013

What to Ask Before Choosing a Hardwood Floor

Article By: Mitchell Parker

So you’ve decided to get hardwood floors. Easy enough, right? Pick a wood and be done with it. 

Not so fast. There are a lot of factors that will determine what kind of hardwood floor your home can accommodate, and what will look best with your existing or planned furnishings and decor. 

You have some basic options: solid wood and engineered wood. Solid wood is what you generally think of as a hardwood floor: thick, solid planks of wood. Engineered wood is made of a veneer layer that sits atop a core of plywood. This construction deals with moisture a bit better and is recommended for concrete slab subfloors. Which brings up another point. The construction of the floor you're working with pretty much will dictate what kind of wood you can use. 

Here's how to prepare yourself for choosing a hardwood floor for your home. 

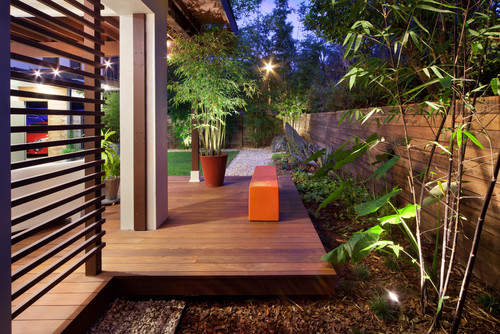
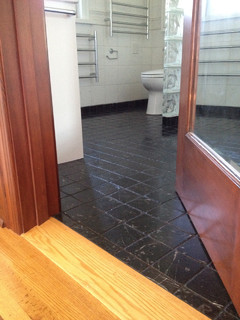
1. Where will the wood be going?

Installing hardwood floors on a second story is much different than doing so in a basement. A space beneath ground level is what’s known as below grade. A floor that’s even with the outside ground level is on grade, and any floors above this are above grade. Where you're installing the wood will limit your recommended options.

“For example, you’re not supposed to put solid wood below grade, because the moisture coming up through the ground can cause problems,” says Bob Hagen, who owns Magnus Anderson Hardwood. “So an engineered wood is recommended."


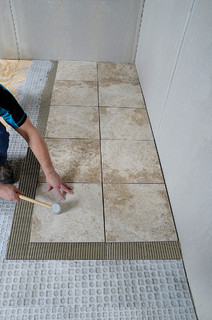
2. What is the subfloor made of? 

Find out what kind of subfloor you have. The three most common types are concrete slab, plywood and particleboard. This will help you determine whether you can install solid wood floors, or if an engineered wood would be best. 

Concrete. “If you have a concrete slab floor, you’re pretty much limited to engineered wood,” says Andrew Zheng, manager of Unique Wood Floors, which specializes in and ships prefinished hardwood. But don’t fret. You can still get any type of wood in an engineered format. And the thickness of the veneer on engineered wood varies. Higher-end engineered woods "are no less than solid woods in performance and price,” Zheng says. 

(Note: Even the hardest woods, such as Brazilian cherry and hard maple, will ding on an engineered floor if the plywood onto which they are veneered is soft, like lauan, which is a commonly used base.)

Another option is to install plywood over the concrete, but you’ll have to pay for the additional plywood, insulation and labor. “Most people just choose to stick with what they have,” Zheng says. 

If you’re still not sold on the engineered product, Hagen says there's a way to still have solid wood on a concrete slab (as long as it's on grade). It just needs to be glued down, preferably by an experienced professional. 

The downsides are that you need completely flat boards (hard to come by in longer lengths), and the glue is so strong that there’s a permanency to it. “If you have a leak or a flood, getting the material up is incredibly difficult,” Hagen says. “You’ll also want to check the VOCs [volatile organic compounds, which are toxic] in the product. And we ask clients about any chemical sensitivities.” 

Plywood. This is probably the most common subfloor and allows for the most versatility with hardwood floors. You can nail solid wood on top or use engineered wood. 

Particleboard. This material was commonly used under carpet in homes built in the 1970s. It’s basically a cheaper version of plywood. For hardwood floors, you'll need to replace the particleboard with plywood. Then you can add engineered or solid wood. 
 

3. What are your living habits?

Think about how much abuse your floors will take and learn about specific wood species and their durability. Do you have kids and pets? Have large parties often? Or are you a single person who travels a lot? 

If you have a high-traffic house, you’ll want to go with a harder wood. The Janka scale measures how strong a wood is; basically a BB is fired into a plank and the size of the dent it leaves is measured. “Red oak is considered the bell curve,” Hagen says. “It’s pretty hard and medium priced.” 

You can also play with grain patterns as well as with stains and finishes that will hide dents and scratches.
 

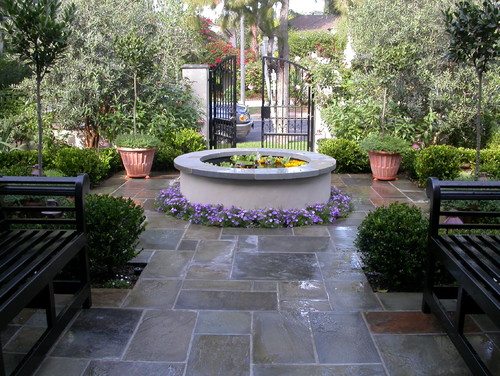
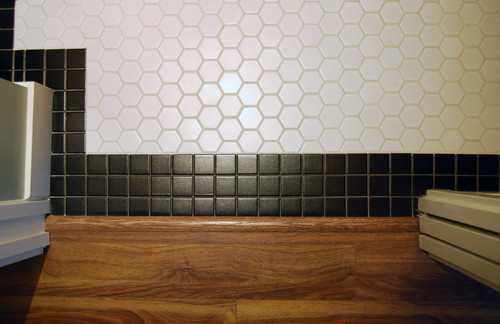
4. What style is your home?

You might love the look of hickory but then think differently when you see it covering a floor in a kitchen with modern cabinets. That's because some woods lend themselves better to certain styles. 


When choosing a wood, consider cabinets, trimwork and door casings to make sure the wood won’t clash with other design elements. And coordinate with the colors of the walls and the amount of natural light. This will affect color choice. If you have a lot of windows and skylights, then you probably have enough light to balance out really dark floors. If you have a dark house already, a lighter floor choice will help brighten things.

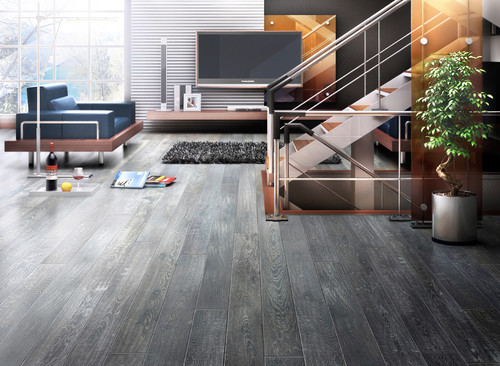
If your style is modern: Natural maple lends itself well to modern styles. “It’s more of a Norwegian-looking design with a clean look and not a lot of variation,” Zheng says. Gray-stained oak and boards without knots create a clean aesthetic that also works in modern settings.

If your style is traditional: Go with something like hickory. "It mixes lighter and darker pieces, and it’s more like a traditional cabin feel," Zheng says. Also, boards with knots and wider planks fit a more traditional style.

Of course, designers do incredibly creative things with mixing old and new, so don’t discount a wood just because it’s considered more appropriate for a certain style. Playing with grain pattern and stains can yield all sorts of interesting results.
 

5. What’s important to you? 

Is budget the biggest factor? Or is the appearance all you care about? 
Determining what’s most important to you will help you determine the right wood for your floor. 

Cost. 
Engineered wood isn’t always the cheapest route, so don’t think you can’t have solid wood floors on a budget. Zheng says you can purchase generic oak flooring in various stains for $3.50 to $4 per square foot, while lower-end engineered floors start at $2.50 to $3 per square foot. Beautiful hardwood like the popular acacia species can be as high as $6 per square foot.

Maintenance. 
If you want something that will hold up over time, you'll want to look at the harder woods (with higher Janka ratings). Also pay attention to the stain. 

The traditional method for staining wood uses a polyurethane finish, which produces a higher sheen. If the floor gets dinged or scratched, light bouncing off the semigloss finish can exacerbate the appearance of those flaws. 

Oil finishes are increasingly becoming more popular these days. They soak into the wood and provide a more matte finish. This can help hide wear and tear; plus, they last longer. While the up-front cost is higher, you won’t need to restain the floor as often, saving you money in the long run.

You can play around with finishes too. Hand-scraped or wire-brushed treatments rough up the appearance, creating a worn look so that if something does scuff it, the mark is not as noticeable. Note that the thickness of the veneer on an engineered floor affects how often it can be sanded down and finished.
 

Appearance. Everyone's preference is different. Some people are attracted to oak more thanwalnut, and vice versa. 

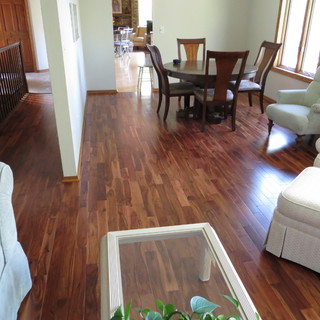
Acacia, shown here, is an exotic wood from Asia that Zheng says is a hot seller right now, because of its mix of lighter and darker tones; plus, it’s harder than hickory. The cost ranges from about $4 to $6 per square foot at his warehouse. The unique look is worth the higher cost for some. 

Pay attention to knots and grain pattern. Patterns in hickory and maple are different than in oak. You might want to spend the extra money for a unique grain pattern, or you may want to save money and go with a less-expensive wood with a better stain.

Consider plank width, too, which alters the appearance of your hardwood floors. Wide-plank walnut and 7-inch European oak are popular in traditional homes at the moment. 


The best thing you can do is see and feel the wood in person. “Wood is a living species. You need to feel what you’re attracted to. You’re the one living in the house, not the designer pushing you,” says Ilan Zamir, CEO ofAmber Flooring.
 

6. How will you stain and finish it? 

A stain adds color to the wood. The finish protects the floors from getting dirty. Any stain or finish can be applied to almost any wood. Some people like the color of oak but want the grain pattern of walnut. That's where staining can come into play. 

Some people can’t tell the difference between unstained black walnut and white oak that's been stained espresso. Others can look at those woods and their grain patterns and immediately know the difference. It all depends on what's important to you. 

A finish affects the maintenance. A solid wood that’s been hand scraped for a lower-sheen matte finish is easier to maintain, because you won’t see as much wear and tear. But maybe you want a semigloss look. 

Also, purchasing wood that's been prefinished will give you a good idea of what it will look like and will save you the time and effort of finishing the floors onsite. Engineered wood is usually prefinished.
 

7. How will you test it? 


This step is incredibly important. The last thing you want to do is install 800 square feet of black walnut based on a photo or tiny sample you saw in a showroom only to find it's overpoweringly dark and contrasts poorly with your furnishings. 

Always ask for a 2- by 2-foot sample of what the floor will look like with a stain and finish on it. Use this to test it with your paint colors and decor to make sure it's exactly what you want.

Friday
Jul122013

How to Pick the Right Floor for Your Garden Room

Article By: Billy Goodnick

Every room needs a floor, and outdoor garden rooms are no exception. Paths, decks, patios, overlooks, trash can storage pads, lawns, ground cover plantings ... they’re all floors. If you can walk on it, store something on it or roll around on it, I call it a floor. 

The simplest, least expensive floor material is the dirt that comes with a property. Unfortunately, the problem with an all-dirt garden floor is, well, it’s dirty, even downright muddy when wet. It does have one redeeming trait: It's dirt cheap. But it's highly likely that you'll have to choose something other than dirt for most of your garden. How to decide, given all the options? As with any design decision I make, I look for practicality, beauty and sustainability.
 

As the saying goes, form follows function. So first consider how the surface will be used and what's the most appropriate material to support that use. 


Loose materials for more casual spaces. I consider loose materials like crushed rock, graveland shale (also bark mulch) when I want an informal garden pathway or lounging area. They usually cost less and require less labor than other materials, and you don't have to be a master builder to make them look good. But because these materials can be movable after placement, you'll need to do some maintenance to keep them from wandering off.

Hard materials for more formal areas. On the other hand, hard materials such asflagstone, brick, tile, concrete and lumber lend themselves to more "civilized" applications like patios, decks and entryways. These generally withstand a lot of traffic and can easily be cleaned with a broom, a washing down (preferably not in water-scarce climates) or an electric blower, if that's your tool of choice.

Visual appeal. But we seek more than just utility. The first thing we notice in a garden is its visual appeal and sense of style — not how easily ketchup stains can be vanquished. Take cues from the materials and finishes of your house as well as influences from the natural environment.

Environmental impact. Think about where the materials originated, whether they come from recycled sources and whether they are permeable. If you don't know, ask.

Cost. For most of us, cost is the elephant in the room. The best advice I can offer here is to notbe penny wise and pound foolish. I've found time and again that a bit more expense (sometimes a lot) on the front end assures that you've selected the best floor for the job, the one least likely to come back and bite you later.
 

7 Materials for Outdoor Floors — and How to Use Them


Stone. Stone is enduring and elemental, taking many forms. Where a naturalistic style is most appropriate, irregular slabs of flagstone edged with dainty ground covers look right at home. In formal dining terraces, geometric shapes solidly mortared to a slab are a practical solution, assuring that the stones stay in place and provide a level surface. 

When it comes to selecting the right stone for your project, consider not only the color, but also its surface texture. Too smooth and it might present a slip hazard; too irregular and you'll have a hard time leveling a table (or walking in 6-inch stiletto heels — not a problem for me).

Stability and safety are paramount concerns, so be sure to set the stepping stones on a well-compacted base with some of their mass underground to keep them from tilting and moving around. Check that pathway stones are large enough and ergonomically spaced so you can land on them without having to delicately dance from one to the next.

The color of the stone should harmonize with the exterior of your home, other garden hardscaping and natural elements. You'll find a wide range, from nearly black to gray to white, and browns including rusty oxide-infused shades.

Brick. Brick is another durable flooring material that can express the aura of a classic garden. If the visible foundation of your house is brick, use the same brick as a walkway border to bind the house and the garden into a coherent composition. Or you can unleash your artsy, bohemian style by creating random patterns and infusing the design with random sprinklings of other materials, like stone or decorative tiles.

If you're the one responsible for rolling the trash cans from the side yard to the curb every Thursday evening, you'll be happy you passed on a pea gravel path and went with a continuous ribbon of mortared brick.

The color palette for brick requires additional design decisions; colors include a range of nearly black through gray, brown, red and some yellowish tints. Although individual bricks are rectangular, there are endless patterns to experiment with, including traditional running bond, herringbone, basket weave, radial spokes, gentle curves and whimsical layouts that look like someone pounded down one too many beers at lunch.


In formal situations brick is laid on a compacted bed of masonry sand or mortared onto a solid slab of concrete. This approach ensures that the brick will not subside or shift, a critical detail under tables and chairs. For paths the standard approach is to set the outer edges of brick in a solid concrete base, pave the inner surface with brick set on well-compacted mason’s sand and then brush more sand into the joints to lock them into place.

For shady, moist areas where moss can cause slip-and-fall accidents, be vigilant about choosing materials, like brick, that can withstand a strong blast from a hose or deep scrubbing with a coarse broom.

Caution: Where the ground freezes, loosely set brick can heave, making the path uneven and possibly dangerous. And steer clear of mature trees with surface roots.


Tile. Tile, like brick, offers a broad palette of styles, ranging from crisp, contemporary forms to old-world Mediterranean. Because tile is thin and unable to bear much weight on its own, it is always mortared to a solid foundation. Be careful to avoid slick surfaces, since they can become dangerously slippery when wet.


Concrete. Square foot for square foot, concrete is a smart long-term investment. It starts off in a semiliquid state, meaning it can assume any shape. If plain old sidewalk gray isn’t your style, concrete can be textured and colored to look like stone, seeded with pebbles, pocked with rock salt or stained with intense pigments to create bold designs. One problem with traditional concrete, though, is it's impermeable; it sheds water rather than allowing it to percolate into the soil where it can do some good.

Decking. A contractor friend of mine calls wood decks “dry rot in slow motion.” He’s pretty spot-on. Traditional wood decks, regardless of how much waterproofing sealant you apply each year, will eventually succumb to nature’s forces (or termites). 

But if you’ve got a sloping property, need a level surface for outdoor entertaining and want to avoid the expense and disruption of building retaining walls, decking is the way to go. Since you’re not likely to add on to the deck once it’s built, now is the time to decide how it will be used and make space for all the furnishings you want.
 

To avoid the effects of weathering and decay, consider building with manufactured plastic lumber made from recycled bottles, plastic bags and wood scraps. It comes in standard lumber sizes, connects with screws and doesn’t rot, making it ideal for rooftop getaways. 


Loose materials.Although they might seem like a low-budget cop-out,loose materials like gravel, crushed rock, compacted shale and decomposed granite can be an inexpensive yet elegant choice, especially whenedged by a richer material, like stone or brick. Advantages include permeability, low cost and ease of installation.

However, these materials are more likely to be displaced, especially if water passes over them. And gritty, sandy materials are the last things you want to track onto your hardwood entryway. One of my favorite design treatments for upgrading crushed rock paths uses enriched thresholds and intersections of stone.


Plants. In addition to inert materials, there’s all the living stuff. Once again, your choice should be guided by the intended use: Active recreation, for example, calls for the evenly mowed surface of a tended lawn.

Another consideration is how "at home" a lawn is in your climate. Where rainfall is dependable and plentiful, you needn't be too concerned about using potable water for irrigation. And there are lots of organic approaches to lawn care, so you can avoid the old-school arsenal of chemical sprays and treatments that can be detrimental to beneficial insects, wildlife and groundwater. But in arid climates, more and more people are going lawnless to help conserve water as well as lower their dependence on fossil fuels for mowing and edging.


Meadows, with their tussled, just-got-out-of-bed appearance, are ideal for creating a rustic feeling — and can attract a diversity of beneficial insects and other cool things for kids to discover. You can walk through them or mow romantic, sinuous paths to explore. If you don’t need to wander through the space, any combination of ankle-high perennials and ground covers can provide color and an open expanse that will carry the eye across the garden.

Wednesday
Jul102013

Transition Time: How to Connect Tile and Hardwood Floors

Article By: John Whipple

Transitioning a bathroom's tile floor to the hardwood of another room is often given little forethought. However, not planning the transition can result in a final product that doesn't meet your expectations, or a floor assembly that's destined to fail. 

Most of the floor framing in North America is designed to meet a base industry standard. This standard (usually measured as a deflection rating) allows for materials like small ceramic tile, vinyl, carpet and hardwood to be used on floors. But these days most of my clients want large, natural stone tile. 

Many also want the tile to transition seamlessly from one room to the other. This can be done, but most homeowners don't know that their home has to be designed with extra strength and rigidity to carry this weight. 

Below you'll learn what to specify when planning a transition from tile flooring to hardwood. 

This bathroom is a great example of current trends in bathroom design: plenty of space, bright light, a great soaking tub and a walk-in barrier-free shower. 

Notice the flush transition from hardwood flooring to tile. Looking closer (click on the photo to enlarge it), you'll see that the tile is large (about 1 foot by 2 feet) and made of marble; both features require a stiffer floor than most homes have. 

Tip: If you're working with large-format tile or natural stone, specify that your rooms meet a stronger deflection rating: L/720, instead of the base-standard L/360. This number indicates how much flex a floor has before tile is installed — both the Tile Council of North America (TCNA) and the Terrazzo, Tile and Marble Association of Canada (TTMAC) require L/720 for heavy installations.


Most of today's floor tile is โ…œ inch to ¾ inch thick. Most hardwood flooring is ¾ inch thick. This means that when you put tile next to hardwood flooring, your tile choice will be critical for a flush transition. 

Simply tiling on top of a plywood subfloor is not an option — this practice is frowned upon and is not permitted by the TCNA or TTMAC. However, you can install a thin uncoupling mat (like Laticrete's Strata Mat or Schluter Systems' Ditra) to meet the tile industry's requirements. 

Tip: Installing a second layer of plywood over your subfloor and under your hardwood allows for more floor preparation options in the future. This is also a valid option if your home's floor joists were not designed for a stronger, heavier floor. However, this should be planned early on, since it affects how your stairs and stair risers are built.


Here's an action shot of tile being installed over an uncoupling membrane from Laticrete, which prepares the plywood subfloor for tile. 

Tip: If your floor isn't strong enough to meet the right deflection rating, an uncoupling membrane won't help. Increasing the floor joist width or adding another layer of plywood is a better and safer option.


Here Tarkus Tile is prepping for a tile installation with a second layer of plywood and an uncoupling membrane. The orange material (Schluter Systems' Ditra) was installed with a quality modified thinset (mortar). Since this home's existing framing was not suited to hold the new tile selection, the installers beefed up the subfloor to make sure the installation would last for years to come. 

Tip: The choice between a flush installation from tile to hardwood and one that meets industry guidelines should not be a hard one. Always follow industry guidelines! They will probably be stricter than local building codes.


This custom oak transition helps adjust for the difference between the bathroom floor and the bedroom floor in this master suite. This is often called a reducing wood transition, because it works with two surfaces, reducing their height differences.

We centered the tile installation under the door, so when the door is closed you see only tile in the bathroom and oak in the bedroom. 

Tip: I find that these transitions look cleaner if the door jamb (the vertical part of the door frame) overlaps the tile a little bit. But this is hard to do if the tile hasn't been installed yet. If possible, install your bathroom door after the tile installation.


The simplest way to link floor tile and hardwood of different heights is with a transition strip. These strips can be finished to look like the floor or painted to stand out. 

Tip: Leave โ… inch to ¾ inch of space centered underneath the door for the bottom of the transition strip. If you affix a piece of scrap baseboard or plywood in the same size, it'll help keep this channel clean of thinset, making the transition strip much easier to install.
 

A custom transition can be milled by your flooring contractor for installation after the tile is complete. Notice where the wood transition meets the tile here — the wood is not cut to a feathered edge but kept to about โ…› inch thick. This makes the edge stronger. The reducing transition also overlaps the tile, which helps with movement, since wood and tile expand at different rates.


Kitchen designs, bathroom designs, and more ∨

When decorating or building a home, don't forget about the walls.
For small bathroom ideas, browse photos of space-saving bathroom cabinetry and clever hidden mirrored medicine cabinets.


Tuesday
May212013

Get Grout Magically Clean - Stains and All

If your grout is grossing you out, this deep-cleaning method will help it look new again!

Photo: American Cabinet & Flooring | Project Manager Randy WilsonTile - whether it's used as flooring, in the kitchen as a backsplash or for counters, or in the bathroom - has one great downfall: grout. Since grout is porous in nature, unsealed grout absorbs all kinds of stains, from mildew to coffee and everything in between. To say it's a headache to keep grout clean is an understatement.

NOTE: Be wary of using too much lemon juice with marble, since it can etch or damage the stone if left on too long. Hydrogen peroxide can be a safe alternative.


We inherited marble tile counters when we purchased our home. It's pretty clear that the grout was never properly sealed, so it soaks up stains like crazy. It makes our kitchen feel gross and grimy, even if it was just cleaned. While I'd love to replace the counters with a solid surface like quartz, it's just not in out budget - plus, we just can't justify getting rid of something that's perfectly fine otherwise.

Luckily, I have a foolproof method that will lift most household stains from that pesky grout. 

What you'll need:

  • Oxygenated bleach (like OxyClean)
  • Warm water
  • Coarse scrubbing brush (like an old toothbrush)
  • Towel
  • Lemon
  • Grout sealer

TIP: Cleaning colored grout should be done with special care. Bleaching agents (like chlorine bleach) can discolor and harm the colored grout. Fortunately, oxygenated bleach does not contain corrosive chemicals and is safe to use on all grout. 

1). Clean the surface thoroughly, removing any surface residue or debris. Let the grout dry fully.

2). Dissolve 2 tablespoons of oxygenated bleach in 2 cups of warm water. Wet the brush in the mixture and apply it to the grout. Let is soak in, then scrub the grout in a circular motion, which will loosen the stain more effectively than a front-and-back motion. If needed, dip the wet brush into the oxygenated bleach to make a paste. Wipe clean, then let dry.

TIP: To lift extra dark stains, squeeze lemon juice onto the stain, let it soak in, then scrub, wipe clean and let the grout dry. Use lemon juice sparingly, since it can damage some tile finishes.

3). Spray the tiles and grout with an ecofriendly cleaning spray and wipe them clean. Let the grout dry fully before making a final decision on whether your hard work paid off - damp grout looks darker than dry grout. 

4). Apply grout sealer after the grout has fully dried to avoid any future stains. Be sure to reapply it each year. 

Still having trouble getting that grout clean? For those impossible-to-remove stains, you might want to consider:

  • A commerical tile and grout cleaner
  • A coarser brush (avoid using metal bristles, though, as they can erode the grout)
  • Grout Renew

If after you've tried all three, the stain is still hanging strong, you may have to resort to removing the old grout and replacing it with new. 

TIP: An electric multitool, like the Dremel Mult-Max, helps to make quick and safe work of removing the old grout. 

(You are reading an article originally posted on Houzz)
Monday
May132013

13 Big Ideas for Small Bathrooms

Photo: via TOHA few things all old house lovers are familiar with: drafty windows, less-than-perfect plumbing, squeaky floors - and small bathrooms. While new home baths have nearly doubled in size over the past 30 years, old home bathrooms average about 5- by 8-feet.

Not to worry, though: you can combat the claustrophobia by scaling down to physically save space. (Pedestal sink, anyone?) And, with the right colors and lighting, you can create the illusion of a roomy bath

Here, we dig into the National Kitchen & Bath Association (NKBA) Design Competition archives to deliver great ideas from Certified Kitchen Designers that you can use in your next remodel. 


Photo: via TOH | Designer: Debbie R. Gualco, California

#1 Rich, Asian-Inspired Design

This homeowner wanted to bring her home out of the 1980s with contemporary Asian design, so the powder room vanity was inspired by a Japanese kaidantansu (stepped chest), which contributes fluidity of design in the cramped quarters. The use of rich and dark colors makes the walls of the small space recede.


Photo: via TOH | Designer: Erica S. Westeroth, Ontario

#2 Day at the Beach

These homeowners opened up their space by getting rid of two small closets and adding task and ambient lighting to help create the illusion of a larger room. Little width remained after incorporating the tub and toilet, so a shallow cabinet was incorporated. Our favorite detail? The playful "dry riverbed" of stones in the floor


Photo: via TOH | Designer: Gary Hentges, Illionis

#3 His-and-Her Bath

The use of continuing horizontal lines, a large, frameless mirror, and well-placed task lighting helps to create the illusion of a larger space. The marble-clad dividing wall lends modesty to the toilet area, while creating a recessed storage opportunity. A must in every small bath, the shower has a curbless entry to eliminate demarcation of the limited footprint. 


Photo: via TOH | Designer: Gary Henteges, Illionis

#4 Small and Simple

These homeowners wanted to "keep it simple and do it well." This cherry and limestone bath replaced a tiny, cluttered space meant for guest use. The curved-front vanity maximizes usable space with two deep drawers on double extension drawer slides.


Photo: via TOH | Designer: Holly Rickert, New Jersey

#5 Zen Escape

The size of this room called attention to an eyesore: an off-center, aluminum-framed window. A floor-to-ceiling Shoji screen took care of that by concealing the flaw, while letting light through. A 7-foot framed mirror, hung horizontally, spans the entire length of the room and reflects the ladder towel rack, which adds storage without taking up floor space. 


Photo: via TOH | Designer: Keri Davis, Oregon

#6 Small Spa Retreat

This bathroom was constrained by bedrooms on either side, so it wasn't possible to increase square footage. To make the space feel roomier, white marble tile and several mirrored surfaces wrap the room. Floor-to-ceiling cabinets add height, while a glass shower wall eliminates the visual barrier of a shower curtain or doors. Rich wood tones add warmth and create balance. 


Photo: via TOH | Designer: Leslie Ann Cohen, California

#7 Hacienda-Style Bath

This guest bath features a custom miniature sideboard topped with a rich red travertine counter and copper vessel sink. Rich shower draperies and handmade tiles add to the charm of this space, showing that patterns used selectively as accents will not overwhelm a small room.


Photo: via TOH | Designer: Lori Carroll, Arizona

#8 Tone and Texture

It's not uncommon to create attention-commanding focal points in compact spaces. This powder room vanity is crafted with smooth, flaxen veneer and is topped with a cast bronze basin and patina counter. Recessed lighting around the large mirror illuminates any reflection.


Photo: via TOH | Designer: Leslie Thompson, Florida

#9 Modern Makeover

This vanity continues the lesson of creating a bold focal point in a small space. The upper walls of this ultra-feminine retreat are upholstered in padded silk, but the stainless steel backsplash adds a rugged accent.


Photo: via TOH | Designer: Margie Little

#10 Compact Commode

This teeny, tiny full bath features a wall hung toilet; the tank is hidden inside the 2x6 stud wall, allowing for 9 inches of extra space in the center of the room. Clear glass shower doors eliminate visual barriers and a skylight floods the space with natural light.


Photo: via TOH | Designer: MaryLou Kalmus

#11 Glass Grandeur

A curved glass countertop provides a sense of spaciousness, while hand-applied 1-inch Bizazza glass tiles mimic the swooping curves of the fixtures. The high ceiling features a deep amethyst color wash to visually lower the height of the room, which felt "like a tunnel" to the homeowers.


Photo: via TOH | Designer: Sheila K. Tilander, Washington

#12 Retro Redo

This homeowner wanted a nostalgic style with a contemporary twist. Trumpet-shaped sconces flank an oval mirror that conceals a medicine cabinet. A frameless shower door extends the visual expanse of the space, while allowing unobstructed views of oversized subway and amber glass tilework. 


Photo: via TOH | Designer: Tiffany De Tomasi, California

#13 Eastern Oasis

A freestanding vanity with elongated fixtures, a custom bamboo mirror, and ladder towel rack create the illusion of vertical space in this small guest bath. A soft color palette accented with dark woods, balances the space. Artistic relief panels add visual interest without completely walling off light. 


(You are reading an article originally posted on This Old House)