twitter Facebook Google+

                 linkedin pinterest houzz  

Click for the BBB Business Review of this Countertops in Denver CO 

Google Review 

Sales & Promotions!

Architects, interior designers, and more ∨

Hire a decorator to find that just-right couch and coffee tables for your living room.
Find wall shelves, a customizable closet organizer and stylish furniture for home to whip your closet into shape.
Remodeling and Home Design

Qualify Us Now! ProView 

Cambria logoUp to $45,000 interest free for your project!Finance by Cambria

 convenient and easy.

  • No Money Down
  • Interest-free financing for up to one year without payments
  • Financing up to $45K for any project that includes Cambria (including cabinets, flooring, sinks, plumbing, install & more)
  • Secure paperless telephone application
  • Credit decision in less than 10 minutes


Tuesday
May212013

Get Grout Magically Clean - Stains and All

If your grout is grossing you out, this deep-cleaning method will help it look new again!
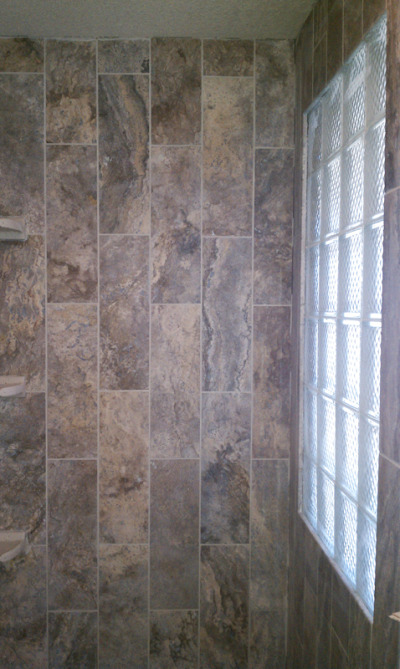
Photo: American Cabinet & Flooring | Project Manager Randy WilsonTile - whether it's used as flooring, in the kitchen as a backsplash or for counters, or in the bathroom - has one great downfall: grout. Since grout is porous in nature, unsealed grout absorbs all kinds of stains, from mildew to coffee and everything in between. To say it's a headache to keep grout clean is an understatement.

NOTE: Be wary of using too much lemon juice with marble, since it can etch or damage the stone if left on too long. Hydrogen peroxide can be a safe alternative.


We inherited marble tile counters when we purchased our home. It's pretty clear that the grout was never properly sealed, so it soaks up stains like crazy. It makes our kitchen feel gross and grimy, even if it was just cleaned. While I'd love to replace the counters with a solid surface like quartz, it's just not in out budget - plus, we just can't justify getting rid of something that's perfectly fine otherwise.

Luckily, I have a foolproof method that will lift most household stains from that pesky grout. 

What you'll need:

  • Oxygenated bleach (like OxyClean)
  • Warm water
  • Coarse scrubbing brush (like an old toothbrush)
  • Towel
  • Lemon
  • Grout sealer

TIP: Cleaning colored grout should be done with special care. Bleaching agents (like chlorine bleach) can discolor and harm the colored grout. Fortunately, oxygenated bleach does not contain corrosive chemicals and is safe to use on all grout. 

1). Clean the surface thoroughly, removing any surface residue or debris. Let the grout dry fully.

2). Dissolve 2 tablespoons of oxygenated bleach in 2 cups of warm water. Wet the brush in the mixture and apply it to the grout. Let is soak in, then scrub the grout in a circular motion, which will loosen the stain more effectively than a front-and-back motion. If needed, dip the wet brush into the oxygenated bleach to make a paste. Wipe clean, then let dry.

TIP: To lift extra dark stains, squeeze lemon juice onto the stain, let it soak in, then scrub, wipe clean and let the grout dry. Use lemon juice sparingly, since it can damage some tile finishes.

3). Spray the tiles and grout with an ecofriendly cleaning spray and wipe them clean. Let the grout dry fully before making a final decision on whether your hard work paid off - damp grout looks darker than dry grout. 

4). Apply grout sealer after the grout has fully dried to avoid any future stains. Be sure to reapply it each year. 

Still having trouble getting that grout clean? For those impossible-to-remove stains, you might want to consider:

  • A commerical tile and grout cleaner
  • A coarser brush (avoid using metal bristles, though, as they can erode the grout)
  • Grout Renew

If after you've tried all three, the stain is still hanging strong, you may have to resort to removing the old grout and replacing it with new. 

TIP: An electric multitool, like the Dremel Mult-Max, helps to make quick and safe work of removing the old grout. 

(You are reading an article originally posted on Houzz)
Friday
May172013

Strategies to Create Color Flow Throughout a Home - a Case Study

Originality and creativity are having a moment: eclectic, colorful spaces are all the rage. But though many are over matchy-matchy furniture and one-size-fits-all paint colors, some consistency throughout the home isn't a bad thing. Done right, color coordinating leads to better flow and a polished, cohesive interior design. 

Model-home interior designer Mary DeWalt from Austin, Texas; creates designs to appeal to buyers, and one of the ways she does does that is by maintaining color flow throughout. "For us, picking colors is all about memory," she says. "People are more likely to remember a home with a particular color scheme, because it's different from all the rest. If buyers are looking at several homes, that all-turquoise one will stand out in their minds."

DeWalt's savvy color-coordinating strategies can help turn a disjointed, choppy sauce into a flowing thought-out masterpiece, as this model home design demonstrates. Pick and choose the ideas that might work for you, too.

 Photo: Colorful House in Portland via Flickr

As you make your color choices, go with what you love, not just what is trendy. DeWalt suggests picking one neutral and two accent colors to carry throughout every room. Accessories provide the color in rooms with neutral walls and grouping accessories in threes keeps tabletops interesting yet clutter free. 

Not every room needs to include every color. Cohesion is key, but that doesn't mean you can't experiment with materials. When accessories aren't enough, add a wow factor, or what DeWalt calls a punctuation mark. 

Even if you love your color scheme, be cautious with big purchases. "Don't commit to large, colorful furniture, because if you get tired of the color, it is much more expensive to replace," DeWalt says. Game rooms and kids' rooms are great spaces to take chances in; consider going bold with a brightly painted ceiling. In a transitional room, such as a hallway or an entryway, don't feel the need to go big with color just a hint of your palette can be enough. 

Don't limit your color scheme to the interior - bring it to your pool or patio with matching tile. For those whose budget doesn't include a pool renovation (or even a pool), something as simple as colorful outdoor cushions can ensure that your outdoor and indoor spaces pair perfectly.

(You are reading an article orginally posted on Houzz)
Thursday
May162013

10 Big Solutions for Small Spaces

From striped floors in the living room to open shelves in the kitchen, designers share their best tricks for tiny rooms. 

Photo: Ngoc Minh Ngo via House Beautiful

#1 Mix Low and Tall Furniture

In any small space, it's important to not feel boxed in. In this Chicago apartment by architectural consultants Richard Bories and James Shearron, a low credenza is a smart substitute for the obligatory tall bookshelf, which would have closed off the space. "It's very effective to keep things low and punctuate with verticals here and there," says Shearron.


Photo: Ngoc Minh Ngo via House Beautiful

#2 Dare to Be Dramatic

Small spaces are perfect for bold decorating because they require less time, money and materials. "In small, modern apartments you have to create dramatic moments that offset the lack of detail - but don't hog the space," says Shearron, who helped chose Benjamin Moore Bright Yellow paint for the apartment's front door. "Bold, graphic gestures like that look cool in small spaces," he explains. 


Photo: Bjorm Wallander via House Beautiful

#3 Choose Side Chairs

Chairs without arms are perfect for small spaces because they're much easier to get in and out of. They're also more lightweight. In this 295-square-foot Brooklyn studio, designer Nick Olsen chose a mismatched pair that can effortlessly be moved around the room to wherever they're needed. 


Photo: Bjom Wallander via House Beautiful

#4 Don't Compromise... Everything

Even though space may be tight, don't settle on what's important to you. Though this apartment is just one room, the bed is centered in the room rather than pushed against the wall. "But you have to pick your moments. It's a full size, not a queen," says Olsen. "She has a love seat instead of a sofa."


Photo: Thomas Loof via House Beautiful

#5 Create Distinct Zones

"If a space in monotone, it's going to feel like one undefined space; if you create distinctions in the space, it feels larger," says designer Maureen Footer. To make her New York City studio feel larger, she divided up the space by function. A Persian rug sets off the entry while a bookcase helps to define the office area.


Photo: Thomas Loof via House Beautiful

#6 Hang Curtains at the Ceiling

Vertical lines help create the illusion of height. By hanging curtains directly underneath the crown molding, Footer made the apartment's low ceilings seem higher and the whole space fell airier.


Photo: Victoria Pearson via House Beautiful

#7 Install Open Kitchen Shelves

Traditional upper cabinets can close off a kitchen. By in stalling open shelves, designer Chris Barrett made her small California kitchen seem more open. "Wall cabinets are utliltarian but so dull. I love having open shelves and being able to stack pretty dishes and paintings on them," she says.


Photo: Victoria Pearson via House Beautiful

#8 Choose Furniture with Curves

Forget about furniture with sharp, pointy corners. For tight corners or narrow hallways, Barrett recommends curved furniture that can easily be walked around.


Photo: Simon Watson via House Beautiful

#9 Elongate a Space with Stripes

Create the illusion of length by playing with pattern. In architect Bill Ingram's 1,400-square-foot Alabama cottage, thick and narrow stripes are painted over the stained wood floors. He then used furniture that's up on legs, so the continuation of the lines are visible under chairs and tables. 


Photo: Simon Watson via House Beautiful

#10 Install Glass Doors

Ingram also used lots of glass doors - even on closets - to "extend views and add sparkle" throughout the home. It's a smart way to carry light into dark storage spaces. 


(You are reading an article originally posted on House Beautiful)

Wednesday
May152013

Be Prepared With A Household Inventory - and Use It To Declutter Too

You may have heard of, or even created, a home inventory before. This record, often used to document belongings for insurance purposes, can also be a really helpful tool if you are trying to declutter, prepare for emergencies, clear space for a remodel or just get organized. Check out these tips to create a thorough home inventory and streamline your belongings at the same time.

Make Your Inventory | Choose Your Checklist

The first step in making a home inventory is getting your hands on a comprehensive checklist - one from your own insurance company is best. Review the checklist before getting started.

Photo: via Insurance U

Work Through Your Home, Room by Room 

Following your checklist, work your way slowly through the entire house - you may wan to divvy up the task over several weekends. Record a brief description of each item, how many you have, how much it cost and the year you purchased it. 

Don't leave out any nooks or crannies. Craft rooms, sheds, attics, workshops, porches and garages should all be carefully examined and documented.

Supplement With Photos or Video

Using digital photos is one option, but you may find it easier to create a video tour of your home to document your belongings. Whether you are taking photos or video, start at the front and work your way through each room - try to go in the same order used on your checklist.

Photo: via Wikipedia Commons

Add a Storage Map

Noting down where exactly in the house everything is stored can be incredibly useful when you need to find something, whether it's an emergency or just time to hang the Christmas lights. 

Use an actual floor plan if you have one; if not, you can create your own simple sketch of each floor of your house. Being as specific as possible, note where in each room boxes or other items are stored. 

Keep Paperwork in One Place

Gather receipts, credit card statements, appraisal documents and the like, and keep them bundled with your other home inventory materials.

Even better, take the time to scan everything and store the digital archive in at least two places.

Use Your Home Inventory to Declutter | Get Rid of Unnecessary Multiples

Cutting back on excess multiples can free up a lot of space in your home, but actually getting rid of unneeded things is easier said than done. Your home inventory checklist can make things easier by providing emotional distance.

Read over your list and mark any items you have a lot of. Do you really need all of those extra dishes? Start a list of things you want to sell or donate. 

Highlight Valuable Items

Especially note valuable pieces you've been holding onto for a long time but are not necessarily using. Do online research and estimate what you could sell the pieces for. Would you rather have the extra space and money? If so, let those pieces go!

Mark Your Calendar for a Big-Junk Toss

You know that stuff you've been meaning to toss but haven't found the motivation to? We all have it. Now that your know exactly what and where yours is, set a date to (finally) take care of it.

Get prepared by researching where you can take it - things in good condition may be candidates for donation, while others may need to be dropped at a special recycling center. Involving a reward at the end of your day of errands is always a good plan!

Box Everything

Now that you've cleared out space in your storage areas, think about ways to make your storage really work for you. One simple but effective strategy is to tuck every single item in storage - whether in closets, cupboards or in deep storage - into a box or bin.

Containers instantly make things look neater, and it's also easier to shift items around or grab a box you need rather than trying to unload armfuls of loose stuff from a shelf. 

Use Storage for Rotating Items Too

Free up space in cupboards, closets, shelves and counters for the items you actually use daily, and pack away the rest. This is one of the best ways to make your life easier, without getting rid of a drastic amount of stuff. Simply rotate in fresh dishes, linens and decorative items seasonally.

Consider Digital Backups

Creating digital backups (photos or scans) of important paper records, photos, kids' art and other memorabilia can offer peace of mind. For less sentimental items, you may choose to actually toss the originals and keep only the digital record. 

Remember to Also...
  • Update your inventory anytime you buy something new or get rid of something on your list, pull out that inventory and note the change. If it's something new you are adding , use this as a cue to look for a similar item on your inventory to get rid of. It's much easier to keep clutter at bay than deal with it after things have gotten out of hand.
  • Keep a copy of your inventory offsite. Use a safe-deposit box or an online cloud-based storage system to keep your home inventory and all supporting documents secure. 


(You are reading an article originally posted on Houzz)
Tuesday
May142013

Breathe Easier with Houseplants

Photo: The Peace Lily via Build Direct Blog | JJ HarrisonI live near an old-age home that spews black dust. I jokingly tell people that those are the "outgoing patients," but whatever the cause of the dust is, I know it affects my home's air quality and wish I could breathe a little easier around it all. 

I've always known that trees clean the air, but I've never really considered the benefit of having house plants for the air-purification qualities. I'm thankful that I'm getting wise to this option. 

These days, I'm looking into such things as quality-of-life improvements that aren't just good for me, but good for my soul, in all aspects of life, and soon I'll fill my place wit a few great plants. 

Houseplants and Science

Now, this isn't just garden fanatics reporting improved air quality with plants. NASA is on the plants-for-better-air stunt too. Yeah, the space guys.

It turns out that, back in the '80s, NASA did a study on common houseplants to see which ones offered the best air purification effects for the space station. Whodathink it, right? You can read that study right here

In fact, we know what plants work with what kinds of air pollution. Got tobacco around the house? Time to get a peace lily. Did you have new carpets installed that are off-gassing? Dun-dun-dah-duh! It's Spidey(-plant) to the rescue.

So, needless to say, leave it to NASA to get all sciency about it. Apparently pots that are 6-8 inches in diameter are the best ones for the job, and of course there had to be a math equation somewhere in it too: You want one plant per 100-square-feet of space. Let that be a lesson to you for buying a big house, huh? "Oh, honey, no, we'd need 31 plants for the 3,100-square-foot home. Are you gonna water them?"

Popular House Plants

Here's just a partial list of all the plants that have been helpfully compiled on Wikipedia:

  • Dwarf Date Palm (phoenix roebelenii)
  • Boston Fern (nephrolepis exaltata "bostonienis")
  • English Ivy (hedera helix) - a great way to make a big statement while nixing formaldehyde
  • Spider Plant (chlorophytum comosum) - another great formaldehyde filter that's great for the not-very green thumb
  • Golden Pothos or Devil's Ivy (scindapsus aures or epipremnum aureum)
  • Peace Lily (spathiphyllum 'mauna loa')
  • Chinese Evergreen (aglaonema modestum)
  • Bamboo Plam or Reed Palm (chamaedorea sefritzii)
  • Snake Plant or Mother-in-Law's Tongue (sansevieria trif asciata 'laurentii') - another formaldehyde killer for those who don't like to fuss with their plants. 
  • Gerbera Daisy or Barberton Daisy (gerbera jamesonii) - here, you're winning with beautiful flowers and by filtering benzene and trichloroethylene
  • Pot Mum or Florist's Chrysanthemum (chrysantheium morifolium)
  • Rubber Plant (ficus elastica)
  • Cornstalk Dracaena (dracaena fragans'massangeana')
  • Janet Craig Dracaena (dracaena deremensis 'janet craig')
  • Warneck Dracaena (dracaena deremensis 'warneckii')
  • Weeping Fig (ficus benjamina)

It's wise to get a range of plants that can filter a number of toxins. We're talking really noxious things like benzene, formaldehyde, trichloroethylene, xylene, toluene and ammonia. The right combination of plants and you can end a whole lot of badness in the air around you. For plants, it's like air-candy.

The trouble is, not all of these plants are safe in homes with pets or kids in them. If you think your cat's bound to nosh on your peace lily, then on peace lily for you.

Luckily, lots of other plants remain on the list!

Questions to Ask

Even still, there are lots of considerations to look at when you're considering air-filtering plants for your space. How big can it grow? How much light does it need? How water-needy is it? Does it play well with others?

If you or those you love have lung ailments, or you live in a polluted area, or you've just moved into a home that's off-gassing all the new construction, then plants are a NASA approved way to improve both your health and beautify your living space.

Take a little nature indoors and maybe it'll be as good for your soul as it is your lungs.


(You are reading an article originally posted on Build Direct Blog)