twitter Facebook Google+

                 linkedin pinterest houzz  

Click for the BBB Business Review of this Countertops in Denver CO 

Google Review 

Sales & Promotions!

Architects, interior designers, and more ∨

Hire a decorator to find that just-right couch and coffee tables for your living room.
Find wall shelves, a customizable closet organizer and stylish furniture for home to whip your closet into shape.
Remodeling and Home Design

Qualify Us Now! ProView 

Cambria logoUp to $45,000 interest free for your project!Finance by Cambria

 convenient and easy.

  • No Money Down
  • Interest-free financing for up to one year without payments
  • Financing up to $45K for any project that includes Cambria (including cabinets, flooring, sinks, plumbing, install & more)
  • Secure paperless telephone application
  • Credit decision in less than 10 minutes


Entries in Tile (6)

Monday
Oct142013

Bathroom Surfaces: Ceramic Tile Pros and Cons

Article By: John Whipple

Often praised for its durability and variety, ceramic tile is a popular choice for bathroom finishes. If you're drawn to color and texture, this material can deliver on both fronts. But the sheer variety of ceramic tiles is endless, which can make finding just the right tile very difficult. 

Because ceramic tends to cost less than porcelain and is much lighter, it's often used for wall and ceiling installations. However, there are some major cons to this material, too: It's not as strong as porcelain, so it doesn't make the best walking surface. It can be very cold underfoot in the winter, and heavy tile can be difficult to install. 

Curious if ceramic tile will work in your bathroom? Here's what you should know before making the purchase. 

The basics: Ceramic tiles are wide ranging; all are generally made from red or white clay that's been fired in a kiln and glazed or finished. If you're a tile nerd like me, ceramic tile technically includes porcelain tile too, but for this ideabook we'll exclude that category. 

Cost: Ceramic tile is often priced below $2 per square foot. Higher-end tiles can easily run $20 to $40 and more per square foot. The average tends to be around $7 to $9 per square foot. 

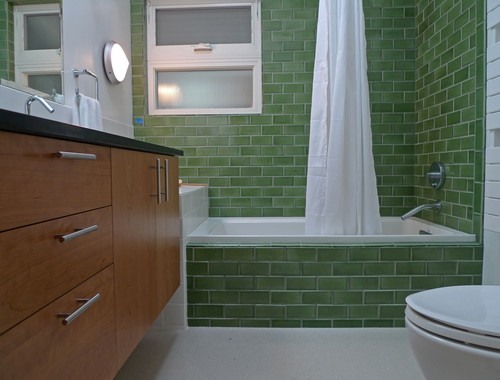
Pros: Ceramic tile can be incredibly affordable, and there's a ton of variety in styles, colors, finishes and textures. It's also easy to customize it for details like chair rails, soap dishes and special edging and nosing, as in this bathroom.


Cons: Ceramic tile is not as strong as its cousin, porcelain tile, but what it lacks in strength, it makes up for in price.


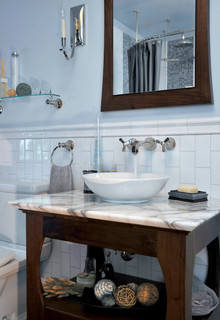
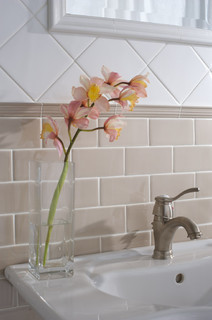
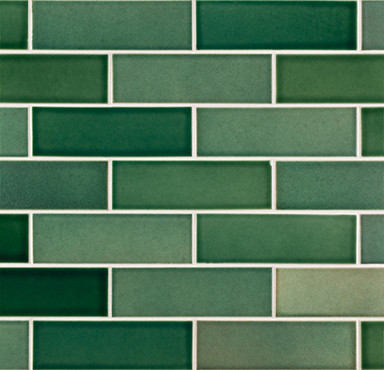
Special considerations: Since ceramic tiles often have texture, you may want to consider this to add dimension to your bathroom. The eased edge on this tile adds a little extra something to a bathroom wall, but can make it difficult to figure out how to cut end tile. Consider using a tile edge profile, like a Schluter strip, to make the transition less awkward. 

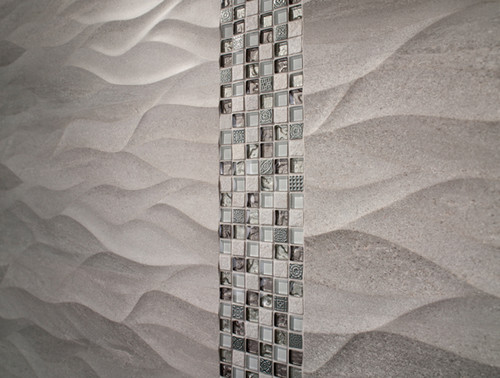
However, today's ceramic tile offers much more than an eased edge. This wavy tile from Porcelanosa is just one example of the texture and detail available today. 

This type of tile can make for a great accent in a bathroom, but I'd avoid using too much texture in a shower , since it can make for difficult cleaning. Try using it for a feature wall or feature corner instead.
 

Maintenance: Make sure you choose a ceramic tile with a durable finish. How can you tell? Buy a sample, take it home and clean it to death. 

I recommend cleaning ceramic tile with a white nylon scrub brush and a little soap. You shouldn't need much more than that. Ceramic is very durable, but it's best to stick to mild household detergents and to spot test before using anything new. 

Installation: Installing ceramic tile is pretty straightforward; it could even be a DIY project if you have some experience working with tile. Many of today's ceramic tile actually has directional arrows on the back side; make sure you keep them lined up the same way so you get the correct look. 


Friday
Aug302013

Bathroom Design: Getting Tile Around the Vanity Right

Article By: John Whipple

Tiling under your new vanity or custom cabinets can prevent shower or sink water from finding its way into your house. Extending tile all the way under freestanding or floating vanities can make a room look and feel larger, too. These vanities are popular choices in today's bathrooms, so it's important to understand the pros and cons of bringing tile all the way under your bathroom storage. 

See how these bathrooms combine vanities and floor tiles, and learn what you should specify when working with your bathroom contractor. 

Making sure the floor is perfectly level is an important step for a vanity like this. Trying to level a vanity after tile installation can be a real chore. If you're having a vanity custom built, designing adjustable legs can help get your vanity and vanity top perfectly level. 

Tip: Consider omitting extra legs in custom vanity designs and securing the vanity to the wall if needed. Getting eight legs to sit perfectly flat is much harder than four! 

If your bathroom floor is a little unlevel and you don't want to spend the money or time making it perfectly level, a little shoe molding (the small strip of molding at the bottom of the vanity toe kick in this photo) on your vanity can visually even things up. Shoe moldings add a lot of charm to a vanity's look and help protect the vanity from water damage. 

Tip: If you are going to use a shoe molding, plan to shim the vanity off the ground by about ⅛ inch or so, so that the only wood in contact with the floor is the shoe molding. If there's ever a leak in your bathroom, the shoe molding, rather than the bottom of your vanity, will absorb the damage. It's much easier (and more affordable) to replace shoe than the entire vanity.


I love how this vanity has higher legs and extra foot room. Traditional bathroom and kitchen cabinets often have a smaller kick space (the little recess below the bottom drawers) with little to no room for your toes. If you like to get up close to your vanity and lean toward the mirror when getting ready, a freestanding vanity with extra leg height is a great idea. 

Tip: If you're installing radiant floor heating, you'll want it to go all the way under your vanity with a design like this. That way your feet will still stay warm when you're up close to the mirror. We prefer cable heating systems rather than heating maps for this very reason; they allow for greater heat placement control.


Tiling under your vanity can help seal up any voids that might collect water and harm your home's construction. Sink and drain lines can leak if not properly installed or prepared, and often this leak runs down the back side of a vanity and into the floor. 

Tip: Make sure all your water supply lines have trim collars inside the vanity. These collars act like little water deflectors and can keep water from running back along a pipe and into the wall.
 

In a larger bathroom, the high cost of tile could be a big factor when you're deciding whether or not to tile under a vanity. Usually we order a 10 percent overage in bathrooms, but for some large bathrooms I'll just order 5 percent and use the off cuts under the vanity. This allows the client to get the benefits of tile under their vanity without added cost. 

Tip: If your tile is crazy expensive, consider using a cheaper, similar tile under the vanity. No one will know but you.
 

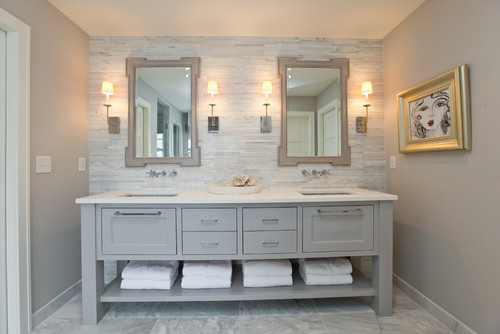
Larger vanities with a solid countertop like this can add a lot of weight to a tiled floor. If you're aiming for a similar look and style, considered the added weight your vanity will bring to the room and make sure your contractor prepares the floor for this kind of installation. 


Tip: Curious if your floor is strong enough? Try this simple test for excessive floor deflection: Fill a drinking glass to the top with water, place it in the room before tiling and walk around the room. Move the glass to a few different locations and walk around each time. If the water spills from the glass anywhere, the floor most likely has too much bounce and might not be suitable for a heavier vanity.
 

Adding some light under a vanity makes for a great night feature and brings another layer of lighting to the room. Some tile is so shiny that it acts like a mirror under the vanity, so make sure that the bottom of your vanity is not littered with job tags, addresses or overspray from finishing.

Tip: If you want a more even glow from the lighting, consider shining the light toward the back wall instead of straight down. This creates a little less light but a more even glow.


Wednesday
Aug282013

Why Bathroom Floors Need to Move

Article By: John Whipple

"Tenting" is a terrible word to a tile professional. When a bathroom floor has been installed incorrectly, tiles can press against one another and pop up off the floor, creating a tent shape. It's not just tile that does this — almost every material in a home expands and contracts with time, including the plywood subfloor, which can develop popped tiles or cracked grout joints. 

These professional pointers for preparation and installation techniques can help keep your bathroom floor from tenting. 

Avoid large-format tile. More grout joints allow for minor movement and spreading out. 

If you have a large bathroom — like this beautiful space — with loads of natural sunlight, a smaller and lighter tile is definitely a safer option. Darker tile absorbs heat and expands and contracts more than lighter tile. 

All of a home's building materials expand and contract; the hardwood floor, the tile and even the countertops all move over time. Any good pro should know how to account for these size changes and prevent expansion from wreaking havoc in a home. 

Tip: Make sure your tongue and groove subfloor does not get filled with dust, debris or adhesive mortar (thinset). This subfloor needs the ability to move, and the joints should not be too tight. 

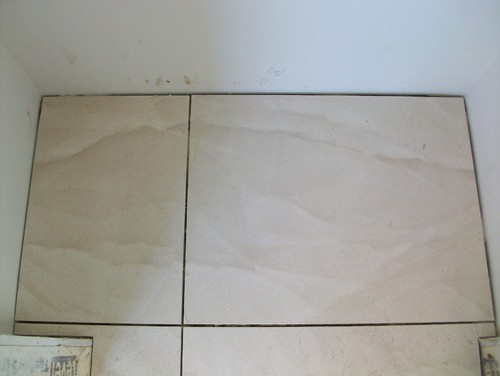
This photo shows some great tile work. The beautiful tile is nicely lined up, but I especially appreciate how there's no mortar or thinset where the tile meets the wall. Using mortar here can lead to tenting issues, since it prevents the tile floor from moving and expanding. This clean finish is exactly what you want to see in your bathroom. Make sure your tile contractor understands that you don't want your installation done with thinset on the edges that meet the wall. 

If you drive over bridges frequently — like I do every day — you'll notice that bridges have expansion strips. During the summer the bridge is quiet, since summer's heat has expanded the bridge's concrete and the expansion strips are pressed tight. But in the winter, driving over the same bridge sounds quite different; the expansion strips are wider, and they click-clack as your tires hit them. 

Designing tile floors to expand and contract follows some of these same principles. Uncoupling membranes underneath floor tile can improve your floor's flexibility. This photo shows a professional installing a Strata Matuncoupling membrane to account for minor floor movement.


Hearing a hollow noise when you're walking across newly tiled floors could be the early signs of tile bond failure. This sound results from poor thinset coverage.

In this photo the floor tile goes underneath the tub skirt. This is a solid design that allows for movement on the floor tile. 

Tip: Gently tapping set tiles with the wooden handle of a rubber mallet can help you find the hollow noise where poor thinset coverage has occurred. 

All steam showers have a modified thinset to account for quick thermal expansion. The powerful steam and heat in steam showers require a thinset that can accommodate immediate expansion and contraction. 


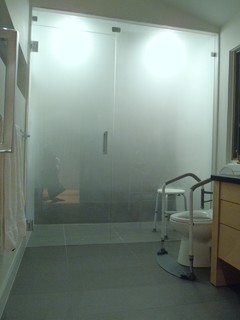
Glass expands more than many other building materials. Large panels like these let in lots of sunshine and quickly heat up the bathroom, increasing thermal expansion. 

For an installation like this, I'd make sure that the corners of the shower stall had two layers of a waterproofing membrane. Products like NobleSeal TShave a thicker membrane that can take some compression in the corners.


With extremely large bathrooms, expansion strips inlayed into the tile assembly are a must. In my opinion, any room larger than 15 feet in one direction should be using some kind of expansion strip and speciality thinsets and grouts to increase expansion and combat mortar fatigue.

Tuesday
May212013

Get Grout Magically Clean - Stains and All

If your grout is grossing you out, this deep-cleaning method will help it look new again!

Photo: American Cabinet & Flooring | Project Manager Randy WilsonTile - whether it's used as flooring, in the kitchen as a backsplash or for counters, or in the bathroom - has one great downfall: grout. Since grout is porous in nature, unsealed grout absorbs all kinds of stains, from mildew to coffee and everything in between. To say it's a headache to keep grout clean is an understatement.

NOTE: Be wary of using too much lemon juice with marble, since it can etch or damage the stone if left on too long. Hydrogen peroxide can be a safe alternative.


We inherited marble tile counters when we purchased our home. It's pretty clear that the grout was never properly sealed, so it soaks up stains like crazy. It makes our kitchen feel gross and grimy, even if it was just cleaned. While I'd love to replace the counters with a solid surface like quartz, it's just not in out budget - plus, we just can't justify getting rid of something that's perfectly fine otherwise.

Luckily, I have a foolproof method that will lift most household stains from that pesky grout. 

What you'll need:

  • Oxygenated bleach (like OxyClean)
  • Warm water
  • Coarse scrubbing brush (like an old toothbrush)
  • Towel
  • Lemon
  • Grout sealer

TIP: Cleaning colored grout should be done with special care. Bleaching agents (like chlorine bleach) can discolor and harm the colored grout. Fortunately, oxygenated bleach does not contain corrosive chemicals and is safe to use on all grout. 

1). Clean the surface thoroughly, removing any surface residue or debris. Let the grout dry fully.

2). Dissolve 2 tablespoons of oxygenated bleach in 2 cups of warm water. Wet the brush in the mixture and apply it to the grout. Let is soak in, then scrub the grout in a circular motion, which will loosen the stain more effectively than a front-and-back motion. If needed, dip the wet brush into the oxygenated bleach to make a paste. Wipe clean, then let dry.

TIP: To lift extra dark stains, squeeze lemon juice onto the stain, let it soak in, then scrub, wipe clean and let the grout dry. Use lemon juice sparingly, since it can damage some tile finishes.

3). Spray the tiles and grout with an ecofriendly cleaning spray and wipe them clean. Let the grout dry fully before making a final decision on whether your hard work paid off - damp grout looks darker than dry grout. 

4). Apply grout sealer after the grout has fully dried to avoid any future stains. Be sure to reapply it each year. 

Still having trouble getting that grout clean? For those impossible-to-remove stains, you might want to consider:

  • A commerical tile and grout cleaner
  • A coarser brush (avoid using metal bristles, though, as they can erode the grout)
  • Grout Renew

If after you've tried all three, the stain is still hanging strong, you may have to resort to removing the old grout and replacing it with new. 

TIP: An electric multitool, like the Dremel Mult-Max, helps to make quick and safe work of removing the old grout. 

(You are reading an article originally posted on Houzz)
Wednesday
Aug222012

ConsumerReports.org Buying Guide: Countertops

Photo: American Cabinet & Flooring Designer Ed Sheats

Getting Started

Replacing a kitchen or bathroom countertop can be a relatively inexpensive part of a total remodeling job, costing as little as $550 for 55 square feet (about 18 linear feet) of laminate counter. Then again, you can spend 10 times that on costlier materials. Whichever once you choose, buy enough the first time out. Delivery is expensive, color and veining vary from sample to sample, and materials bought separately may not match.

Traditionally, the more exotic countertop materials have been used in the kitchen. But more and more materials such as concrete, granite, limestone, marble - and yes, even stainless steel - are migrating to the bathroom. Though bathroom counters typically see less wear and tear than kitchen counters, you might want to limit materials that need TLC to powder rooms or lightly used guest bathrooms. 

Each material offers distinct advantages and disadvantages. We tested more than a dozen popular types to see how well they resisted stains, heat damage, cuts, abrasion, and impact. 

Think Big

Tiny samples make it hard to visualize how the finished counter will look. Check manufacturers' websites for brochures or smart phone and iPad apps that can help you match the counter to your cabinets. And look for online guides that let you try various materials and colors in virtual settings. Engineered stone, recycled glass, laminate, and solid surfacing are likely to match the samples you see in the store. If you're set on stone, however, go to a stone yard. You'll find significant variations not only from one slab to another, but even within the same slab. When you find a slab you like, put a deposit on it. 

Start with the Sink

A waterproof material such as concrete, solid surfacing, stainless steel, stone, or quartz is essential if the sink is under mounted - in other words, if it's raised into place from below the counter, rather than lowered from above so that its edges overlap the countertop. And keep in mind, each of these materials except quartz and stone can be matched to the sink. 

Tricks of the Trade

Besides being on the lookout for sales, you can shave the cost by mixing materials. Complement a large, modestly priced run of laminate on a kitchen island with a small but exquisite piece of stone. Since bathroom counters are typically smaller, cut costs by using less expensive stone or quartz remnants - essentially left over pieces from other jobs. 

Let the Fabricator do the Measuring

All measurements and templates should be made by the fabricator or installer including cut-outs for the sink and faucet. Then any errors are the pro's responsibility, not yours. 

Types of Countertops

We found significant strengths and weaknesses among materials, but few differences among brands. Here are the types of countertops to consider. 

Quartz
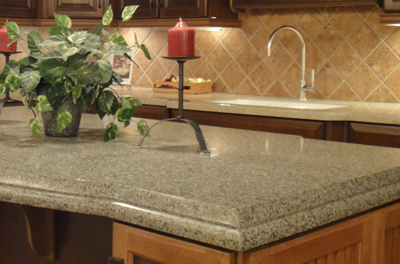
Photo: American Cabinet & Flooring

Also known as engineered stone, quartz is a blend of stone chips, resins, and pigments. It's an ideal material for high-traffic applications. It comes in many vibrant colors and styles that mimic granite and marble. 

PROS: It survived a gauntlet of spills, hot pots, knives, and more with top scores and it doesn't have to be sealed for stain protection. Because it's waterproof, it's a sound choice to be paired with undermounted sinks

CONS: Quartz won't resist impacts as well as granite, and its edges can chip. Some patterns can appear unnaturally uniform, although manufacturers are trying for a more random look closer to natural stone. 


Granite
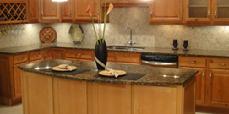
Photo: American Cabinet & Flooring

It's still what you'll see in magazines and real-estate ads, but fancy faux materials are giving granite serious competition. Granite is a good choice for areas that get a lot of use. It comes in many colors and variations and provides a natural stone look.

PROS: Like quartz, it survived our gauntlet of spills, hot pots, knives, and more with top scores.

CONS: Unlike quartz, it needs periodic sealing for stain protection. Color and grain may differ from store samples. 


Tile

Ceramic Tile comes in an almost limitless selection of colors and patterns. It mixes nicely with other materials, and it works well on a backsplash or island top.

PROS: Tile is inexpensive and relatively easy to install. It offers good heat resistance, so it's a good choice around stoves. Buying a few extra tiles will allow you to repair localized damage easily, one tile at at time.

CONS: Poor impact resistance is a sore point. The grout is likely to stain even when it's sealed. Darker grout can help. 


Laminates
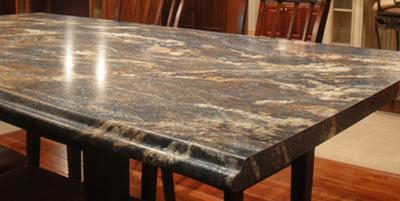
Photo: American Cabinet & Flooring

This material generally consists of layers of paper or fabric impregnated with resin over composition wood. Laminates are inexpensive and relatively easy to install. Use them in areas of heavy use but minimal abuse. This material is available in hundreds of fun patterns (try boomerang), interesting colors (hollyberry, anyone?), and detailed edges. Laminates typically show seams on the front edge and between the backsplash and counter. Post-forming is a process that melds adjoining sections, making them look continuous, but it offers fewer color choices. 

PROS: Laminates excelled at resisting stains, impact, and heat; they also withstood our abrasive pads nicely. They're easy to clean and relatively easy to install. Though laminates are no longer trendy, they still appeal to remodelers on at tight budget.

CONS: Most versions have a colored top layer over a dark core, which shows at the edges. Water can seep through seams or between the countertop and backsplash, weakening the material beneath or causing lifting. Laminate is easily scratched and nicked and can't be repaired. Textured finishes are better than flat finishes at hiding imperfections. 


Solid Surfacing
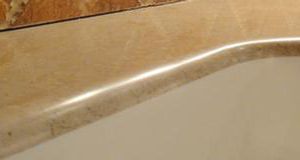
Photo: American Cabinet & Flooring

Made of polyester or acrylic resins combined with mineral fillers, this material imitates concrete, marble, and other types of stone, as well as quartz (essentially an imitation of an imitation). Solid surfacing comes in various thicknesses and can be joined almost invisibly into one apparently seamless expanse. It can also be sculpted to integrate the sink and backsplash, and routed to accept contrasting inlays. 

PROS: Resistance to heat and impact are pluses, and scratches and small nicks can be buffed out and repaired. Because the surfacing is waterproof, it's a sound choice for an undermounted sink

CONS: Solid surfacing scratches easily, and prolonged heat can cause discoloration. Cost can rival that of quartz and granite, which are much tougher and more authentic looking. 


Paper Composite

We tested a version from Richlite, which says that its paper-and-resin countertops are green, in part because the paper comes from renewable resources. 

PROS: The product did well at resisting stains and heat.

CONS: It was only fair when it came to cuts and abrasions. What's more, it doesn't use recycled paper, and its resin is petroleum-based and non-renewable. 


Concrete

Concrete countertops can provide a unique look. This exclusive material is typically custom-formed by local fabricators, so quality may vary.

PROS: Concrete can be tinted and textured and can include stone chips.

CONS: It chips and scratches easily and can develop hairline cracks. Topical sealers can protect against stains but not heat; penetrating sealers can handle heat, but not stains. 


Stainless Steel

It lets you integrate countertops with stainless appliances for a sleek, professional kitchen look. It can be welded, ground, and buffed away to get rid of seams.

PROS: Resistance to heat and stains is a plus. Because stainless steel is waterproof, it's a sound choice for an undermounted sink.

CONS: Steel dents and scratches easily and shows fingerprints. (If fingerprints are an issue, consider faux stainless laminate instead.) Drain cleaners and hard-water-deposit removers can discolor steel. 


Limestone

Limestone provides a stone look without heavy veining. It's attractive but impractical. Use it only in low-traffic areas.

PROS: Limestone resists heat well.

CONS: Scratches and dings from our dropped 5-pound weight marred the surface of this soft, porous stone. And even a high-quality sealer didn't protect against stains. Twelve of the 19 substrates we applied left permanent marks after they were left on the surface for just 24 hours. 


Butcher Block

These hardwood countertops provide a country kitchen look. Maple is most common, but you'll also find red oak and teak.

PROS: This material is useful for food preparation such as chopping and slicing. It's relatively easy to install and repair.

CONS: Damage from heat, cuts, scrapes, and impacts make for high maintenance. Butcher block countertops must be treated regularly with mineral oil or beeswax. Varnished butcher block was extremely stain-resistant, but terrible at everything else. Butcher block with an oil finish was better at resisting heat, but stains spread and were impossible to remove. Fluctuations in humidity affect wood, making butcher block a poor choice for over a dishwasher or around a sink.


Marble

This material provides a traditional look. Consider it for areas with medium traffic.

PROS: Small nicks and scratches can be polished out.

CONS: Marble chips and scratches easily. And you'll need to seal marble periodically to protect it from staining. Most stains that marred and unsealed marble wiped away with water on sealed samples. But hard-water-deposit removers left a permanent mark, even on sealed stone. 


Recycled Glass

Take shards of recycled glass, turm them into a countertop and the result is an infusion of color and style. 

PROS: Best for a contemporary look when it's made with large shards, or it can resemble solid surfacing when it's finely ground. Resistant to heat, cuts, and scratches.

CONS: But chips and stains can be a problem. Unlike other recycled-glass counters we tested. Cosentino's Eco line developed a thin crack during our heat tests.


Soapstone

You'll have to rub the soapstone with mineral oil to reveal and maintain its beauty.

PROS: Best for adding the beauty of stone to a low-traffic kitchen. It withstands heat very well, and small scratches can be repaired. Slabs vary, so go to a stone yard.

CONS: It's easily sliced, scratched, and nicked. Stain resistance is so-so, and it needs to be periodically rubbed with mineral oil.


Bamboo

While bamboo may be eco-friendly, it isn't user-friendly.

PROS: Best for show rather than daily use. It's available in several styles, including a parquet pattern.

CONS: It's easily stained, scorched, sliced, and nicked. The maker might warn against using it around a sink, because moisture can warp the material. It may darken over time.


Photo: American Cabinet & Flooring Designer Amber Albrecht

Copyright © 2006-2012 Consumers Union of U.S., Inc.