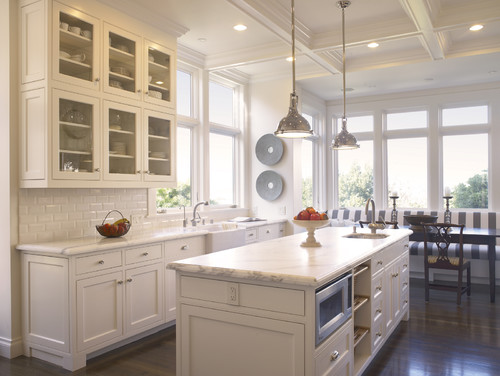
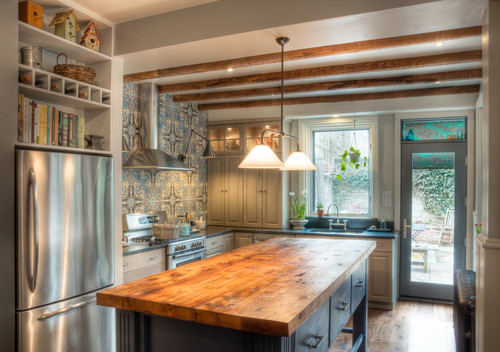
Photo: American Cabinet & Flooring Designer Ed Sheats
Getting Started
Replacing a kitchen or bathroom countertop can be a relatively inexpensive part of a total remodeling job, costing as little as $550 for 55 square feet (about 18 linear feet) of laminate counter. Then again, you can spend 10 times that on costlier materials. Whichever once you choose, buy enough the first time out. Delivery is expensive, color and veining vary from sample to sample, and materials bought separately may not match.
Traditionally, the more exotic countertop materials have been used in the kitchen. But more and more materials such as concrete, granite, limestone, marble - and yes, even stainless steel - are migrating to the bathroom. Though bathroom counters typically see less wear and tear than kitchen counters, you might want to limit materials that need TLC to powder rooms or lightly used guest bathrooms.
Each material offers distinct advantages and disadvantages. We tested more than a dozen popular types to see how well they resisted stains, heat damage, cuts, abrasion, and impact.
Think Big
Tiny samples make it hard to visualize how the finished counter will look. Check manufacturers' websites for brochures or smart phone and iPad apps that can help you match the counter to your cabinets. And look for online guides that let you try various materials and colors in virtual settings. Engineered stone, recycled glass, laminate, and solid surfacing are likely to match the samples you see in the store. If you're set on stone, however, go to a stone yard. You'll find significant variations not only from one slab to another, but even within the same slab. When you find a slab you like, put a deposit on it.
Start with the Sink
A waterproof material such as concrete, solid surfacing, stainless steel, stone, or quartz is essential if the sink is under mounted - in other words, if it's raised into place from below the counter, rather than lowered from above so that its edges overlap the countertop. And keep in mind, each of these materials except quartz and stone can be matched to the sink.
Tricks of the Trade
Besides being on the lookout for sales, you can shave the cost by mixing materials. Complement a large, modestly priced run of laminate on a kitchen island with a small but exquisite piece of stone. Since bathroom counters are typically smaller, cut costs by using less expensive stone or quartz remnants - essentially left over pieces from other jobs.
Let the Fabricator do the Measuring
All measurements and templates should be made by the fabricator or installer including cut-outs for the sink and faucet. Then any errors are the pro's responsibility, not yours.
Types of Countertops
We found significant strengths and weaknesses among materials, but few differences among brands. Here are the types of countertops to consider.
Quartz
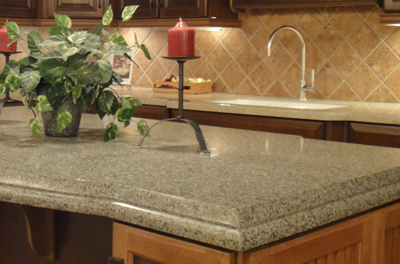 Photo: American Cabinet & Flooring
Also known as engineered stone, quartz is a blend of stone chips, resins, and pigments. It's an ideal material for high-traffic applications. It comes in many vibrant colors and styles that mimic granite and marble.
PROS: It survived a gauntlet of spills, hot pots, knives, and more with top scores and it doesn't have to be sealed for stain protection. Because it's waterproof, it's a sound choice to be paired with undermounted sinks.
CONS: Quartz won't resist impacts as well as granite, and its edges can chip. Some patterns can appear unnaturally uniform, although manufacturers are trying for a more random look closer to natural stone.
Granite
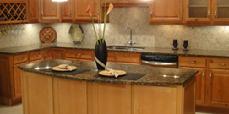 Photo: American Cabinet & Flooring
It's still what you'll see in magazines and real-estate ads, but fancy faux materials are giving granite serious competition. Granite is a good choice for areas that get a lot of use. It comes in many colors and variations and provides a natural stone look.
PROS: Like quartz, it survived our gauntlet of spills, hot pots, knives, and more with top scores.
CONS: Unlike quartz, it needs periodic sealing for stain protection. Color and grain may differ from store samples.
Tile
Ceramic Tile comes in an almost limitless selection of colors and patterns. It mixes nicely with other materials, and it works well on a backsplash or island top.
PROS: Tile is inexpensive and relatively easy to install. It offers good heat resistance, so it's a good choice around stoves. Buying a few extra tiles will allow you to repair localized damage easily, one tile at at time.
CONS: Poor impact resistance is a sore point. The grout is likely to stain even when it's sealed. Darker grout can help.
Laminates
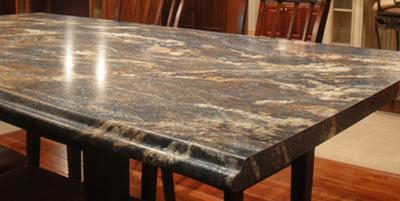 Photo: American Cabinet & Flooring
This material generally consists of layers of paper or fabric impregnated with resin over composition wood. Laminates are inexpensive and relatively easy to install. Use them in areas of heavy use but minimal abuse. This material is available in hundreds of fun patterns (try boomerang), interesting colors (hollyberry, anyone?), and detailed edges. Laminates typically show seams on the front edge and between the backsplash and counter. Post-forming is a process that melds adjoining sections, making them look continuous, but it offers fewer color choices.
PROS: Laminates excelled at resisting stains, impact, and heat; they also withstood our abrasive pads nicely. They're easy to clean and relatively easy to install. Though laminates are no longer trendy, they still appeal to remodelers on at tight budget.
CONS: Most versions have a colored top layer over a dark core, which shows at the edges. Water can seep through seams or between the countertop and backsplash, weakening the material beneath or causing lifting. Laminate is easily scratched and nicked and can't be repaired. Textured finishes are better than flat finishes at hiding imperfections.
Solid Surfacing
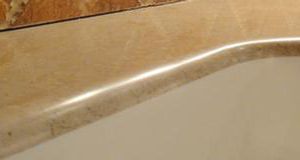 Photo: American Cabinet & Flooring
Made of polyester or acrylic resins combined with mineral fillers, this material imitates concrete, marble, and other types of stone, as well as quartz (essentially an imitation of an imitation). Solid surfacing comes in various thicknesses and can be joined almost invisibly into one apparently seamless expanse. It can also be sculpted to integrate the sink and backsplash, and routed to accept contrasting inlays.
PROS: Resistance to heat and impact are pluses, and scratches and small nicks can be buffed out and repaired. Because the surfacing is waterproof, it's a sound choice for an undermounted sink.
CONS: Solid surfacing scratches easily, and prolonged heat can cause discoloration. Cost can rival that of quartz and granite, which are much tougher and more authentic looking.
Paper Composite
We tested a version from Richlite, which says that its paper-and-resin countertops are green, in part because the paper comes from renewable resources.
PROS: The product did well at resisting stains and heat.
CONS: It was only fair when it came to cuts and abrasions. What's more, it doesn't use recycled paper, and its resin is petroleum-based and non-renewable.
Concrete
Concrete countertops can provide a unique look. This exclusive material is typically custom-formed by local fabricators, so quality may vary.
PROS: Concrete can be tinted and textured and can include stone chips.
CONS: It chips and scratches easily and can develop hairline cracks. Topical sealers can protect against stains but not heat; penetrating sealers can handle heat, but not stains.
Stainless Steel
It lets you integrate countertops with stainless appliances for a sleek, professional kitchen look. It can be welded, ground, and buffed away to get rid of seams.
PROS: Resistance to heat and stains is a plus. Because stainless steel is waterproof, it's a sound choice for an undermounted sink.
CONS: Steel dents and scratches easily and shows fingerprints. (If fingerprints are an issue, consider faux stainless laminate instead.) Drain cleaners and hard-water-deposit removers can discolor steel.
Limestone
Limestone provides a stone look without heavy veining. It's attractive but impractical. Use it only in low-traffic areas.
PROS: Limestone resists heat well.
CONS: Scratches and dings from our dropped 5-pound weight marred the surface of this soft, porous stone. And even a high-quality sealer didn't protect against stains. Twelve of the 19 substrates we applied left permanent marks after they were left on the surface for just 24 hours.
Butcher Block
These hardwood countertops provide a country kitchen look. Maple is most common, but you'll also find red oak and teak.
PROS: This material is useful for food preparation such as chopping and slicing. It's relatively easy to install and repair.
CONS: Damage from heat, cuts, scrapes, and impacts make for high maintenance. Butcher block countertops must be treated regularly with mineral oil or beeswax. Varnished butcher block was extremely stain-resistant, but terrible at everything else. Butcher block with an oil finish was better at resisting heat, but stains spread and were impossible to remove. Fluctuations in humidity affect wood, making butcher block a poor choice for over a dishwasher or around a sink.
Marble
This material provides a traditional look. Consider it for areas with medium traffic.
PROS: Small nicks and scratches can be polished out.
CONS: Marble chips and scratches easily. And you'll need to seal marble periodically to protect it from staining. Most stains that marred and unsealed marble wiped away with water on sealed samples. But hard-water-deposit removers left a permanent mark, even on sealed stone.
Recycled Glass
Take shards of recycled glass, turm them into a countertop and the result is an infusion of color and style.
PROS: Best for a contemporary look when it's made with large shards, or it can resemble solid surfacing when it's finely ground. Resistant to heat, cuts, and scratches.
CONS: But chips and stains can be a problem. Unlike other recycled-glass counters we tested. Cosentino's Eco line developed a thin crack during our heat tests.
Soapstone
You'll have to rub the soapstone with mineral oil to reveal and maintain its beauty.
PROS: Best for adding the beauty of stone to a low-traffic kitchen. It withstands heat very well, and small scratches can be repaired. Slabs vary, so go to a stone yard.
CONS: It's easily sliced, scratched, and nicked. Stain resistance is so-so, and it needs to be periodically rubbed with mineral oil.
Bamboo
While bamboo may be eco-friendly, it isn't user-friendly.
PROS: Best for show rather than daily use. It's available in several styles, including a parquet pattern.
CONS: It's easily stained, scorched, sliced, and nicked. The maker might warn against using it around a sink, because moisture can warp the material. It may darken over time.
 Photo: American Cabinet & Flooring Designer Amber Albrecht
Copyright © 2006-2012 Consumers Union of U.S., Inc.


 American Cabinet & Flooring