twitter Facebook Google+

                 linkedin pinterest houzz  

Click for the BBB Business Review of this Countertops in Denver CO 

Google Review 

Sales & Promotions!

Architects, interior designers, and more ∨

Hire a decorator to find that just-right couch and coffee tables for your living room.
Find wall shelves, a customizable closet organizer and stylish furniture for home to whip your closet into shape.
Remodeling and Home Design

Qualify Us Now! ProView 

Cambria logoUp to $45,000 interest free for your project!Finance by Cambria

 convenient and easy.

  • No Money Down
  • Interest-free financing for up to one year without payments
  • Financing up to $45K for any project that includes Cambria (including cabinets, flooring, sinks, plumbing, install & more)
  • Secure paperless telephone application
  • Credit decision in less than 10 minutes


Entries in Sink (5)

Wednesday
Nov132013

15 Doggone-Good Tips for a Pet Washing Station

Article By:

This is going to sound harsh, but your dog stinks. Don't feel bad — it's natural, and you are nice to let him swim in that creek and run in the mud and roll around in yucky things. You don't notice anymore, because your schnoz is used to it. But when I come over to visit, the smell of your dog's bed and the smell on my hand after I pet him is very noticeable, so chances are, the same smell is in your carpets, car and any furniture Fido lounges on. 

You probably mean to wash the dog more often, but it's a pain in the neck. Large dogs are tough to get into bathtubs, the big shake afterward makes a mess, and the whole thing can be quite an ordeal. 

Now that we've got that out of the way, a home pet washing station isn't looking so crazy. In fact, you can use them for other things, too. A builder who's been adding them for years, Vincent Longo, says that one client uses his pet care station for cleaning dirty golf clubs, gardening tools and even the kids after a busy day making mud pies. 

Whatever your thoughts about pet wash stations, there's no denying their popularity. If you're thinking about adding one, here are some ideas to consider. 

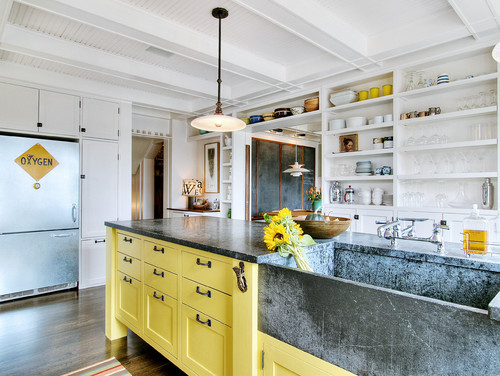
Incorporate the washing station into the mudroom. Mudrooms are a very popular spot for dog wash stations. Dogs enter from the back or side door, and their muddy paws never make it into the rest of the house.


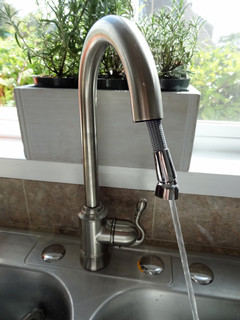
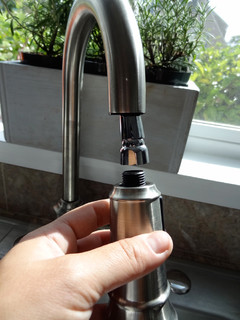
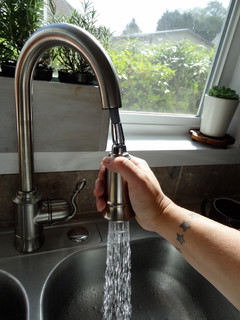
Include a handheld showerhead or sprayer. Not only will it help you get your dog's entire bod nice and clean, but it will also let you do a quick paws-only wash.


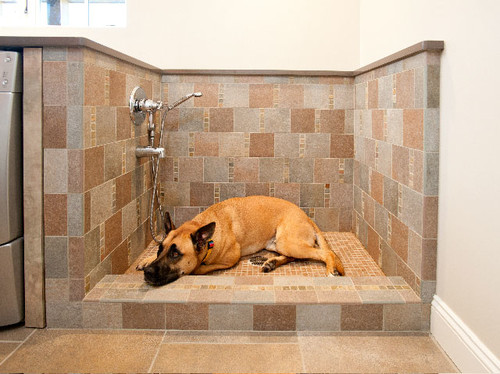
Be prepared for the big shake. Anyone who has ever washed dogs knows that afterward they shake off the water with gusto and get the entire area wet (including the person doing the washing). Having a surround and floor that can stand up to water will keep the big shake from damaging drywall and floors. 

If your dog is the type that runs around the house in crazy circles after a bath, all I can recommend is shutting the mudroom door until Sparky dries off and calms down, or else letting him into the garage for the runaround.


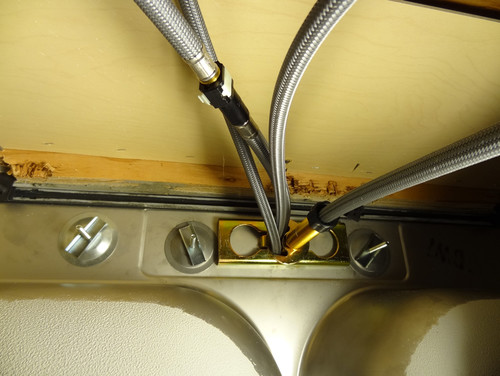
Go bigger with the drain. Longo recommends using a 3-inch drain in a pet washing station. It will handle dog hair better than the standard 1½- to 2-inch shower drain. He also recommends adding a hair filter over the drain.

Clearly, this dog loves the pet wash station and is just begging for a rinse.
 

Consider an elevated dog bath for smaller pets. It will be easier on your back and knees in the long run, as long as your dog is willing and able to jump into it, or you don't have a problem lifting your pet into place.


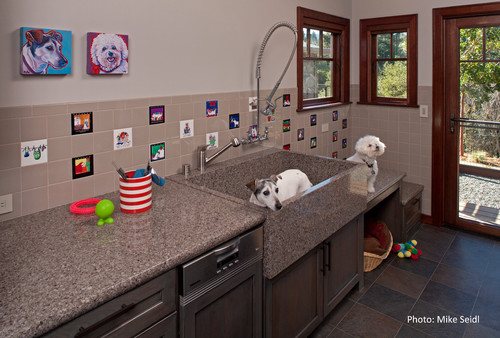
Step it up. In this clever design, the counters double as steps up to the basin. The middle step serves as a drying station and has room for a cozy pet bed underneath. 

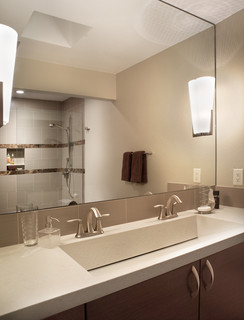
For smaller dogs a large utility sink plus a sprayer is all you need. 

Use what the pros use. You can find professional bathing stations complete with ladders or ramps at places like ProGroom. 

Combine gardening and pet grooming. Pet washers are also great places to water plants, rinse off mucky Wellies and clean your gardening tools.


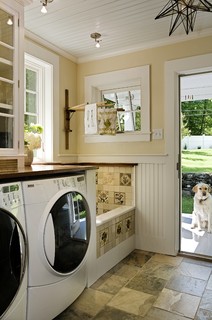
Incorporate your own style. This custom dog bath utilizes vintage tiles that the homeowner had been collecting for years.


Have drying towels handy. An overhead drying rack is a handy spot for drying dog towels as well as laundry. If you utilize this kind of system, be sure to remove your people laundry before the big shake. 

Embrace the theme. This area celebrates dogs in the wallpaper and has plenty of shelves for dog supplies.


Consider going high-end. Do you and your pet have luxurious tastes? If so, try a dog-specific tub. When family-owned company Hydro Systemsdecided to dip into dog bath design, the owners collaborated with their groomer of more than 20 years, adding features like skidproofing to prevent slips and slides, and even an optional jetted whirlpool system. 

Is your dog the spa type? Do tell, because this idea is certainly new to me, and I can't quite wrap my head around it. Unless the dog's name is Zsa Zsa. Then it makes sense. (Seriously, though, the folks who designed this tub and added the spa option say it's a matter of personality on a case-by-case basis.)


This model is for smaller dogs. I included it because a photo of a dog sitting in its own personal bath wearing a bling-bling necklace simply must be shared.


Think about storage for supplies. Just like a human shower area, this one has handy shelves for dog shampoo and sponges.


Take it outside. Homeowners are increasingly incorporating pet washing stations into their outdoor showers. All it takes is a handheld sprayer or showerhead that can reach down to the ground. Rinse off muddy paws here before they can get inside and muck up your rugs.


Provide a clean path to the door. A concrete, gravel or stone walkway will prevent your dog from dirtying up his paws on the way in from an outdoor wash. Unless, of course, the dog breaks free and does that crazy circle thing out in the yard.


Friday
Oct112013

How to Replace Your Kitchen Faucet

Article By: Meg Padgett

Kitchen remodels require a multitude of skills from conception to completion, and ours was no exception. From tearing down walls to replacing floors, we've been through it all — and we're exhausted. Luckily, the very last change was the quickest and easiest to tackle.

Replacing our basic kitchen faucet with a gorgeous one-handle high-arc pull-down faucet was the finishing touch our kitchen remodel needed. The process was surprisingly easy — it's a do-it-yourself project that almost anyone can accomplish. 

All you'll need are a new faucet and a few household tools:

  • Adjustable basin wrench
  • Slip joint pliers
  • Safety glasses
  • Bucket or bowl for catching water 

Clean out the area underneath the sink so you have ample space to inspect your work area and move about freely. Next, turn off both the hot and cold water supplies via the shutoff valve under the sink. Test that the water is off at the faucet.


Using a basin wrench or slip joint pliers, unscrew the connections for each water line at the shutoff valve. Have a bowl handy to catch any residual water, and place the ends of the water lines in the bowl.


Unscrew the mounting nuts that hold the faucet to the sink, using either the wrench or the pliers. Remove the faucet from the sink and set it aside. Instead of tossing the old faucet into the trash, consider donating it to a salvaged goods shop, like a Habitat for Humanity ReStore. Check here for locations

Once the old faucet has been removed, clean the surface of the sink. I used a baking soda paste to eliminate water stains. 

Place the gasket that came with your new faucet around the sink hole and slip the supply lines and faucet tailpipe through. Our new Moen Woodmere faucet required only a single hole for installation, so we capped the remaining three holes on our stainless steel sink with covers that can be found at any hardware store. In lieu of capping, consider adding accessories such as a soap dispenserwater filter faucet or hot water dispenser. You can also use the deck plate that is provided with some models.

Note: Some faucets do not include gaskets; you need to apply sealant to the sink.


Secure the faucet in place from beneath the sink with the provided installation hardware. Ensure the faucet is positioned correctly and then tighten the mounting nut securely. Check the faucet from above to make sure it doesn't wobble or wiggle. 

Attach the faucet's supply lines to the shutoff valves and tighten the connections with a wrench.


Our faucet included a pullout sprayer, which required a few extra steps. If yours does too, simply insert the spray hose through the faucet and push through until the hose is visible beneath the sink.


Then attach the spray hose to the water line and push in the locking clip.


Turn on your water supply and test that the water is working. If the stream is irregular, you'll need to adjust the flow at the supply.


Attach the spray nozzle to the spray hose.


Tighten the connection with a wrench or pliers.


Attach the spray nozzle weight to the hose between the marked area and the curve.


Once again test that the spray nozzle works.


Here's what everything looks like from below once the faucet is fully installed.


Wednesday
Oct022013

Master Bathroom Choices: One Sink or Two?

Article By: Tiffany Carboni

One sink or two? This is the classic debate for couples renovating a sizable master bathroom. There are pros and cons to both. So what's right for your bathroom? I spoke with architect Thayer Hopkins, who offered up what you need to consider about installing either a single or double sink during your master suite remodel. 

“Couples these days usually prefer the idea of two sinks for one simple reason,” says Hopkins. “They lead busy lives and need access to the bathroom at the same time."

On paper the double sink looks ideal. But let's walk through this two-sided argument. 

Some Benefits of 2 Sinks 

Personal space. With two sinks, theoretically no one will ever again spit toothpaste on your hand as you're trying to wash up. Also, your very own sink means you can keep your makeup, moisturizers or shaving kit out as necessary without having your partner knock anything over.

And by having your own designated sink, you don’t have to stare at your partner's toothpaste residue while you're brushing your own teeth. Even in the best of partnerships, there are some things that neither of you want to see of the other.

Two sinks can help make you and your partner feel like you're in a loving, adult relationship rather than siblings fighting over a single faucet.
 

Some Disadvantages of 2 Sinks

“The convenience of two sinks has its tradeoffs to consider,” Hopkins notes.

Cost. It costs more to plumb two sinks than one. Add to that the additional cost of finishes and a larger vanity.

Space. A typical sink basin is about 17 to 19 inches wide. “If there isn’t a solid 6 feet or more available for two sinks, I will counsel clients to stick with just one sink basin,” says Hopkins.“These 6 feet or more will give the minimum 11- to 12-inch buffer needed between basins to keep a couple from banging elbows and crowding each other out.”
 

Even if you do have a good amount of space, two sinks will eat into counter space that could be used for tasks, displays etc. Two sinks will also double the amount of undercabinet space taken up by the double drain pipes. 

If you've got ample storage or counter space elsewhere in the bathroom, this space tradeoff may not pose any problems.


Two-sink styles you can both agree on. The prefabricated two-sink vanity is one of the easiest styles to choose and install in a bathroom because of its fixed dimensions. In other words, there's no guessing if elbow clearance might be an issue for you and your partner. You can see for yourself in the showroom or tape out the dimensions prior to ordering a vanity online to test the sink measurements.

Custom vanities offer even more benefits, as they can be tailored to your exact wishes. But you and your partner have to be willing to work with a designer or cabinetmaker to cull through the endless possibilities.


You can also use two freestanding pedestal sinks, either for aesthetics or to overcome any space limitations, as they can be put side by side or on separate walls. “Pedestal sinks have made a resurgence in the last 10 to 15 years," Hopkins says. "As a result, there’s more product available to suit different needs.” 

If you don’t need the counter space or storage space in a vanity, two pedestals will create an airy feel that may sway your choice.
 

You can also use a single basin with two separate faucets. 

This sort of double sink performs duties for two people while acting like one sink underneath with its single drain, which leads us to …


The Benefits of the Single Sink

Leaves room for other amenities. “I might push for a couple to install only one sink if there’s a possibility of using that extra space for a separate shower and tub instead,” says Hopkins.

Cost and cleaning. One sink, with one hardware set, is cheaper than two, and one sink is easier to clean than two.

More storage. You can have more storage underneath if there's only one drainpipe. If you’re the kind of person who loves to pull out every bit of makeup, you’re going to get frustrated if you don't have enough room for it because of that extra sink.
 

More counter space. You can get a lot more usable counter space if there’s only one basin. More countertop space equals more display opportunities and more room for your everyday toiletries.

Monday
Sep092013

Designing Your Kitchen: Deep Thoughts for Your Sink

Article By: Jennifer Ott

I tend to think bigger is always better. Maybe it's because I live in Texas. So when it comes to working in my own kitchen, I do love having a nice, wide sink. It offers plenty of space for food prep and cleanup, perfect for our two-cook household. But what about bowl depth? Sure, an extra-deep sink is good for hiding dirty dishes, but it can also do a number on your back, especially if you are of a shorter persuasion. 

Here are some tips for selecting the correct sink depth for you and how you use your kitchen. 

Kitchen sinks have been steadily growing in bowl depth. Most sinks used to be as shallow as 6 inches or less; the average today is 8 to 10 inches, and they can go as deep as 12 inches. If you repurpose a vintage sink, such as the one pictured here, it will likely be on the shallow side. 

When to Go Shallow

A shallow bowl depth — say, less than 8 inches — is going to be the most comfortable bowl depth for those who are 5-foot-4 or shorter or who are very tall (6-foot 2 or taller). A shallower bowl depth allows a shorter person to work in the sink without having to lean into it to wash items in the bottom. Taller folks can work in a shallower sink without having to crouch down or hunch over.


Shallow sinks also take up less space in the sink cabinet below them. Not only does this free up storage space, but it also makes it easier to install and access the garbage disposal and the plumbing fittings. Shallow sinks also tend to cost a bit less than deeper versions.


When to Go Deep

For those who, like me, seem to dirty every dish in the house when making a meal, a superdeep sink is ideal. You have plenty of space for prepping meals, and in a pinch you can hide your dirty dishes in there until you are able to wash them. This is a nice sink for bakers or others who are regularly washing large sheet pans and cutting boards, too. A sink depth of at least 10 inches will give you the room you need to wash larger dishes without splashing water all over the floor and surrounding countertops.
 

Keep in mind that if you are going with an undermount sink, you will gain the additional depth of the countertop thickness. You can offset this, however, by using a raised sink grid, as shown here. 

Try One On for Size

When selecting your kitchen sink bowl depth, it's all about finding one that is just right for your height and how you use your sink. If you can, check out kitchen showrooms that have a variety of sink sizes on display —mounted at the standard 36-inch countertop height — to see what sink depth feels most comfortable.

Friday
Sep062013

Bathroom Details: Show Off Your Sink Line

Article By: John Whipple

Many modern and classic sink designs expose our waste and water supply lines. If your new sink is going to show off your plumbing, you'll want to choose a good sink trap — specifically a P-trap, named for its shape, like the letter "P" — and matching sink fittings. 

There are two basic kinds of P-traps: A European-style P-trap has no U-shaped pipe, while the North American style does. Regardless of which shape you choose, you can find a sink trap in all kinds of materials — including nickel, oil-rubbed bronze, stainless steel, brass and copper — to coordinate with your bathroom's style. 

Your sink trap holds back a little water after each use to keep air from your sewer pipes from coming back into your home. Consistent sink use, from simply running the tap to washing your hands, keeps the system working well. 

In seldom-used bathrooms, water in the trap slowly evaporates. If you have a guest bath you don't use very often, get into the habit of sending a little water down the sink from time to time to maintain the proper water level in the P-trap. 

Toilets need this same care; make sure you flush toilets in seldom-used bathrooms once every one to three weeks.


Kohler Adjustable P-trap With Tubing Outlet, 1¼ by 1½ Inches - $126.15 »
This shot of a Kohler adjustable P-trap (North American style) shows where the trap got its name; if you tilt your head to the right, the pipe looks a lot like the letter "P." The curved part of the trap retains a small amount of water after the sink is used.

This shot shows a European-style sink trap, which doesn't have the same P shape and can actually save a little more room under your sink. The water in these traps acts the same way as in the previous trap. This clever installation has a shelf notched around the well-placed trap, creating great towel storage under the sink. 

Here's a shot of the same sink in the previous photo. The installer did a great job with this setup. If you have a small vanity and need extra storage, consider using one of these European-style P-traps to save room under your sink. 

Most sink traps are installed perfectly centered on the sink with the pipe running from the front of the sink to the back ...


... while some installations show off the curve with the pipe run parallel to the wall, allowing you to see the full P shape.


Plan your fittings to fit the space and feel of the room. This bathroom has loads of old-home charm, and the exposed plumbing is part of that look. A sleek, modern pipe would look out of place with this sink.


If you're planning for your golden years and want a more universal bathroom design, understand thatAmericans with Disability Act–compliant bathrooms have room to roll under a bathroom sink with a wheelchair. This means choosing a pipe that won't bang anyone's legs or knees. 

Make sure the front of your sink is no higher than 34 inches off your finished flooring to comply with theNational Kitchen and Bath Association's planning guidelines for accessibility. 

Tip: If you want more room under your sink, ask your plumber to send the sink waste line to the back wall and install the P-trap in the wall or right up against it.


Some of today's sink designs don't need a P-trap, like the one in this photo. This sink doesn't even have a waste line; the water simply slides down into the shower drain! 

Tip: Today a sink's graywater (wastewater) can be used to fill the toilet and cut down on water use. If you want your home to save on natural resources, this is a great ecofriendly option.