twitter Facebook Google+

                 linkedin pinterest houzz  

Click for the BBB Business Review of this Countertops in Denver CO 

Google Review 

Sales & Promotions!

Architects, interior designers, and more ∨

Hire a decorator to find that just-right couch and coffee tables for your living room.
Find wall shelves, a customizable closet organizer and stylish furniture for home to whip your closet into shape.
Remodeling and Home Design

Qualify Us Now! ProView 

Cambria logoUp to $45,000 interest free for your project!Finance by Cambria

 convenient and easy.

  • No Money Down
  • Interest-free financing for up to one year without payments
  • Financing up to $45K for any project that includes Cambria (including cabinets, flooring, sinks, plumbing, install & more)
  • Secure paperless telephone application
  • Credit decision in less than 10 minutes


Thursday
Oct032013

October Checklist for a Smooth-Running Home

Article By: Laura Gaskill

From the first crisp mornings spent raking leaves, to the last exciting days preparing for trick-or-treaters, October is usually a busy month around the house. Mix in necessary home maintenance (clean rain gutters, roll hoses) with items you've been wanting to get to (finish a decorating project, pick up gourds for the front porch) and you'll find your to-do list vanishing before your eyes. Work your way through the 11 tasks on our checklist, and by the end of the month you'll have your home winter-ready — and a bit more beautiful, to boot. 

1. Clean rain gutters after leaves fall. Leaves and other debris that clog your rain gutters can cause leaks, so it is best to get to this chore as soon as possible after most of the autumn leaves have fallen. If your house is smaller, and you feel comfortable on a ladder, clearing rain gutters is a fairly straightforward job to do yourself. If your home is more than one story, hire a pro.

2. Repair roof and siding. If you see any damaged areas to your roof, siding or shingles, it is important to take care of the problem before winter storms come through. 

3. Scrub and store outdoor furniture and tools. By the end of October, with light fading earlier and weather becoming less friendly, your outdoor seating area is likely to go unused. Rather than leave furniture out in bad weather, put it away in a shed or the basement. This month, also aim to clean your gardening tools and put them away neatly. Those in cold climates should move winter tools (snow shovel, ice scrapers) to a convenient spot now so that you don't have to scramble when the first frost hits. 

4. Put up storm windows and doors. If you use storm windows or doors, now is the time to get them installed. These features can help conserve energy during cold months and protect your home from drafts.
 

5. Give porch a fall makeover. Sweep away the summer sand, refresh pots with fall flowers, clean front windows and use a broom or soft brush to clean up siding. An armful of decorative gourds and pumpkins makes an easy display that will last all month.

6. Shut off outdoor faucets and roll hoses.Freezing temperatures can damage hoses and water pipes, so be sure to shut off faucets and empty hoses of water before the first big freeze.


7. Organize mud room. In the rush of getting back to school — and work — this hardworking entryway can take a major beating. Schedule a weekend afternoon to sort through the mud room, putting away unneeded items and paper clutter and cleaning the floors. Invest in a few new baskets, bins and hooks to corral items. 

8. Check safety devices. Every home should have a carbon monoxide detector, as well as smoke detectors positioned throughout the house. Take a moment to test that yours are in working order, and change batteries if needed. 

9. Sharpen knives. If you notice your kitchen knives getting a bit harder to use, that's a sign they are due for a professional sharpening. Regular sharpening at home can help extend the life of a sharp edge on knives, but once that edge is lost, only a pro can bring it back. Make a date to drop off your knives. 

10. Sort and store clothing. Don't let summer swimsuits and shorts take up valuable closet space year-round if you only use them for a few months! 

Shift warm-weather clothes and accessories to an out-of-the-way closet in bins with tight-fitting lids. And be sure to store only freshly laundered items — bugs are attracted to dirty clothes but usually leave clean garments alone.


11. Tackle a decorating project from start to finish. Stop dreaming and start doing! Pick one realistic project (e.g., a single room or nook) that you would like to transform this month, and make it happen. 

It may help if you break your project down into bite-size pieces and schedule tasks throughout the month.

Wednesday
Oct022013

Master Bathroom Choices: One Sink or Two?

Article By: Tiffany Carboni

One sink or two? This is the classic debate for couples renovating a sizable master bathroom. There are pros and cons to both. So what's right for your bathroom? I spoke with architect Thayer Hopkins, who offered up what you need to consider about installing either a single or double sink during your master suite remodel. 

“Couples these days usually prefer the idea of two sinks for one simple reason,” says Hopkins. “They lead busy lives and need access to the bathroom at the same time."

On paper the double sink looks ideal. But let's walk through this two-sided argument. 

Some Benefits of 2 Sinks 

Personal space. With two sinks, theoretically no one will ever again spit toothpaste on your hand as you're trying to wash up. Also, your very own sink means you can keep your makeup, moisturizers or shaving kit out as necessary without having your partner knock anything over.

And by having your own designated sink, you don’t have to stare at your partner's toothpaste residue while you're brushing your own teeth. Even in the best of partnerships, there are some things that neither of you want to see of the other.
Two sinks can help make you and your partner feel like you're in a loving, adult relationship rather than siblings fighting over a single faucet.
 

Some Disadvantages of 2 Sinks

“The convenience of two sinks has its tradeoffs to consider,” Hopkins notes.

Cost. It costs more to plumb two sinks than one. Add to that the additional cost of finishes and a larger vanity.

Space. A typical sink basin is about 17 to 19 inches wide. “If there isn’t a solid 6 feet or more available for two sinks, I will counsel clients to stick with just one sink basin,” says Hopkins.“These 6 feet or more will give the minimum 11- to 12-inch buffer needed between basins to keep a couple from banging elbows and crowding each other out.”
 

Even if you do have a good amount of space, two sinks will eat into counter space that could be used for tasks, displays etc. Two sinks will also double the amount of undercabinet space taken up by the double drain pipes. 

If you've got ample storage or counter space elsewhere in the bathroom, this space tradeoff may not pose any problems.


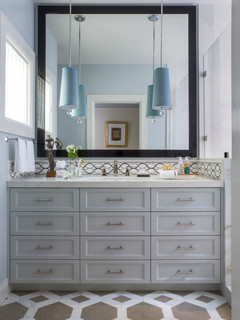
Two-sink styles you can both agree on. The prefabricated two-sink vanity is one of the easiest styles to choose and install in a bathroom because of its fixed dimensions. In other words, there's no guessing if elbow clearance might be an issue for you and your partner. You can see for yourself in the showroom or tape out the dimensions prior to ordering a vanity online to test the sink measurements.

Custom vanities offer even more benefits, as they can be tailored to your exact wishes. But you and your partner have to be willing to work with a designer or cabinetmaker to cull through the endless possibilities.


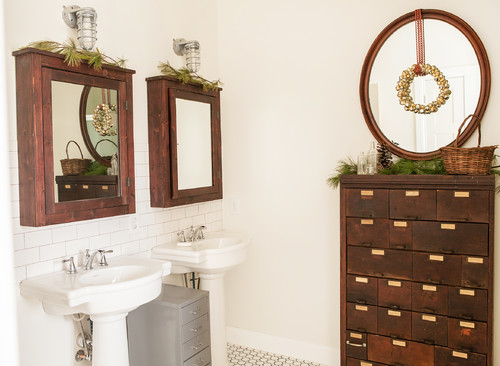
You can also use two freestanding pedestal sinks, either for aesthetics or to overcome any space limitations, as they can be put side by side or on separate walls. “Pedestal sinks have made a resurgence in the last 10 to 15 years," Hopkins says. "As a result, there’s more product available to suit different needs.” 

If you don’t need the counter space or storage space in a vanity, two pedestals will create an airy feel that may sway your choice.
 

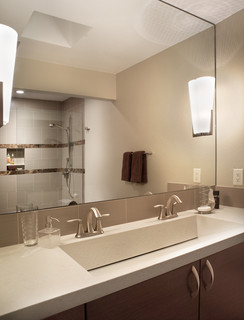
You can also use a single basin with two separate faucets. 

This sort of double sink performs duties for two people while acting like one sink underneath with its single drain, which leads us to …


The Benefits of the Single Sink

Leaves room for other amenities. “I might push for a couple to install only one sink if there’s a possibility of using that extra space for a separate shower and tub instead,” says Hopkins.

Cost and cleaning. One sink, with one hardware set, is cheaper than two, and one sink is easier to clean than two.

More storage. You can have more storage underneath if there's only one drainpipe. If you’re the kind of person who loves to pull out every bit of makeup, you’re going to get frustrated if you don't have enough room for it because of that extra sink.
 

More counter space. You can get a lot more usable counter space if there’s only one basin. More countertop space equals more display opportunities and more room for your everyday toiletries.

Tuesday
Oct012013

Tricky Basement Bathroom? Cool Design Opportunity!

Article By: Mark Clement

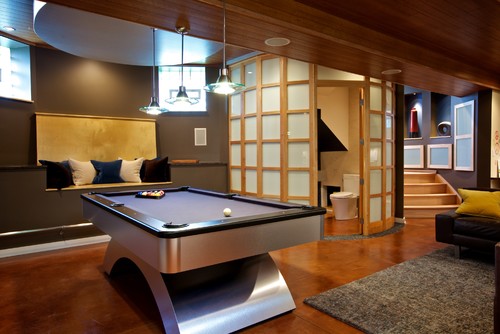
Small spaces, outbuildings and basement bathrooms can be some of the toughest projects on the bathroom remodeling spectrum. With so much happening in so little space, you've got to plan a lot in advance. Not only do you have to route plumbing and ventilation, but you have to think about the space you're building in. Is it a hundred-year-old home with a stone foundation that might be a design wow? Or is it a modern building with a poured-concrete structure? You also have to think about what's happening on both sides of the door, which affects, well, everything. 

Be bold. The typical strategy for a bathroom in a basement is to hide it, but sometimes there's just no way to pull that design move off that isn't boring. The reason: Basement bathrooms need to compete for space with the furnace, water softener, hot-water heater, stairs etc. And sometimes after I lay out the bar, bedroom and whatever else makes the space awesome, there's no place awesome left for the bathroom. 

In that case it's often best to run hard in the other design direction and celebrate it in plain sight, make the bathroom part of the plan and a piece of the experience. Celebrating "unwanted" things is one of my favorite design tricks. 

Always vent. One of the most important parts of a bathroom in a basement is a sufficiently powerful ceiling fan to evacuate the moisture — not letting it go into the ceiling or utility room, but outside. Like, where the sky is. Steam is just a little cloud while you're showering. But after you've left, the water falls back to the baseboards and turns back into water. Then it becomes that gross stuff you don't want to clean.

A vent fan is the way to get the moisture out of the house. I repeat, out of the house. Don't get me started on how many times I've seen bathrooms vented into the attic or another hidden space. Your attic may be hot or cold, but it's still technically inside. Get that moisture outside with the rest of the clouds!


Expose the structure. A basement bathroom offers abundant opportunities to use the existing raw structure of the home. Rubble foundations, for example, are essentially structures. Why cover their powerful looks with drywall?

And consider the plumbing, too. While drain lines and electrical services aren't all that cool to look at, copper supply lines (water lines) can be gorgeous. If you've got an open structure, it's sometimes easiest — and awesome-est — to make the most of what you've got. 

Exposing pipes can be a cool way to make a basement space feel industrial or like a man cave. It's also way easier than building soffits and bulkheads to hide everything. If you're a building geek like me, it's best to design a space where you can see the working parts.


Boost privacy. Many builder-grade houses contain hollow-core doors. These doors have a real-looking wood grain but are made up only of ¼-inch-thick parts, and are essentially cardboard and air inside. 

While hollow-core doors can be fine for certain rooms, I try to use solid-core doors for the bathroom to keep the bathroom experience as much of a one-person affair as possible. Solid-core doors deaden the sounds created in the bathroom. So if you're having a book club meeting or poker night down there, a solid door and insulated wall framing that both deaden sound are nice for everybody.


Build up. Small-space remodels can often be harder than big-space overhauls. So much has to happen in such a tiny space, it's like dancing on the head of a pin. 

So when I go into a small space, I'm always thinking about how I can use it smartly, use it vertically and make everything look like it's supposed to be there.


Be one with nature. Basements aren't always underground. When designing or building a bath, think about the approach from the outside, as well as the windows, egress and view, from inside and outside the john.

Monday
Sep302013

9 Ways to Avoid Kitchen Traffic Jams

Article By: Jennifer Ott

When it comes to designing your dream kitchen, it's tempting to try to squeeze in all of the latest and greatest appliances and gadgets — and enough cabinetry to contain them all. But unless you also put some thought into how you, your family and guests will circulate through the space, you could end up with a dysfunctional layout that is no fun to work in — newfangled gadgets and all. I've pulled together some tips to keep in mind when designing a kitchen to avoid traffic jams and poor flow. 

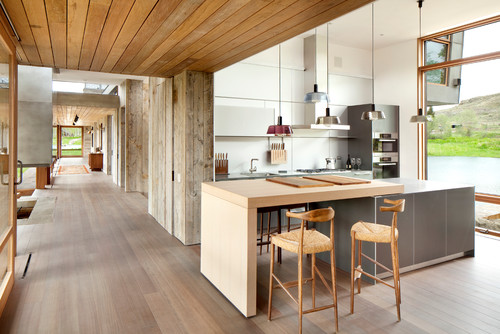
1. Optimize the layout. One of my favorite kitchen layouts is an open kitchen with an island and no closed corners. I find having an island that family and guests can easily circulate around, without getting stuck in a corner, greatly reduces kitchen traffic jams. 

2. Provide ample walkways and aisles. Make sure your kitchen walkways are at least 36 inches wide and your work aisles — those spaces in front of sinks, appliances and prep areas — are at least 42 inches wide, or 48 inches to accommodate multiple cooks. 

Those with larger families or who entertain often may want to go as wide as 54 inches for work aisles. This will allow two people to easily pass behind someone working at the countertop, sink or appliance. 

3. Consider sitting room. If you plan to have a seating area at an island or a peninsula, think about where the stools will be. Ideally you want visitors to be facing you while you are working in the kitchen, and you want to keep them out of your main work aisles, too. 

If you anticipate stools in a walkway or an aisle, allow for the extra space they'll require when occupied. You'll want at least 36 inches so someone can easily pass behind a stool when it is pulled out. 

4. Pay attention to appliance and cabinetry clearances. While your goal should be to arrange your appliances into efficient work zones, watch for any awkward adjacencies. Avoid placing major appliances directly opposite each other, as this can create a traffic jam if both appliances are being used simultaneously. 

Also, try to keep appliances away from any corners, as corners prevent full access to the appliance, and the adjacent cabinets cannot be opened if the appliance door is also open. 

This applies to your cabinets as well — make sure you can open all of your cabinet doors and drawers without their running into one another. It's tough to avoid this with corner cabinets, but all other cabinets should open freely without banging into another door or a drawer.
 

5. Don't block kitchen entry points. Leave enough space for someone to enter or exit even if the appliance or cabinet door or drawer is open. 

6. Give your refrigerator ample space. The area around a refrigerator tends to be a high-traffic zone, so don't crowd it in. Plus, some refrigerator doors are a whopping 36 inches wide — meaning they take up a lot of space when open. If your refrigerator is near a kitchen entry point, add a pantry cabinet to act as a buffer so that the open refrigerator door will be less likely to block someone. 

7. Give your sink some space, too. Have plenty of countertop space on either side of the sink, and don't cram the sink in between other appliances, with the notable exception of the dishwasher, which is handy to have right next to the sink for cleanup. Avoid corner sinks — they are major culprits of kitchen traffic jams. 

8. Don't fight with a small space. As much as I love an island in the kitchen, I also value space for moving around. If you have a tight kitchen, keep it as open as possible. You can always add a movable island cart that you can tuck off to the side out of the flow of traffic when it's not in use. As tempting as it may be to cram as much cabinetry and countertop area in as possible, it's just not worth it if that makes the space awkward to use. 

9. Consult an expert. The best piece of advice I can offer is to engage the services of a qualified and reputable designer who specializes in kitchens. If your remodeling budget is tight and you are going the DIY route, consider finding a kitchen designer willing to consult for a few hours with you for a flat fee. This investment of a few hundred dollars can help you avoid ending up with a dysfunctional kitchen layout — and will save you time, money and frustration down the road.

Friday
Sep272013

10 Ways to Cozy Up the House for Fall

Article By: Laura Gaskill

From the first crisp morning and the first leaves that change colors to the first night you need to put an extra blanket on the bed, signs of fall beckon us to spend more time indoors. Satisfy your urge to nest while sparing your wallet with these 10 easy, elegant and, of course, cozy touches for every room. Whether you are looking for an instant change (toss a plaid blanket over your table) or something more permanent (install DIY shelving), here you'll find inspiration to get your creative juices flowing. 

1. Give an old quilt a new purpose. While you wouldn't want to eat on Grandma's priceless heirloom, vintage quilts picked up at thrift shops can make fabulous tablecloths. Spot clean it between uses and give it a full wash only when really necessary.


2. Craft DIY shelving. Why spend big bucks on a fancy industrial-style shelving unit when you can make your own with basic supplies from the hardware store? Check out the tutorial for the piece shown here on The Brick House and thissimilar industrial shelving project.


3. Use a plaid blanket as a tablecloth. A small, round table is the perfect spot for showing off your favorite fall colors and textures in the form of a cozy blanket. Let the blanket drape to the floor — imperfect is what you are going for here. Top it with a cluster of small picture frames or place one large item, like an urn or a lamp, in the center.


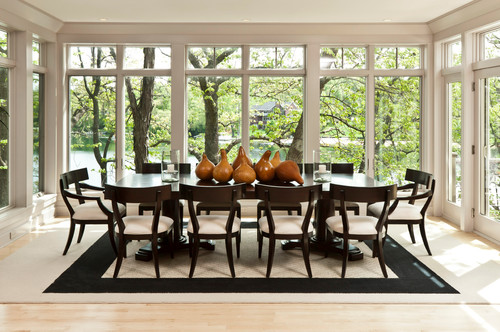
4. Display fall gourds the elegant way. Want to try something different from the usual piles of pumpkins this year? Pick up at least five or six big decorative gourds for an abundant display — look for the kind with elegant, swan-like necks — and line them up down the center of your dining table. What could be easier? 

5. Scour fall flea markets for original art. Vintage portraits and landscapes from unknown artists are often affordable. Choose just one to spotlight, or collect art around a theme and make a gallery wall. 

6. Paint your stairs a daring hue. Who says stairs have to be boring? If you have plain wooden stairs, especially if the wood is not in particularly good condition, consider painting them magenta, navy, mustard ... or any color you love.

This is a bold look, so if you are feeling wary, try it on a back stairway or in a tight stairwell — not on the front-and-center entry stairs.


7. Use vintage textiles as upholstery. Although the sectional shown here was custom made, you can draw inspiration from this look to revamp your own sofa, chair or cushions with colorful vintage textiles, including rugs. If you're DIY savvy, you could attempt to re-cover cushions or upholstery yourself, make cozy pillow covers or simply wrap seat cushions in textiles for a temporary change.

If you want to use vintage rugs on your furniture, have them professionally cleaned first. Or you can carefully clean vintage textiles yourself by gently agitating them by hand in a bathtub of lukewarm water with a mild soap. Rinse and air-dry them before using.
 

8. Get beautifully organized. Bring a touch of glamour to your morning routine by setting the items you use daily atop pretty trays. There's no need to buy new trays — just peek into your kitchen cabinet or china hutch, and grab a few pieces you haven't used in a while. 

If you really want to go the extra mile, scoop up a few little glass containers at the craft store and decant your favorite toiletries.


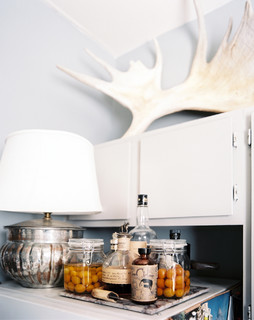
9. Style your kitchen. Corral jars of pretty preserves and artisanal cocktail makings on a tray, bring in a real table lamp for a soft glow, and put something sculptural and a little unexpected (like the antler shown here) atop a high shelf. 

We tend to cook and congregate more in the kitchen during the fall and winter, so why not make it a place that feels just as warm and cozy as the rest of your house?


10. Paint your front door. It's the first thing you see when you come home each day — why not make it gorgeous? A few coats of a rich hue that complements the color of your siding, plus a shiny new door knocker, can completely transform the front of your house for less than 50 bucks.