twitter Facebook Google+

                 linkedin pinterest houzz  

Click for the BBB Business Review of this Countertops in Denver CO 

Google Review 

Sales & Promotions!

Architects, interior designers, and more ∨

Hire a decorator to find that just-right couch and coffee tables for your living room.
Find wall shelves, a customizable closet organizer and stylish furniture for home to whip your closet into shape.
Remodeling and Home Design

Qualify Us Now! ProView 

Cambria logoUp to $45,000 interest free for your project!Finance by Cambria

 convenient and easy.

  • No Money Down
  • Interest-free financing for up to one year without payments
  • Financing up to $45K for any project that includes Cambria (including cabinets, flooring, sinks, plumbing, install & more)
  • Secure paperless telephone application
  • Credit decision in less than 10 minutes


Entries from May 1, 2013 - May 31, 2013

Tuesday
May282013

Cabinets Fly at Kitchen Kompact

Producing thousands of cabinets is all in a day's work for the Indiana-based firm.

Four thousand cabinets assembled daily. That's the current production rate at Kitchen Kompact, one of the largest cabinet assembly plants in the United States. 

Based in Jeffersonville, IN, Kitchen Kompact provides low-cost, value cabinetry for distribution throughout North America. But what sets the family-owned Kitchen Kompact apart from other cabinet companies is its business model: Not only is the company a pure assembler, but it also buys material and builds to inventory versus the more common practice of just-in-time production.

According to John Gahm, vice president of manufacturing, this enables Kitchen Kompact to meet the needs of the marketplace while providing fast lead times to stock distributors [like American Cabinet & Flooring]. "We buy to inventory, work-in-process to inventory and produce finished goods for inventory," Gahm says.

It's no small inventory. Kitchen Kompact currently stocks approximately 40,000 finished cabinets, with a capacity for 100,000. "This has allowed us to adjust quickly to market fluctuations," he adds. 

The business model has proven highly successful for Kitchen Kompact, while enabling it to keep an estimated 200 employees busy producing cabinetry for sale to single- and multi-family residences. 

"The company was founded on keeping things simple -- and simplistic," Gahm says.

Simplistic refers to Kitchen Kompact's niche as a pure assembler. Components are purchased already cut to size, leaving the company to focus its strengths on finishing and assembly. And as a side benefit, the company has essentially eliminated the cost and production justifications needed for large amounts of manufacturing equipment, particularly during slowdown periods. 

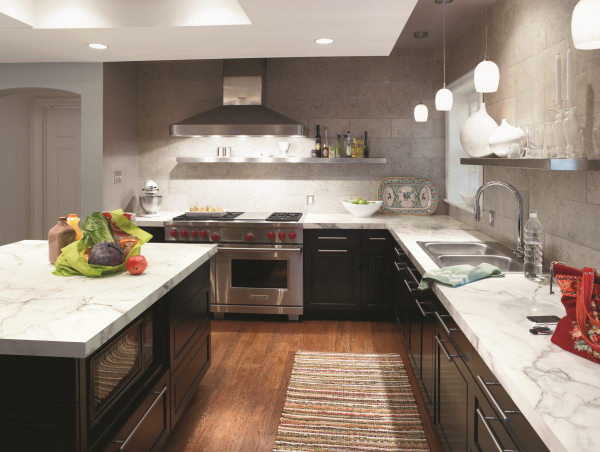
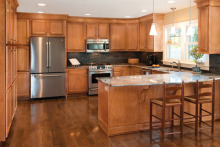
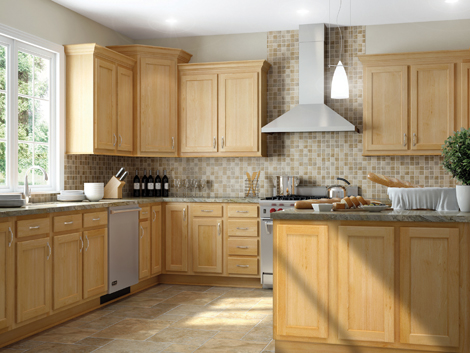
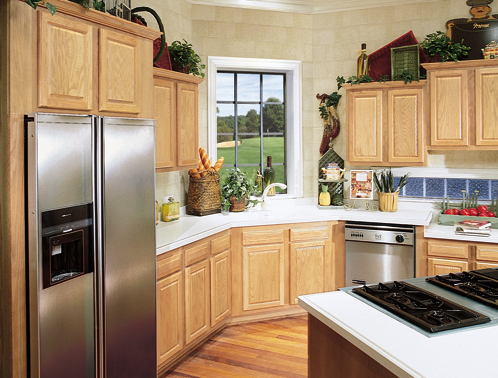
Recognizing that it "cannot be all things to all people," Kitchen Kompact keeps things simple by offering a compact line of cabinetry. The five standard styles of face-frame cabinetry are: Glenwood Beech, featuring recessed panel doors; Bretwood, with maple flat panel doors in a warm tone; Mellowood, featuring natural maple flat panel doors; Richwood Lite, with oak raised-panel doors and a subtle woodgrain pattern; and Chadwood, the company's oldest and best-selling line featuring oak flat panel doors. The select style and colors, the company says, "represent the volume segment, or approximately 75% of the market."

Glenwood Beech

Bretwood

Mellowood


Richwood LiteChadwood 

Production Detail

It was 1955 that Dwight Gahm purchased a small custom cabinet company and changed its course forever. His philosophy then, as now, drives the company's success: "We will offer a quality product at a reasonable price and, most importantly, deliver these goods in the most dependable lead time in the industry."

It starts at the 750,000-square-foot plant where processing of the wood components - doors, drawers, upper and lower cases - is done in departments located throughout the plant. 

"We just do sanding, finishing, drilling and then assemble with hotmelt and staples. We keep our costs down as loo as possible - that's what keeps us competitive," John Gahm says.

Thousands of cabinet components fly through the shop on miles of overhead and automated floor conveyors to the appropriate areas. The movement throughout the plant is continuous due to the large volume of products being readied daily for inventory, plus the high production of cabinets constructed by Kitchen Kompact each day. 

A combination of solid wood and CARB compliant composite cores are used for the cabinetry construction. The company says hanging rails, corner blocks, toe kicks, face frames and drawer fronts are made from solid wood. The frames are ¾-inch solid oak, maple or beech, and the end panels are a three-ply construction, with a ½-inch thick core and hardwood veneer. Plywood drawers are standard. 

The components are assembled using a combination of mortise-and-tenon joinery, adhesives and stapling. All wood parts are stained, sealed and topcoated in-house in a four-step finishing process. 

Among the equipment used in the plant are Graco and DeVilbiss  HVLP and air-assisted airless sprayers, Carlson Systems assembly machines, as well as custom machinery. The company also utilizes sanders from Timesavers and Northtech Machinery.

Recently installed, the Northtech industrial widebelt sanders are arranged in a line as a two-head calibrator plus three-head finishing sander, with a tie-in conveyor, for face-frame processing. In other areas, Timesavers sanders, including the 3300 Series variable feed-speed widebelt with electronic belt tracking and double infeed and outfeed hold-down rolls, also are used in tandem.

Quality control is a plant-wide endeavor and finished cabinetry is ANSI/KCMA A161.1 certified. 

Sustainable Initiatives

In addition, since 2007 Kitchen Kompact's products have been certified sustainable under the Kitchen Cabinet Manufacturers Association's Environmental Stewardship Program (ESP). Gahm adds that ESP's holistic approach to sustainable manufacturing ties in with the company's environmental initiatives.

Kitchen Kompact continually looks for ways to improve processes and reduce waste in the operation. Among its efforts are the collection of woodwaste for an alternative fuel source, the installation of a cardboard compactor and increased recycling of other materials.

A CARB-compliant product, Kitchen Kompact's cabinetry also can contribute to toward LEED credits through points earned under: MR 2 Construction Waste Management, MR 3 Materials Reuse, MR 4 Recycled Content and MR 5 Regional Materials.

Its sustainability also provides the cabinet company with a marketing edge. Kitchen Kompact promotes its certification and other initiatives on its website, KitchenKompact.com, in literature and in conversations with customers. 


(You are reading an article origianlly published in Wood Products magazine May 2013)

Friday
May242013

Raw Materials Revealed: Drywall Basics

Learn about the different sizes and types of this construction material for walls, plus which kinds work best for which rooms.

Photo: Pine Grove Homes Ready for Drywall via Wiki Commons

Drywall vs. Plaster

Drywall is a master of disguise. The walls in this picture look like they could be plaster. One of the visual giveaways that you're actually looking at dry wall is when you see the sharp corners created by standard corner bead.

Corner bead is a metal or plastic piece that covers the outside corners of drywall to protect them from damage. Then joint compound is spread over the bead and sanded smooth.

In many traditional plaster applications, a rounded piece of wood trim was placed at the corners and then plastered over, creating a round corner. To mimic this look with drywall, look for a bullnose corner bead.

Unlike with traditional plaster applications, for which the entire surface was troweled on by hand, only the seams and fasteners are covered with joint compound when you're finishing drywall.

The finishing happens in several steps. First paper tape is embedded in joint compound, or "mud". Then two more coats of mud go on before sanding.

If you are looking for a plaster-like finish, you should install blue bead - a drywall product made for this purpose - then skim coat the entire surface instead of just the seams. This is much faster than with traditional plaster. 

Drywall Sizes

Most drywall of Sheetrock you see is either ½ inch or ⅝ inch thick. What size to use depends on a variety of factors, including durability, location and fire safety.

The width of drywall sheets is either 48 or 54 inches. The reason for the two width sizes is that when installed horizontally, two sheets will equal either 8 or 9 feet - common ceiling heights in residential construction.

The sheet lengths vary from 8 to 16 feet. For the do-it-yourselfer, a 4- by 8-foot sheet will be difficult enough to maneuver. And don't forget that you'll need to cut holes for every outlet and light fixture box and get those all to line up, too. 

Professionals generally use the longer sheets, like the one shown in this picture, because it reduces the time spent on taping joints. 

The advantage of ⅝-inch-thick drywall is that it does not bend or sag as much as ½-inch drywall, which can show imperfections in the framing.

But what if you want the drywall to bend? Use ¼-inch or ⅜-inch drywall. You may also need to make slits in the material to allow it to take the curve.

Quiet Rock Soundproof Drywall & Other Drywall Types

Other than regular gray drywall, you'll also see green and purple. Both of these are good for areas that will see a lot of moisture, like a bathroom. The purple is a step up in moisture protection from the green. Even with this added security, I don't recommend installing these in a shower or tube surround - you'll want to tile on cement board for bathroom walls outside the shower. And install a good bath fan with a timer switch so that you're not testing the capability of the drywall.

Other types of drywall you'll see are type X for added fire protection and QuietRock, which is two pieces of gypsum laminated together with a special glue that allows the assembly to absorb sound and make your living space quieter. The drywall is installed with the same special glue at the seams, and a putty-like material is placed around outlet boxes. If installed properly, it is quite effective - but that doesn't come cheap.

If you're looking for a lighter sheet of rock, try USG's new lightweight drywall. Better yet, DIYers should rent a drywall left for ceilings. It's worth the added expense. 

We've only scratched the surfaces of what can be done with drywall. Although drywall is easier to install than plaster, it takes time to master the skill. Look for opportunities to practice, like in a garage, before you try your skills on the living room.

Have fun, wear a mask when you sand and rock on!


(You are reading an article originally posted on Houzz

Thursday
May232013

Love Your Living Room | Make a Design Plan

Create a living room you and your guests will really enjoy spending time in by first setting up the right layout!

Photo: American Cabinet & Flooring, Inc. | Designer Clay BernardMake a List

To get an idea of what you already have, make a list of everything in your living room: furntiure, rugs, lights, curtains - even accessories. What pieces do you love? What peices should be tossed? Do you have any other pieces that you'd like to integrate into your living room? Maybe you have an inherited table or chair that would  look perfect in your living room after you redo the layout. This also could be the right time to replace a few worn-out pieces or order new window coverings.

Decide What Your Living Room Can Do For You

How do you need to live in this room? Is the space for watching television only? Does it flow directly into your kitchen or dining room? Maybe you have small children and pets. Prioritize your needs so that the space can function effectively - you may not be able to get everything you want in one space. 

Have a Focal Point

Identify your room's best focal point. Our natural inclination is to visually focus on one object or area when we enter a room. If your living room doesn't have a focus, a striking piece of art or built-in shelving may give you an anchor point to build your furniture around.

Maximize Your Seating

Try to design your living room to comfortably cater to six to eight people. Day to day you will have only immediate family to worry about, but don't forget that your visitor's comfort is equally important. 

Occasional seating like a stool or ottoman takes up less space than a sofa or chair and will work hard for you. If you have more dining chairs than you use every day and the color scheme works, put one in a corner of your living room - this can be a nice way to link the decor in both rooms. 

Lay Out the Living Room

Your list of furniture and accessories is made; how will everything fit?

An interior decorator or designer can work with you to get the look you're after, and even come up with ideas you didn't know you'd love. If you're going the DIY route, start with a simple sketch of the room on paper. Measure the length and width of the room, including any windows or doors. Plain paper and a ruler are all you will need to draw up the room - 1 centimeter on the paper equals 1 foot (or 1 meter) of real space. 

Then measure, draw and cut out paper to match all the pieces of furniture you want in the room, new and existing, including rugs. Don't stress about trying to make them look professional; the basic shape is enough to get an idea. Make sure you use the same formula used for the room measurements. 

Once you are happy with how it all looks on paper, you can start moving furniture around. Use masking tape to make an outline of any pieces you like but haven't yet bought. This will help with scale and help you avoid any unwanted purchases.

If possible, arrange the furniture so it sits off the walls. This allows for airflow around the perimeter and actually makes the living room appear larger.


(You are reading an article originally posted on Houzz)


Wednesday
May222013

Adding Storage Solutions to Kitchen Backsplashes

A beautiful backsplash can be a stunning focal point in a kitchen - but did you know this prime piece of kitchen real estate can work harder for you if you add a bit of dimension? We're not just talking textured tiles, laminates or other decorative surfacing materials... think storage rail systems, open and recessed shelving and ledges. Here are a few examples:

Although certainly not new to kitchen design, rail systems, such as the ones below, provide flexible storage options for commonly used cooking utensils, dish towels and even plants. 

Photo: 2012 Küchenmeile in Germany via Formica®

Open shelving can easily be mounted to a variety of backsplash materials, as seen below...

Photo: Formica® Laminate 180fx® in Calacatta Marble

Photo: Formica® Laminate 180fx® in Travertine Gold

... or integrated into the backsplash design.

Photo: 2013 imm cologne's LivingKitchen® via Formica®

Recessed shelving provides niche storage for commonly used cooking supplies. According to Ellen Cheever, CMKBD, ASID, CAPS, in her recent article "Ideas for Smashing Splashes & Counter Designs" for Kitchen and Bath Design News, kitchen planning standards allow any surface 16" or deeper to be considered a functional work area, so keep these measurements in mind as you develop plans.

Photo: via Formica® 

Ledges also provide convenient resting places for spices, sauces and timers. As you can see, these are perfect for traditional kitchens...

Photo: via Formica

... as well as more contemporart ones.

Photo: via Formica®

(You are reading an article originally posted on Formica® Share the Love Blog)

Tuesday
May212013

Get Grout Magically Clean - Stains and All

If your grout is grossing you out, this deep-cleaning method will help it look new again!

Photo: American Cabinet & Flooring | Project Manager Randy WilsonTile - whether it's used as flooring, in the kitchen as a backsplash or for counters, or in the bathroom - has one great downfall: grout. Since grout is porous in nature, unsealed grout absorbs all kinds of stains, from mildew to coffee and everything in between. To say it's a headache to keep grout clean is an understatement.

NOTE: Be wary of using too much lemon juice with marble, since it can etch or damage the stone if left on too long. Hydrogen peroxide can be a safe alternative.


We inherited marble tile counters when we purchased our home. It's pretty clear that the grout was never properly sealed, so it soaks up stains like crazy. It makes our kitchen feel gross and grimy, even if it was just cleaned. While I'd love to replace the counters with a solid surface like quartz, it's just not in out budget - plus, we just can't justify getting rid of something that's perfectly fine otherwise.

Luckily, I have a foolproof method that will lift most household stains from that pesky grout. 

What you'll need:

  • Oxygenated bleach (like OxyClean)
  • Warm water
  • Coarse scrubbing brush (like an old toothbrush)
  • Towel
  • Lemon
  • Grout sealer

TIP: Cleaning colored grout should be done with special care. Bleaching agents (like chlorine bleach) can discolor and harm the colored grout. Fortunately, oxygenated bleach does not contain corrosive chemicals and is safe to use on all grout. 

1). Clean the surface thoroughly, removing any surface residue or debris. Let the grout dry fully.

2). Dissolve 2 tablespoons of oxygenated bleach in 2 cups of warm water. Wet the brush in the mixture and apply it to the grout. Let is soak in, then scrub the grout in a circular motion, which will loosen the stain more effectively than a front-and-back motion. If needed, dip the wet brush into the oxygenated bleach to make a paste. Wipe clean, then let dry.

TIP: To lift extra dark stains, squeeze lemon juice onto the stain, let it soak in, then scrub, wipe clean and let the grout dry. Use lemon juice sparingly, since it can damage some tile finishes.

3). Spray the tiles and grout with an ecofriendly cleaning spray and wipe them clean. Let the grout dry fully before making a final decision on whether your hard work paid off - damp grout looks darker than dry grout. 

4). Apply grout sealer after the grout has fully dried to avoid any future stains. Be sure to reapply it each year. 

Still having trouble getting that grout clean? For those impossible-to-remove stains, you might want to consider:

  • A commerical tile and grout cleaner
  • A coarser brush (avoid using metal bristles, though, as they can erode the grout)
  • Grout Renew

If after you've tried all three, the stain is still hanging strong, you may have to resort to removing the old grout and replacing it with new. 

TIP: An electric multitool, like the Dremel Mult-Max, helps to make quick and safe work of removing the old grout. 

(You are reading an article originally posted on Houzz)